Installing fan trays, Ut 1 in, Figure 32 – H3C Technologies H3C S12500X-AF Series Switches User Manual
Page 36: Ut 2 in, Rotate outward the ejector le
32
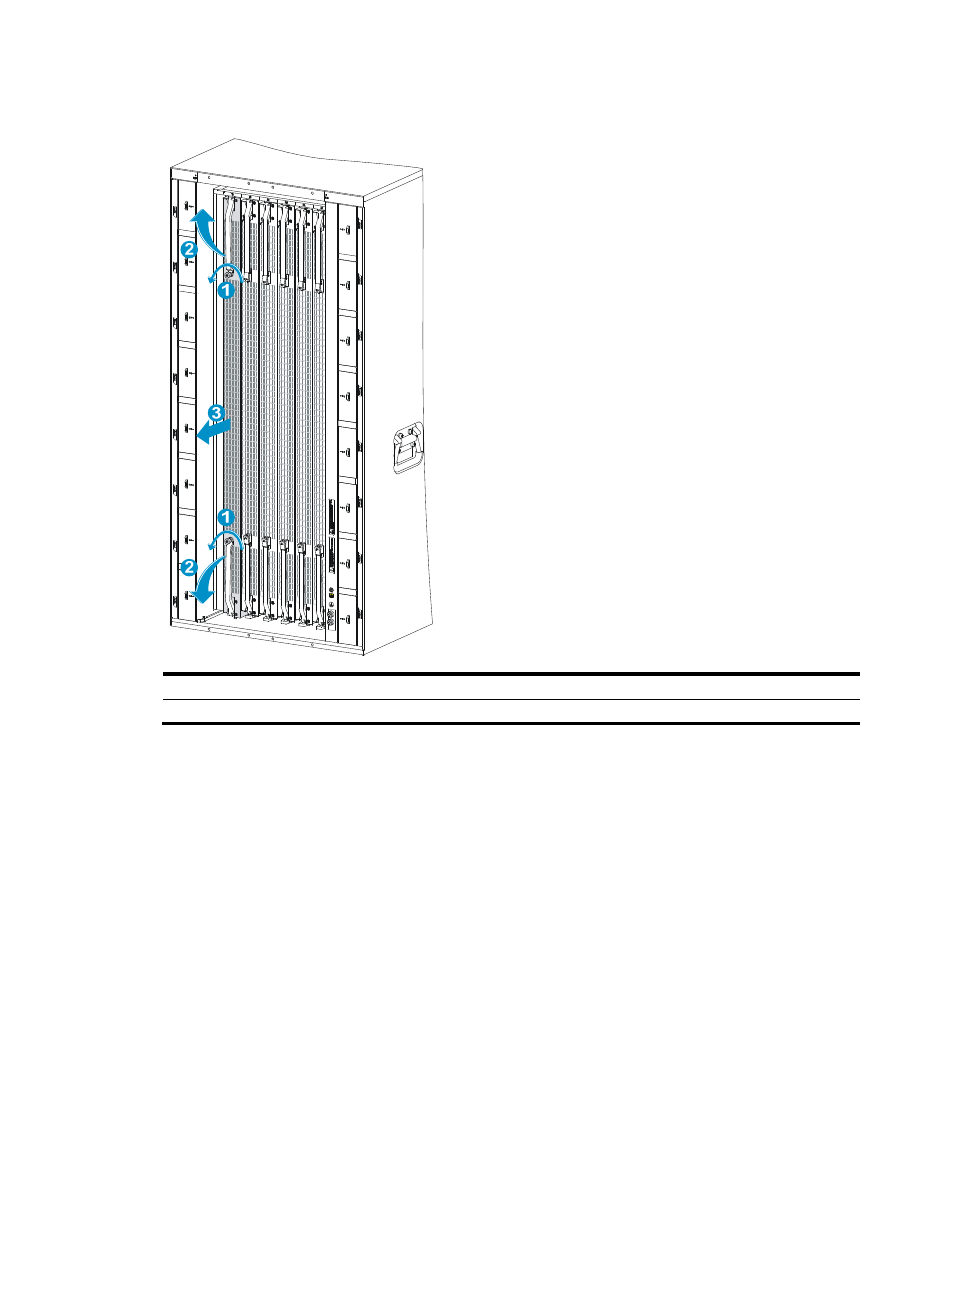
Figure 32 Removing the filler panel from a switching fabric module slot (S12516X-AF switch)
(1) Loosen the captive screws on the ejector levers
(2) Rotate the ejector levers outward
(3) Pull the filler panel out of the slot along the guide rails
Installing fan trays
Follow these restrictions and guidelines when you install a fan tray:
•
Install the switching fabric modules before you install a fan tray.
•
For good heat dissipation, you must install fan trays in both FAN1 and FAN2 slots. When a fan
tray fails, do not remove it until the new fan tray is ready. The device can operate correctly if the
failed fan tray is still in position.
•
The fan tray is hot swappable. Follow these guidelines when you hot swap a fan tray:
{
Ensure electricity safety.
{
Replace a fan tray only when the other fan tray is operating correctly.
{
To avoid power-off protection of the switch caused by high temperature, finish replacing a fan
tray within 3 minutes.
•
When you hot swap a fan tray, only one fan tray is operating and it makes loud noise. Take
protection measures such as wearing an earmuff or earplug. In addition, make good preparation
before hot swapping a fan tray to minimize the operation time.
•
Do not power on a switch that does not have any fan trays installed.