Installing mpus for the s12504x-af switch, Ut 1 in, Figure 22 – H3C Technologies H3C S12500X-AF Series Switches User Manual
Page 26: Orient the mpu with the upside, Ut 3 in, Pull the ejector levers of the, Push
22
7.
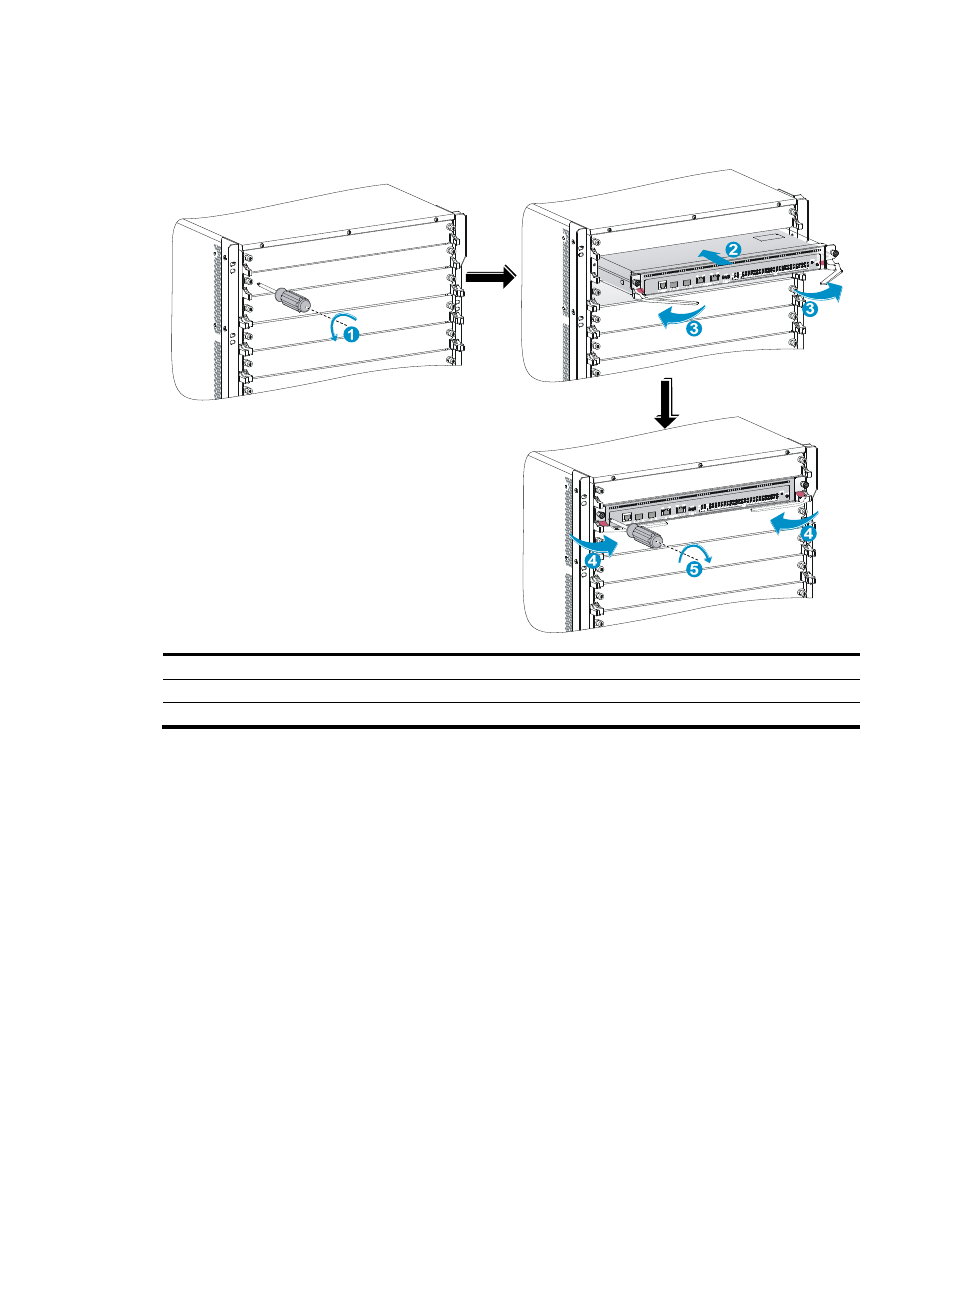
As shown by callout 5 in
, fasten the captive screws on the MPU.
Figure 22 Installing an MPU (S12516X-AF switch)
(1) Loosen the captive screws and remove the filler panel (2) Insert the MPU into the slot
(3) Pull the ejector levers outward
(4) Push the ejector levers inward
(5) Fasten the captive screws
Installing MPUs for the S12504X-AF switch
The S12504X-AF switch MPU marks and MPU slot edges are pink-marked.
To install an MPU for the S12504X-AF switch:
1.
As shown by callout 1 in
, remove the filler panel from the target MPU slot.
Keep the removed filler panel secure for future use.
2.
As shown by callout 2 in
, pivot up the handle of the MPU.
3.
As shown by callout 3 in
, orient the MPU with the upside up based on the orientation of
characters on the MPU. Hold the MPU by the front panel with one hand and support the bottom
with the other. Push the MPU steadily into the slot along the guide rails.
Keep the MPU parallel to the slot to avoid touching other components in the chassis.
4.
As shown by callout 4 in
, push the MPU until the handle breaks touch the slot edges
tightly.
5.
As shown by callout 5 in
, continue to push the MPU handle until the MPU is secure in
position.
6.
Fasten the captive screws on the MPU.