Advanced controls – GoPro Hero 5 Black User Manual
Page 33
64
65
ADVANCED CONTROLS
Using Exposure Control with Locked Exposure
With this option, the camera locks the exposure. That exposure level
remains until you cancel it.
For example, suppose you are snowboarding on a sunny day. By manually
setting the exposure level based on your subject's jacket, the images that
you capture throughout the day are based on the jacket. So, they are less
likely to be underexposed compared to the bright snow.
1. Press the touch display until a square outline shrinks to the middle of
the screen.
2. Drag the square to the area that you want to use to set the exposure
level. (You can also tap that area instead of dragging the square.)
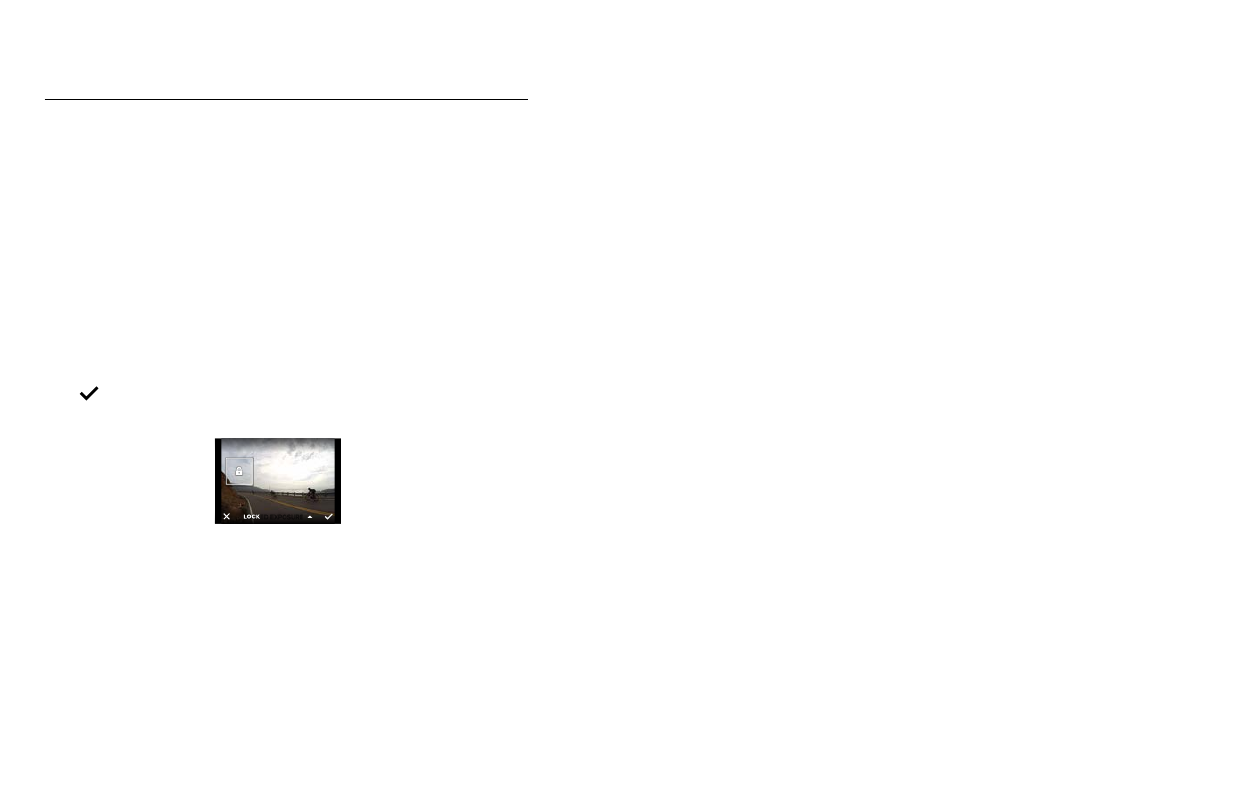
3. Tap Auto Exposure to change it to Locked Exposure.
4. Confirm that the exposure looks the way you want it to, and then tap
[
] in the lower right corner to lock the exposure.
Canceling Exposure Control
Exposure Control is automatically canceled when you select a different
mode or restart the camera. You can also cancel this setting manually
(below). When you cancel the exposure setting that you previously set,
the camera returns to using the entire scene to determine the correct level
of exposure.
1. Press the touch display until a square outline shrinks to the middle of
the screen.
2. Tap [
] in the lower left corner.
PRO TIP: For advanced exposure settings, see
ADVANCED CONTROLS