Kichler 12501 v.1 User Manual
Kichler Hardware
INSTRUCTIONS PERTAINING TO A RISK OF FIRE, OR INJURY
IMPORTANT SAFETY INSTRUCTIONS
Lighted lamp is HOT! Allow lamp to cool before removing.
Install only in open top cabinets.
Use only with Kichler 12VAC Class 2 power units.
CAUTION: To prevent the risk of fire, do not install closer than ½ inch (12.7mm) to cabinet wall or in a
compartment smaller than 12 inches by 12 inches by 12 inches. (30.5mm x 30.5mm x 30.5mm)
All installations should comply with national and local electrical codes. If you have any doubts
concerning installation contact a qualified licensed electrician.
WARNING – TO REDUCE THE RISK OF FIRE OR INJURY:
Turn off power and allow to cool before replacing lamp.
Lamp gets HOT quickly!
Do not touch hot lens, guard, or enclosure. Keep lamp away from materials that may burn.
Do not touch the lamp at any time. Use soft cloth. Oil from skin may damage lamp.
Do not operate the luminaire with missing or damaged lens.
PLEASE SAVE THESE INSTRUCTIONS
Kichler 12 Volt Xenon Puck Light Installation Instructions
Surface Mounting Instructions:
1. Select desired location of cabinet light.
2. Wires may be run along the cabinet surface or through the cabinet behind the fixture.
• By removing the D shaped knock out on the puck cover and routing the wires
through the hole the wires can be run along the cabinet surface
• By drilling a hole in the mounting surface large enough to accommodate the wires
and removing the circular knock out on the top surface of the puck cover, the wires
can be thread through hole and run behind the puck fixture.
3. Mount the cover to the cabinet surface using the screws provided.
4. Install the fixture housing into the cover by feeding the wires through the hole. Compress
the side springs of the fixture housing inwards and insert into the cover.
5. Connect the fixture wires to a Kichler Class 2 Transformer (sold separately) using the
wire nuts provided.
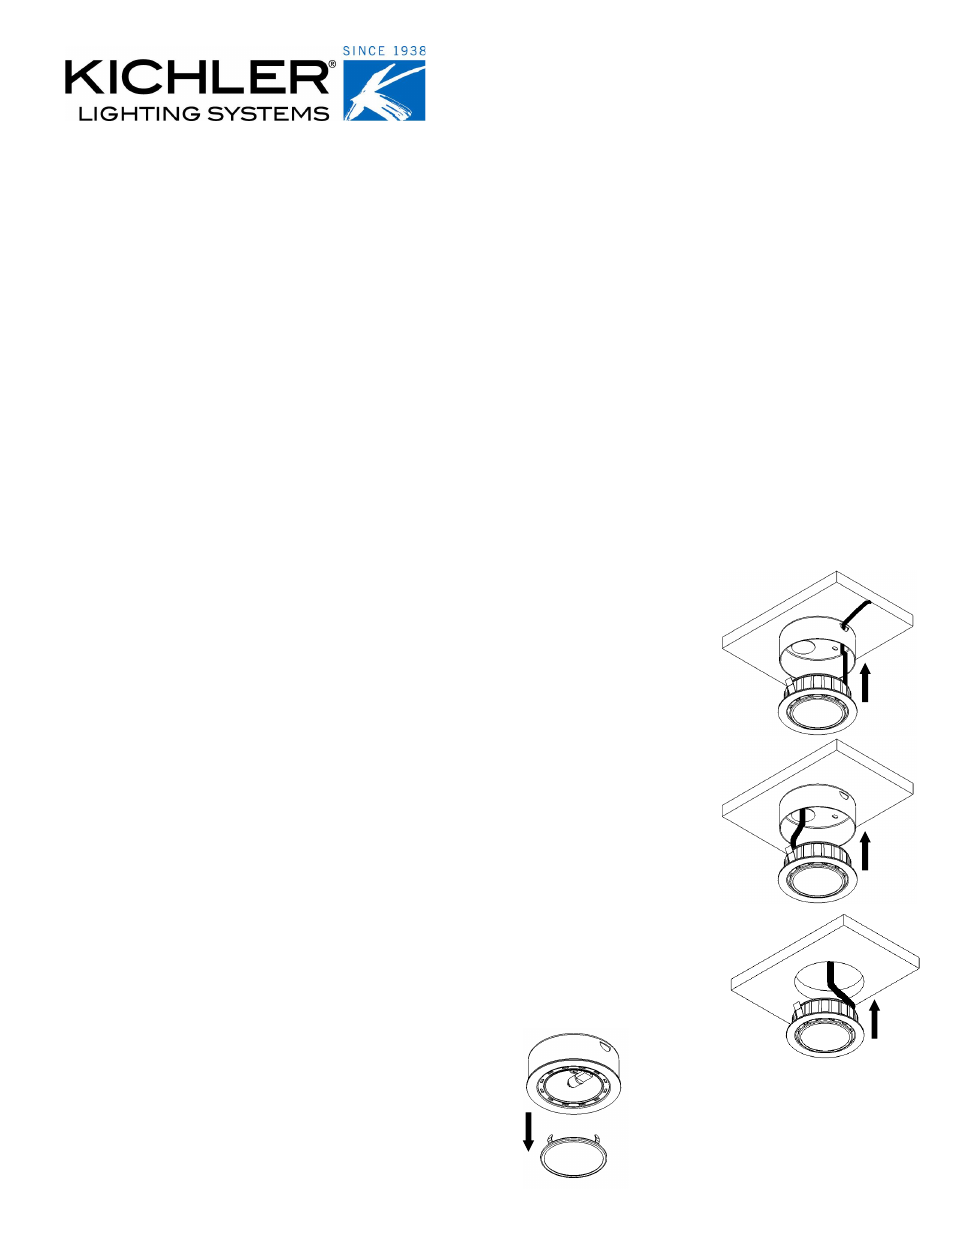
Recess Mount Instructions:
1. Select desired location of cabinet light.
2. Cut a 2 3/4 (70 mm) diameter hole through the mounting surface.
3. Install the fixture housing into the cabinet by feeding the wires through the hole.
Compress the side springs of the fixture housing inwards and insert into the hole.
4. Connect the fixture wires to a Kichler Class 2 Transformer (sold separately) using the
wire nuts provided.
Replacing the Bulb:
1. Turn the fixture off and allow to cool before replacing the bulb.
2. Use only 12V 20W MAX Xenon bulb (type G4).
3. Remove the lens ring and lens from the fixture housing.
4. Replace bulb.
5. Snap lens and lens ring back into place.
IS-12501-CB