Kichler 15565 User Manual
Kichler Hardware
1) Make sure power is off and transformer is NOT plugged into a n electrical outlet. NOTE: No splice or wiring
is required if transformer is equipped with jumper connector.
2) Open front cover of the transformer case by lifting the cover up.
3) Locate and disconnect the white jumper connector inside the housing. *Save the jumper connector with
these instructions for possible future use.
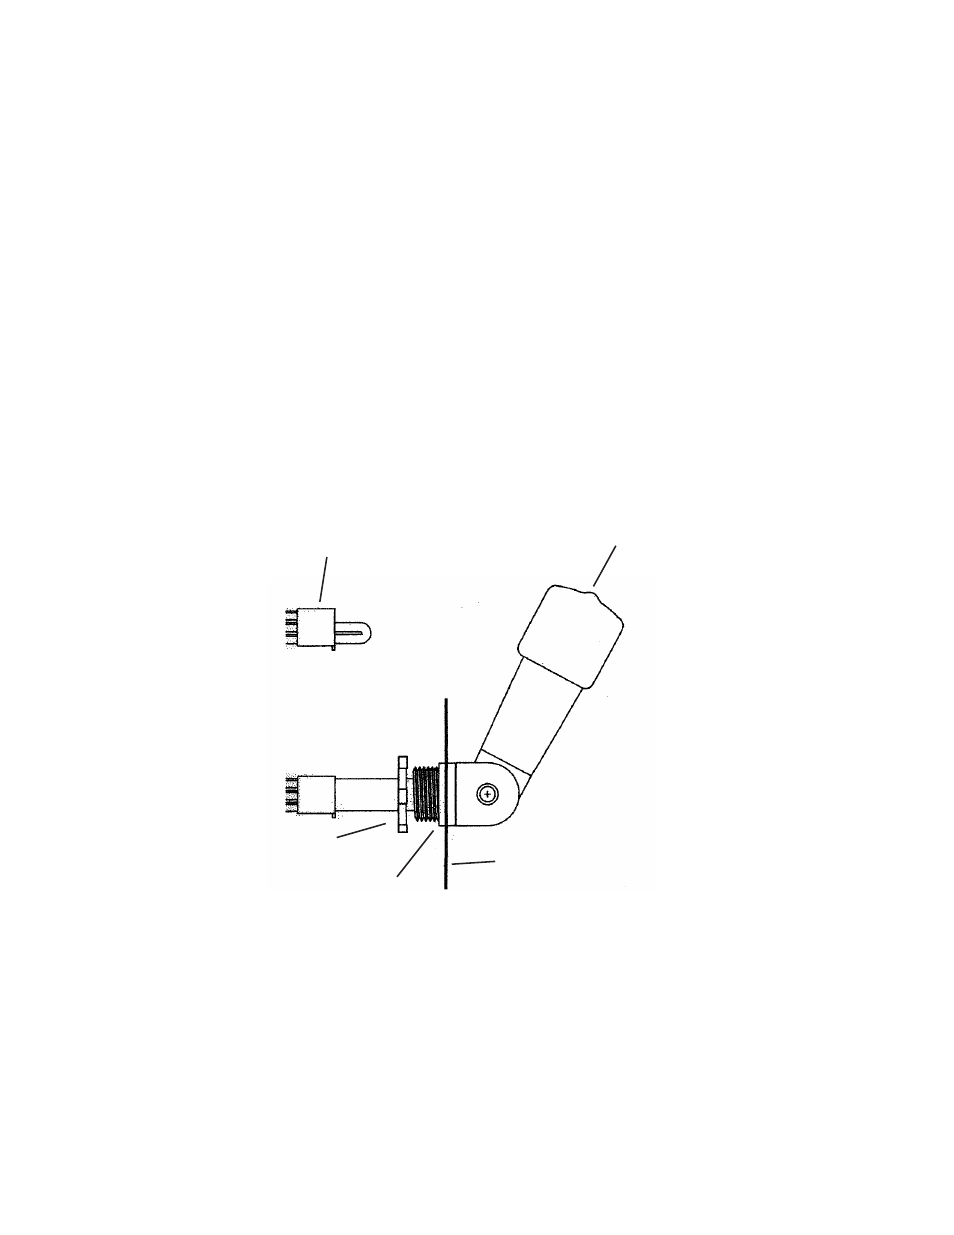
4) Remove one (1) of the 1/8” diameter knockouts on the side of the transformer and push the photo control
white connector through the knock out hole.
5) Inside the housing, slide the spacer and the star nut over the white connector and thread on to the photo
control and tighten.
6) Plug photo control withe connector into the housing connector.
7) Push the front cover back into position and secure with the two (2) screws provided.
8) Locate transformer and position photo control so the no artificial light will shine on the cell. This would cause
the photo control to cycle on and off.
*In the event that the photo control should fail, the lighting fixtures will remain on, even in the daytime. If
this should happen, follow these instructions and remove the defective photo control** and place
the jumper connector in its place.
9) Plug power supply cord into standard 115/120 volt receptacle. NOTE: The power supply cord must be
plugged into a weather tight receptacle equipped with a Ground Fault Circuit Interrupter (GFCI).
**Contact your local Kichler
®
Landscape Lighting distributor to order replacement photo control No. 15565BK.
PHOTO
CONTROL
JUMPER
CONNECTOR
TRANSFORMER
HOUSING
STAR LOCK-UP NUT
PLASTIC SPACER
IS-15565