Kichler 12383 User Manual
Kichler Hardware
KICHLER 30 WATT (P/N: 12383WH, BK)
AND 60 WATT (P/N: 12384WH, BK) WALL PLUG
POWER SUPPLY INSTALLATION INSTRUCTIONS
Before Installing:
All installations should comply with National and local electrical
codes.
If you have any doubts concerning installation contact a qualified,
licensed electrician.
1) For use only with Kichler
®
LED 24VDC Class 2, 5 AMP MAX
Cabinet Lighting fixtures and Accessories.
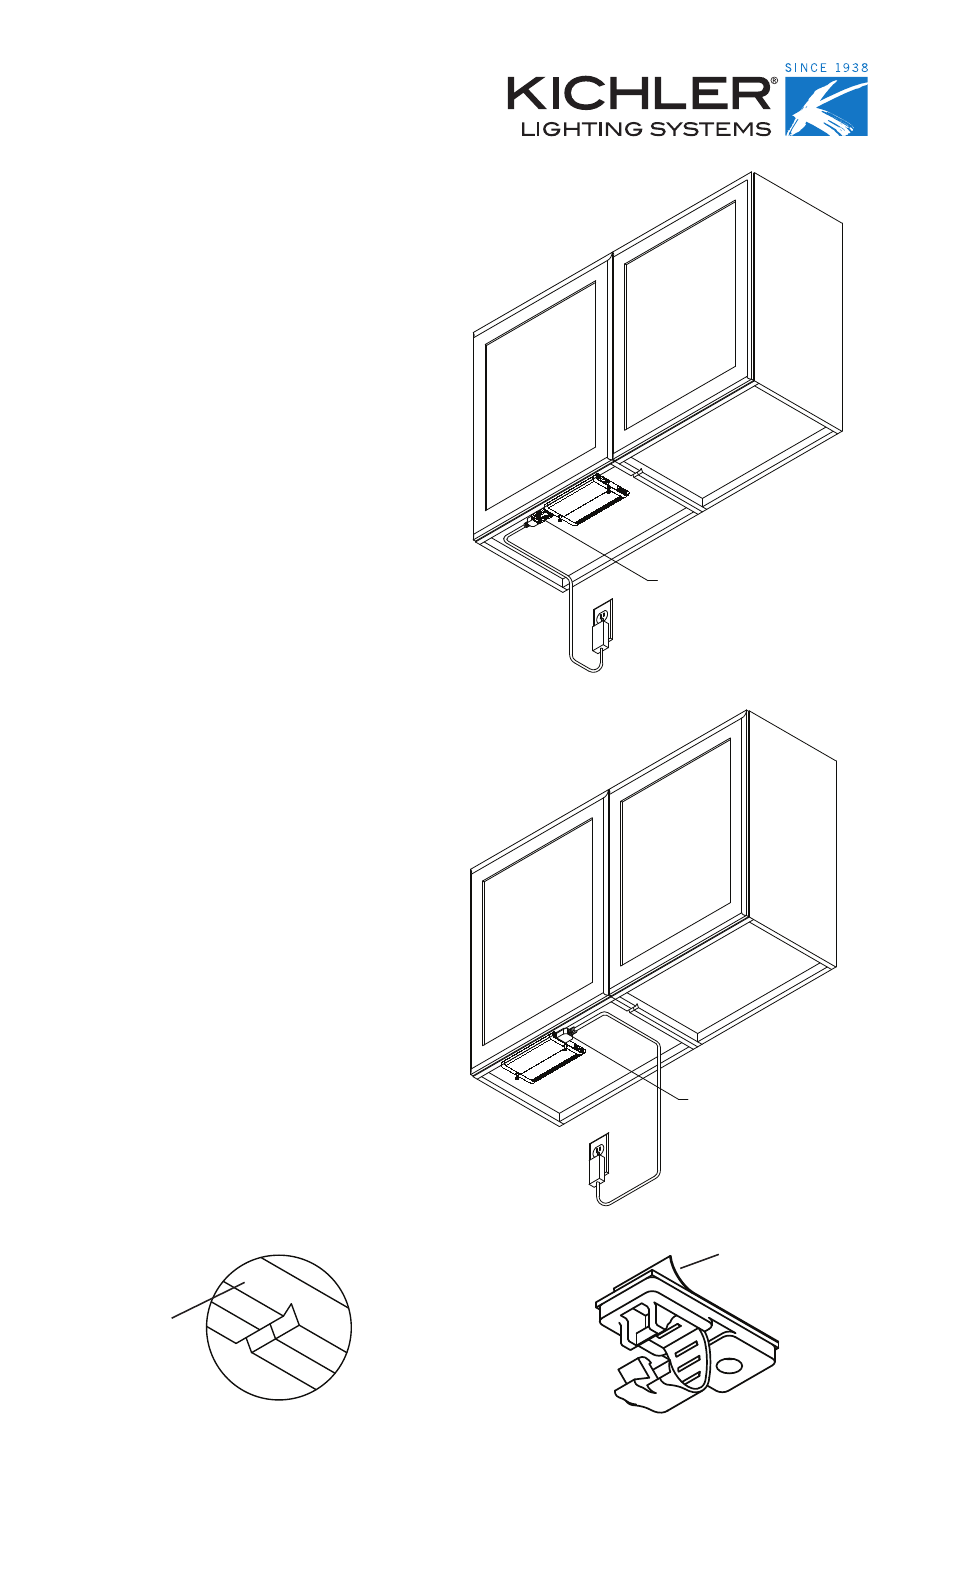
2) Plug power supply into outlet and run the 4ft cable to the location
of where the first fixture is to be connected. Hold the power
cable to mounting surface and determine best path for cable. If
the cable is being run from cabinet to cabinet a notch such as
a “V” could be cut in cabinet side panels to help keep cable out
of sight. (See fig. 3)
NOTE: Interconnect cable is UL rated CL2. Installer should
check with local building codes to determine if CL2 wire is
allowed to run through walls and ceilings.
3) Determine desired location of first fixture to be connected.
Mounting surface should be a minimum of ½” thick and
approximately 2” clearance for interconnect and power cable
should be allowed at both ends of fixture. For LED fixture
installation instructions refer to fixture instruction sheet supplied
with product.
4) Connect polarity sensitive plug from the 30 watt P/N 12383 or
60 watt P/N 12384 power supply to the fixture.
NOTE: The male connector attached to the 30 and 60 watt
power supply will connect to the corresponding female
connector of a fixture, module or interconnect cable. If
connecting to another male connector is required, you must
use Kichler
®
Gender Adaptor (Kichler P/N: 12348WH, BK
included). An additional 2” will be needed on the side of the
fixture to clear the extra length of the gender changer.
5) Peel backing off retaining clip(s) and affix to desired location(s).
Surface should be as clean as possible. Drive pre-installed
screw into the cabinet surface to secure the retaining clip to the
surface. (See fig. 4)
6) Slip Cable into clip(s) and snap closed
Date Issued: 10/12/07
IS-12383-CB
CONNECTING POWER SUPPLY
TO GENDER CHANGER
TO FIXUTRE
Retaining Clip
Backing
Fig. 3
Cabinet Side Panel
Fig. 4
CONNECTING POWER SUPPLY
TO FIXUTRE
INSTRUCTIONS
For Assembling and Installing Fixtures in Canada
Pour L’assemblage et L’installation Au Canada