TA Triumph-Adler DC 2045 User Manual
Page 14
2. Set-up
2-4
• Editing the shared Address Book
The following explains the procedure to use the scanner’s
touch panel to edit the shared Address Book.
* New addresses can also be registered in the Address Book
using this procedure.
* Registration in the shared Address Book is possible from
an Internet Web browser as well as the Address Editor
software.
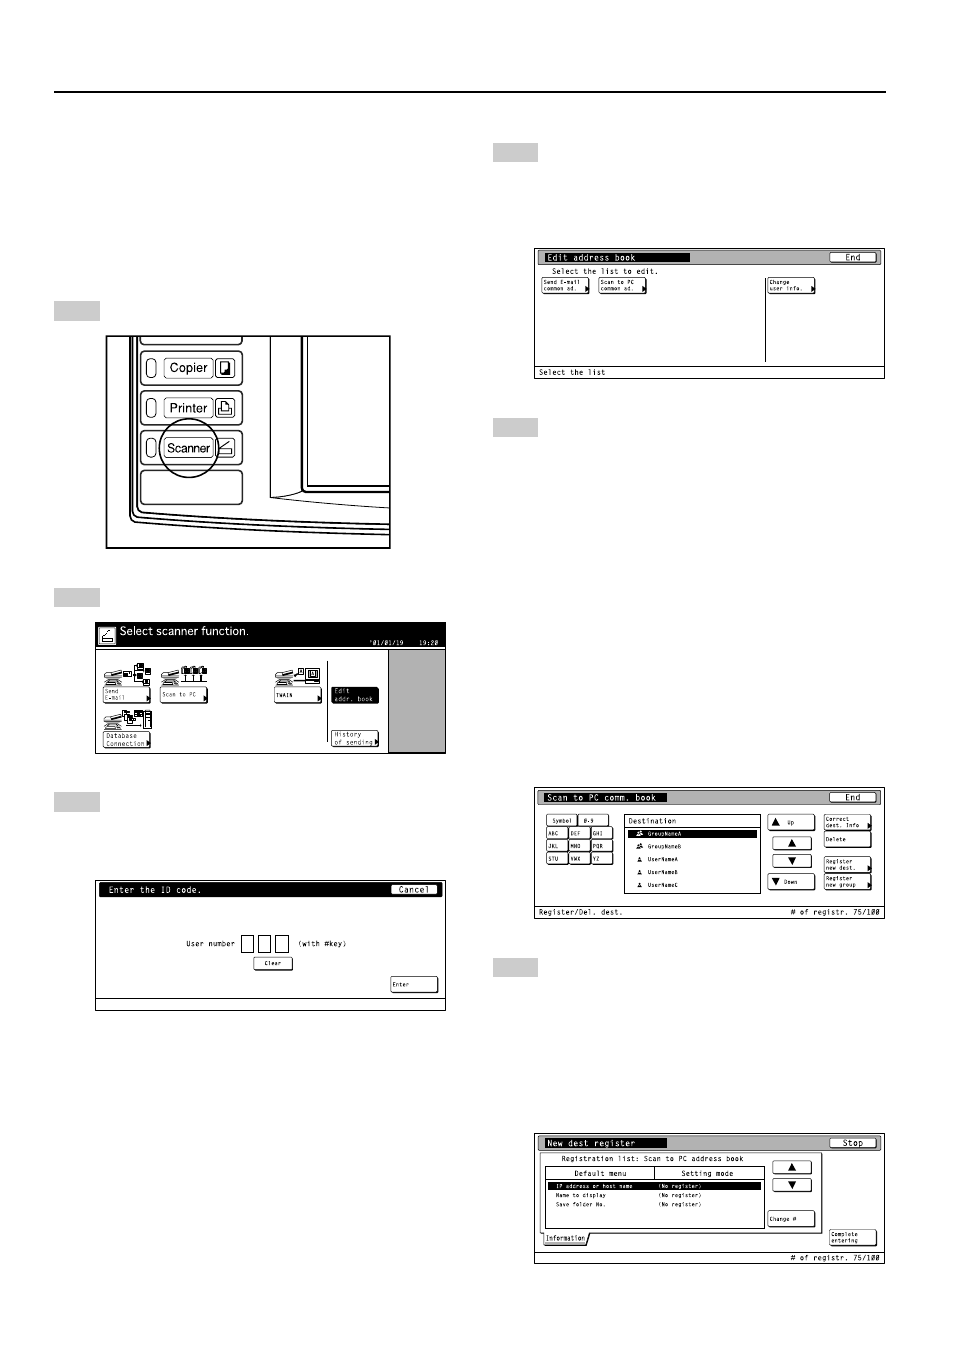
10
Press the Scanner key to display the Select Scanner
Function screen.
11
Touch the “Edit addr. book” key. The User Number
Input screen will appear.
12
Enter your user number and then touch the “Enter”
key. The Edit Address Book screen will appear.
(Refer to step 8 on page 2-3.)
* If you registered a password during user registra-
tion, enter the registered password.
13
Select the shared Address Book that you want to edit.
The registration and edit screen for the Address Book
will appear.
* If you want to change your user information, touch
the “Change user info.” key and register the infor-
mation as desired. (Refer to step 9 on page 2-3.)
14
If you want to register a new destination in the
Address Book, touch the “Register new dest.” key.
If you want to register a new group of destinations, or
add a destination to a previously registered group,
touch the “Register new group” key.
If you are registering a new destination, go to the
next step.
If you are registering a new group of destinations,
proceed directly to step 16.
If you want to change the information for a previously
registered destination, use the “
▲” and “▼” cursor
keys to select the name of the destination that you
want to edit the information for. Then touch the
“Correct dest. info” key and change the information
as desired.
If you want to delete a registered destination, use the
“
▲” and “▼” cursor keys to select the name of the
destination that you want to delete and then touch the
“Delete” key.
* The sample screen below is the shared Address
Book editing screen from the Scan to PC function.
15
Destination registration
Use the “
▲” and “▼” cursor keys to select the setting
that you want to register information for and then
touch the “Change #” key. The Change Setting
screen will appear.
Enter the corresponding information in accordance
with the settings, etc., that are shown on the touch
panel. Once you have finished entering the corre-
sponding information, touch the “Complete entering”
key and the destination will be registered.