Installation – Whelen 295HFSC9 User Manual
Page 2
Page 2
Installation
The 295HFSC9 is designed to be mounted directly onto the dash or other
surface through the use of a bail strap mounting bracket. The unit may
also be mounted into your vehicle’s console (if so equipped). Regardless
of the style selected, be sure to observe the air bag warning on the
cover of this manual.
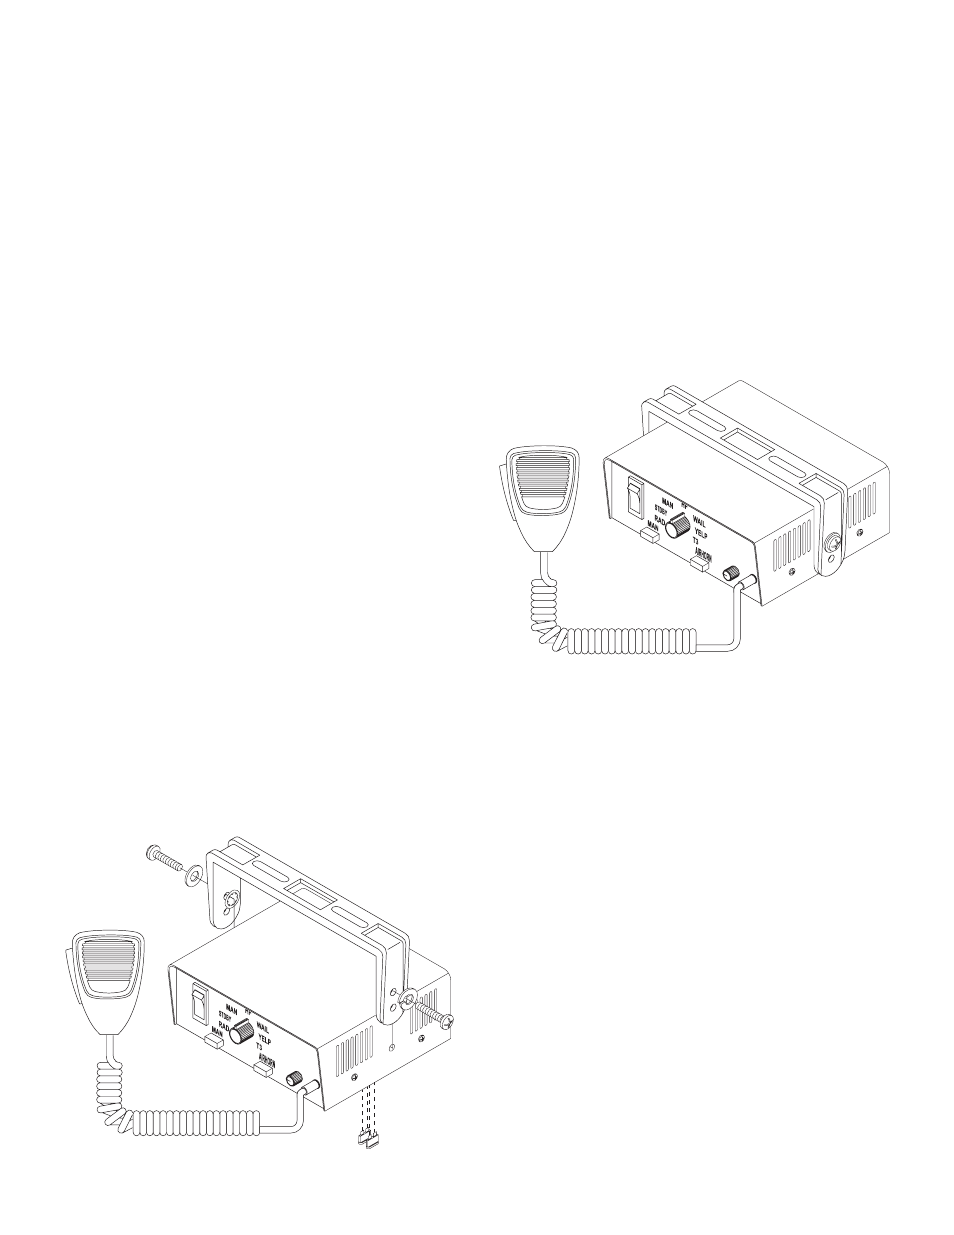
Bail Strap Mount
1.
Position the bail strap in the selected mounting location. Using an awl
or other suitable tool, scribe the surface where the mounting holes
are to be drilled.
Caution:
As mounting this unit will require drilling, it is
absolutely necessary to make sure that no other
vehicle components could be damaged in the
process. Check both sides of the mounting
surface before starting. If damage is likely,
select a different mounting location.
2.
Drill the mounting holes in the areas scribed in step 1. The size of the
drill bit should be determined by the size of the mounting hardware
used and thickness of the mounting surface.
3.
Secure the bail strap to the mounting location.
Note:
There are 2 sets of holes on the bail strap for
positioning the unit at 2 different heights.
4.
Locate the two, 1/4-20 x 5/8” screws, two 1/4” internal tooth
lockwashers & two 1/4” split-lockwashers (included). Place the
internal tooth lockwashers between the desired holes in the strap
and the housing. Place the split-lockwashers onto the screws as
shown.
5.
Place the unit into its mounted position. Align the theaded holes in
the case with the desired holes in the bail strap.
6.
Thread the screws into the case and tighten firmly.
Congratulations on selecting the 295HFSC9 Siren! The 295HFSC9 offers a unique and distinctive collection of features designed to allow
the user to customize the operation of this siren to suit their individual wants or needs.
• 8 Programmable operating profiles
• Switch or ignition activated panel
illumination.
• Stereo (dual) or mono sound control.
• 200 Watts of output power.
• Removeable microphone.
• Park-Kill Siren shutdown.
• “Siren In Use” output signal.
• Hands-Free operation.
• Radio Repeat.
• Simulated mechanical siren tones.
• Harmonically-rich, composite
Airhorn tones.
• Title 13-compliant profiles.
• Independent, non-destructive short
circuit protection.
Console Mount
Console manufacturers offer mounting kits that include all the necessary
hardware and brackets required to mount this unit into their console. The
console mount brackets are secured onto the unit the same way the bail
bracket does (except for the addition of two flat washers that must be
inserted between the 295HFSC9 and the bracket). Please refer to the
manual included with your console for specific information on securing the
295HFSC9/mounting bracket assembly onto the console.
NOTE: Due to the lack of air flow within a console, prolonged
operation of this siren will require the console to be modified to
improve ventilation.
Microphone
A 1/4” port is provided on the front right-hand side of the unit for
installation of the microphone.