Switching between videos to output, Using effects when switching videos (mix/wipe), Video operations – Roland P-20HD Video Instant Replayer User Manual
Page 16
16
Video Operations
Shuttle mode
Press the [SHUTTLE] button to enter shuttle mode (the button lights up).
Changes the playback speed according to the
angle at which you move the dial.
Turning
To the right
Play forward
To the left
Play in reverse
Press the dial
Cancels the shuttle mode
There are two operating methods. You can set the speed factor
(maximum value) for each operation.
¹
Turn the [JOG/SHUTTLE] dial
Set the speed factor in “SHUTTLE Speed”, Project Settings menu
¹
Turn the [JOG/SHUTTLE] dial while holding down the [SHUTTLE]
button
Set the speed factor in “[SHUTTLE] + Dial”, Project Settings menu
When in shuttle mode, a gauge is shown on the preview screen that indicates
the shuttle dial’s angle (the playback speed rate).
Switching Between Videos to Output
The P-20HD lets you seamlessly switch the output between the input
video (live in video) and the playback video (replay video).
1 .
Press the OUTPUT [LIVE IN] button or the OUTPUT
[REPLAY] button to select the video that you want
to output.
Button
Explanation
OUTPUT
[LIVE IN] button
The video of the LIVE IN bus is output from
the OUTPUT MAIN connector.
OUTPUT
[REPLAY] button
The video of the REPLAY bus is output from
the OUTPUT MAIN connector.
Using effects when switching videos (mix/wipe)
You can use effects such as mix or wipe that are applied when
switching between videos.
1 .
Press the [MENU] button
Ó
Project “Transition”
Ó
select “LIVE IN
Ë
REPLAY” or “REPLAY
Ë
LIVE IN,”
and press the [VALUE] knob.
* You can also use separate effects for when the live in video
switches to the replay video (LIVE IN > REPLAY), and for when the
replay video switches to the live in video (REPLAY > LIVE IN).
The Transition screen appears.
2 .
Select “Time,” and press the [VALUE] knob.
3 .
Set the transition effect switching time and press
the [VALUE] knob.
For example, if you set “Time” to one second, the effect takes one
second to completely finish after it starts.
4 .
Select “Type,” and press the [VALUE] knob.
5 .
Select the transition effect and press the [VALUE]
knob.
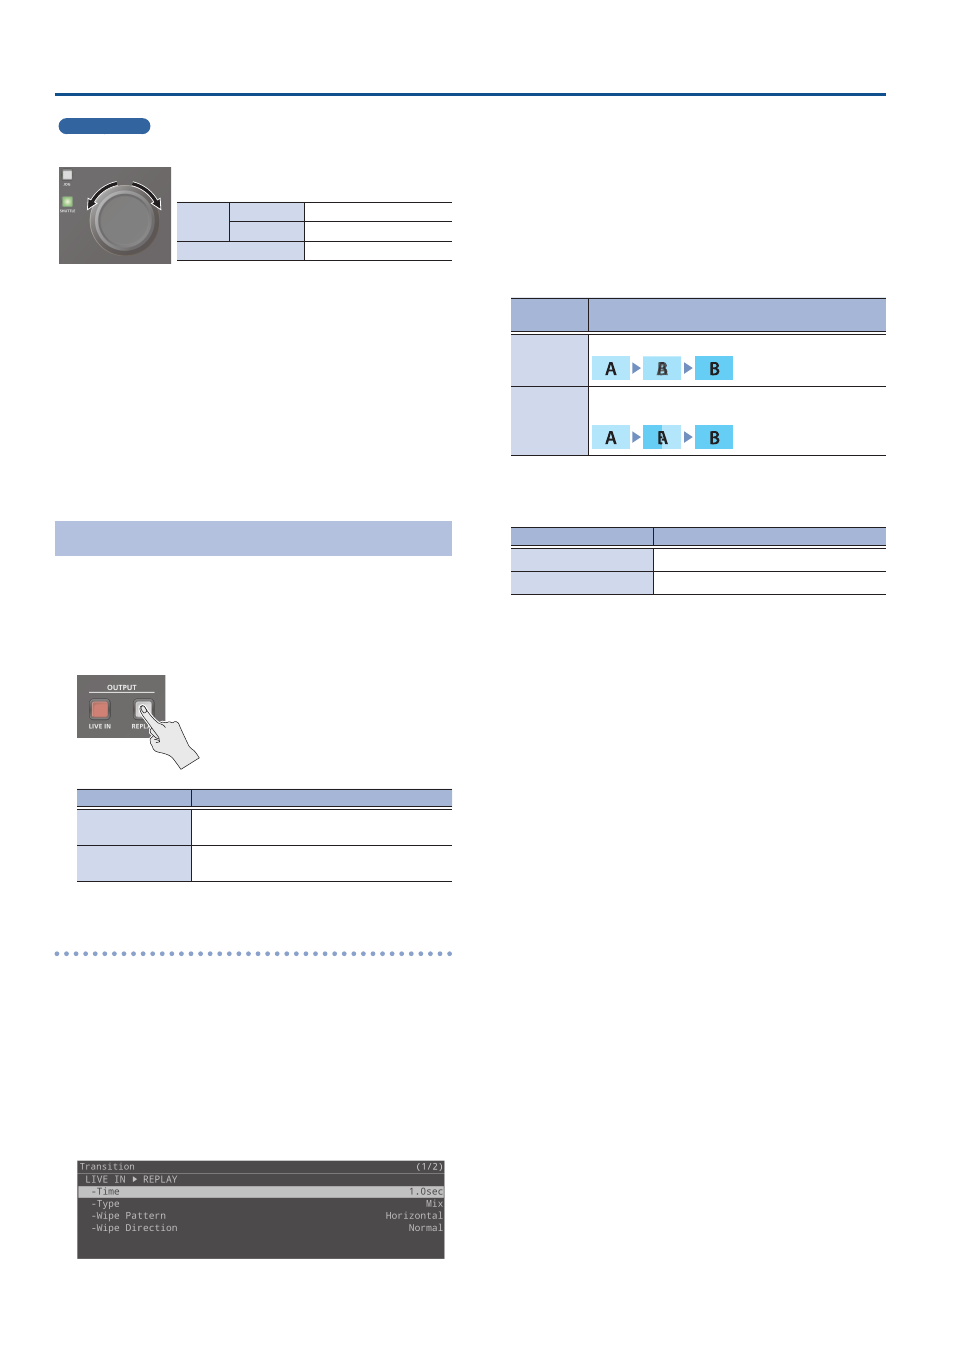
Transition
effect
Explanation
Mix
The two videos are mixed as the transition occurs.
Wipe
The next video moves across to replace the original
video.
6 .
When wipe has been set in step 5, set this using the
menu items shown below.
Menu item
Explanation
Wipe Pattern
Selects the wipe pattern.
Wipe Direction
Selects the wipe direction.
7 .
Press the [MENU] button to close the menu.