Intro, Overview, Front – Erica Synths LXR-02 Drum Machine Synthesizer User Manual
Page 6: Pattern generator mode
INTRO
THANK YOU FOR PURCHASING THE ERICA SYNTHS X
SONIC POTIONS LXR-02 SYNTHESIZER!
The LXR is a fully-fledged digital drum machine with
an integrated sequencer. Its sound engine provides
6 different instruments, each with over 30
parameters to tweak. It can produce a wide variety
of sounds, ranging from classic analogue
emulations to crunchy digital mayhem.
DISPLAY
The display is used to show parameter values
from the selected menu page.
KNOBS
The 4 encoders are used to edit the values
shown in the display above.
In this first chapter we will focus on the physical
appearance of the LXR, describing the front panel
controls as well as the connection jacks on the
back. Further, the basic menu navigation is
explained.
1
2
3
7
8
9
10
11
12
4
5
6
1
OVERVIEW
2
RECORD/PLAY BUTTONS
The PLAY button starts and stops the playback.
The current pattern is reset to the first step when
the sequencer is re-started.
The RECORD button activates the recording
function. If the LED is lit, all incoming MIDI notes
will be recorded to the active pattern. Knob
movements will also be recorded to the selected
automation track.
SHIFT BUTTON
Activates an alternate function set for some
buttons, indicated by the white background labels.
COPY/CLEAR BUTTON
Copy and clear sequencer and kit data.
16 SEQUENCER BUTTONS
Function depending on active mode
> Voice mode: set and clear active steps in the
sequencer.
> Performance Mode: Buttons 1 to 7 are used to
trigger manual rolls. Buttons 8-16 are unused at
the moment.
> Step Edit Mode: select a step to edit the step
parameters.
> Used together with the shift button, to access
special menus.
ENCODER
Navigate through the menu.
VOLUME FADERS
There are 6 faders that control the volume of the
individual voices as well as a main volume fader.
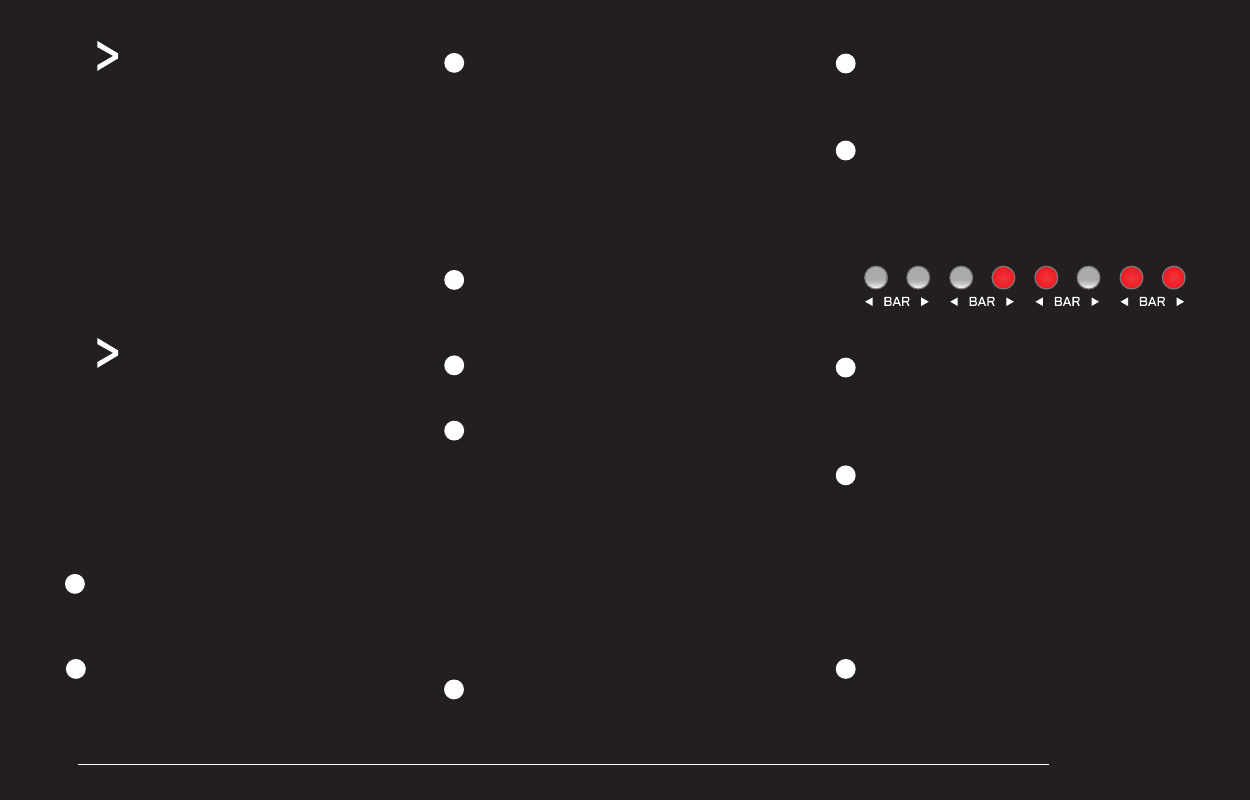
BAR BUTTONS
To edit a 64 step Pattern with only 16 sequencer
buttons, the pattern is split into 4 bars with 16
steps each. The bar buttons are used to select
which of the 4 bars to show on the buttons.
7 VOICE BUTTONS
The voice buttons select the active track to edit.
Together with the shift key they will mute/unmute
the voices.
4 MODE BUTTONS
Switch between the 4 main operating modes.
VOICE - Voice edit mode (a second push toggles
step edit mode)
PERF - Performance mode [Pattern generator
mode]
LOAD – Load data
SAVE – Save data
8 SELECT BUTTONS
Select the synthesis section to edit (Oscillators,
Mixer, Envelopes etc.)
2.1. FRONT
MORPH KITS
A morph kit is a normal kit that is loaded as morph target. Any kit can be loaded as
a morph target.
Loading
> Press LOAD + MORPH
> Select the preset number of the kit you want to load.
> Push the encoder.
> The morph sound is loaded.
> Please note that you won't hear any change if the morph parameter value is set to
zero.
> Use the morph parameter on the performance page to morph the current kit into
the loaded morph kit.
Saving
You can also save the resulting sounds from morph operations. Just press the
SAVE + MORPH buttons and save the sound as a new kit. Instead of the original
sound, the currently playing mixture of the 2 presets will be saved.
Did you know?
If morphing arbitrary presets is too drastic for you, try modifying your
favourite pattern just a little bit and save it to a new location. Now you
can control all tweaked parameters at once!
SONGS
The process to load and save songs is the same as described for the kits. Just use
the button combo Press LOAD + SONG or SAVE + SONG instead.
PATTERNS
Patterns are a special case as they have no name. Loading and saving is done in
a similar fashion like changing patterns in pattern mode.
Loading
> Press LOAD + PATTERN
> The screen will show “Select Pattern, Current: x”
> Now you can use the SEQUENCER and BAR buttons to select the pattern to load.
> If the sequencer is playing, the new pattern will start after the current pattern
has finished playing.
Saving
> Press SAVE + PATTERN
> The screen will show “Save Pattern, Current: x”
> Now you can use the SEQUENCER and BAR buttons to select where to save the
pattern.
> As soon as you press the SEQUENCER button, the display will show “success!”
and the pattern is saved.
1st bar
1-16
2nd bar
17-32
3rd bar
33-48
4th bar
49-64
PROJECT
The process to load and save project is the same as described for the kits. Just
use the button combo Press LOAD + PROJECT or SAVE + PROJECT instead.
Where Projects are special is in regard to the place where they are saved. All
previous datatypes are loaded from and saved to the non persistent RAM region
where the project data is located. Projects however are saved to the memory
card and are the only way to save kits, songs and patterns so they will be
restored after a power cycle. Projects are containers that are a collection of Kits,
Patterns, Songs and settings.
7.5. PATTERN GENERATOR MODE
The pattern generator provides an easy way to generate interesting poly rhythms
on the fly. You just have to set the desired pattern length and the number of
active steps to generate a new pattern using the euclidean algorithm.
1
LXR OWNERS MANUAL
6