Rs-232 – Atlona AT UHD CLSO 612 V2 User Manual
Page 24
24
atlona.com
Toll free: 1-877-536-3976
Local: 1-408-962-0515
RS-232
Connection
Set Up
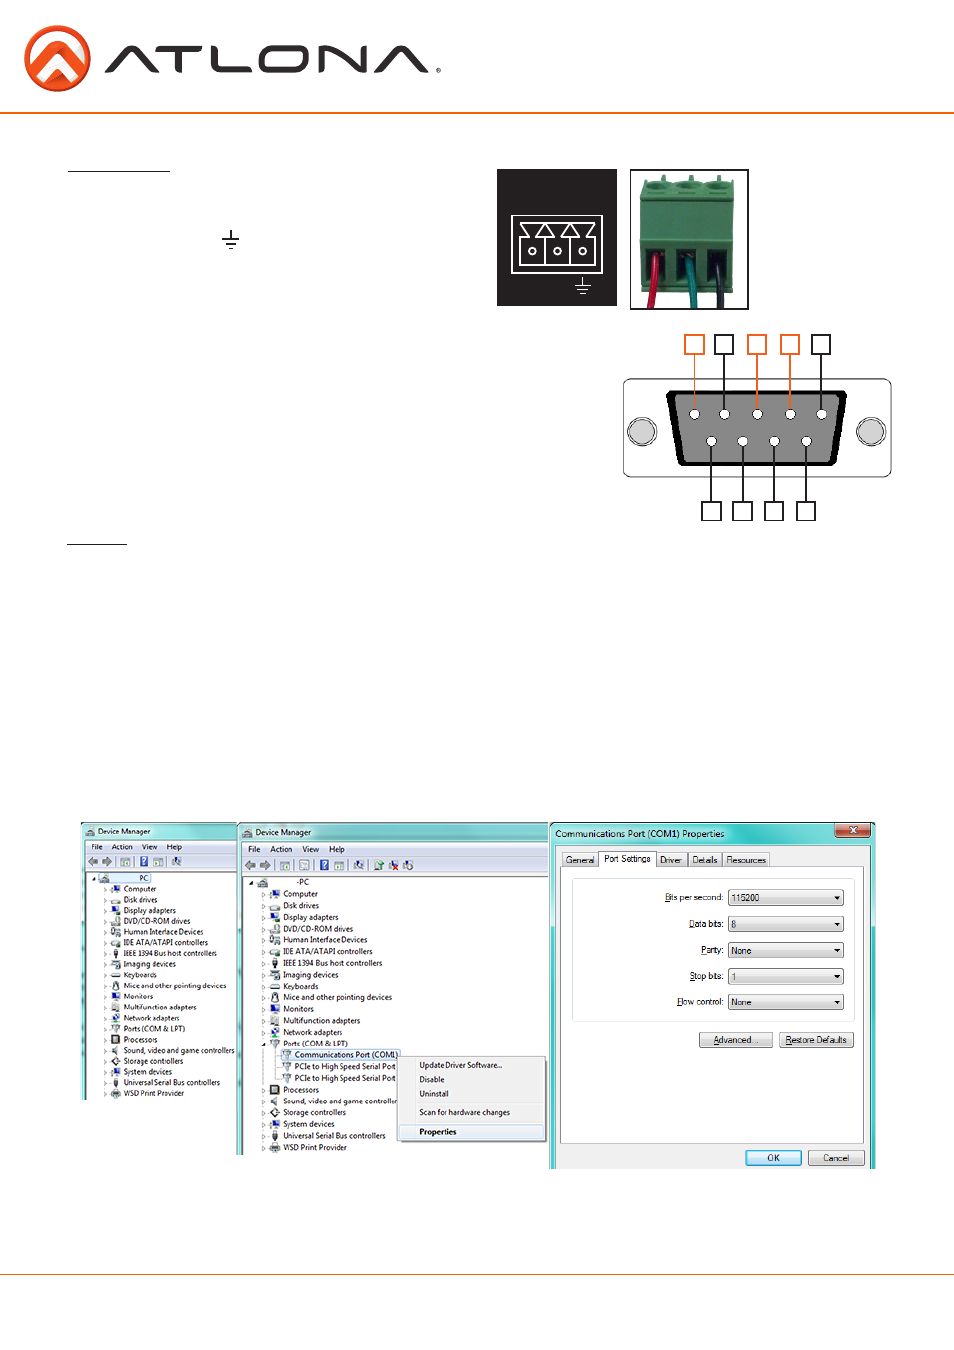
To set up the RS-232 hyperterminal (if not using 3rd party software) use the following steps:
1. Connect the CLSO-612 to a PC using a 3 pin to USB cable
2. Go to the Device manager folder (see picture A)
3. Find the CLSO-612 COM port and right click with a mouse and select properties (see picture B)
NOTE: If unsure which COM port is the CLSO-612, unplug the cable and plug it back in. It will disappear and
reappear on the COM port list.
4. Under the properties menu select the port settings tab and update the menu to the CLSO-612
default settings of: Bits Per Second: 115200, Data Bits: 8, Parity: None, Stop Bits: 1 and Flow
Control: None. (see picture C)
Set up is done and any hyperterminal program may be used to control the CLSO-612 now.
A
B
C
RS-232 is often connected through a 9-pin D to captive screw
connector. The pins will have functions associated with them,
some will be unassigned.
Note: Typical DB9 connectors use pin 2 for TX, pin 3 for RX, and pin 5
for ground. On some devices functions of pins 2 and 3 are
reversed.
5
4
3
2
9
8
7
6
1
RS-232 pin out will be determined by the RS-
232 cable and will connect as Rx (receiver), Tx
(transmitter), and
(ground). (See picture 1)
Wire color will
differ by cable
manufacturer.
1
RS-232
RX TX