Casella CEL CEL-593 User Manual
Page 10
3. Use
and
to move the reverse
video cursor to SOUND ANALYSER,
then press the LOAD key to load this
Application and display a similar Select
Acquisition Mode screen (shown in
Chapter 5).
Indicates further parameters on
other screens accessed by
and
SLM SETTINGS
REVIEW
'A'
STOP
SLM 1
LIN
Q=
Q=3
SLOW
FAST
PREV
VALUE
NEXT
VALUE
GS-12
RECORD TIMER=
OFF
_
PEAK=
LINPEAK
BARGRAPH(S)
FAST
-
/
-
-
/
-
more
250Hz
STOP
56.4
A
L
SPLF
RUN
GS-08
RANGE
L
SLM
RANGE
1
/
1
F
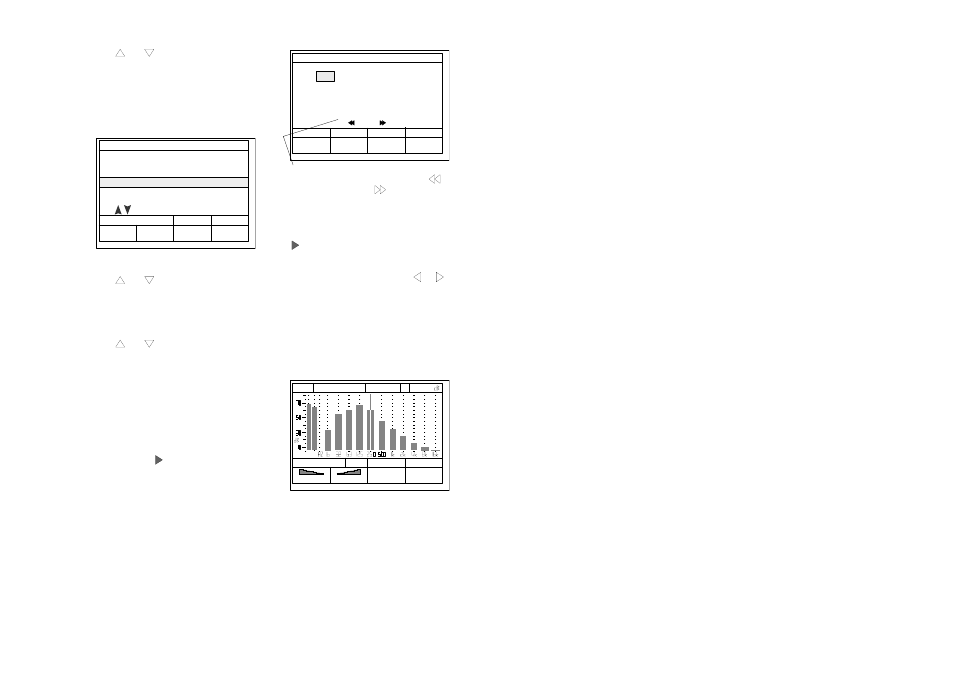
SELECT APPLICATION
CEL-593.C1L
LOAD
STOP
GS-05
1 SOUND ANALYSER
2
3
FASTORE
4
BUILDING ACOUSTICS
LOUDNESS
Use
to select
4. Use
and
to move the reverse
video cursor to highlight the required
Mode. then press the LOAD key to
load the Mode and display a similar
Select Bandwidth screen (see
Chapter 5).
5. Use
and
to move the reverse
video cursor to highlight the required
bandwidth, then press LOAD to load
the default setup for the indicated
bandwidth and display the relevant
Status screen.
6. If the voltage shown for a NEW SET of
batteries is only 9-10 V, check battery
orientation.
7. When the instrument is switched ON,
once the self test is completed, the
default setup (
in Figure 1) for each
mode and bandwidth is loaded
automatically for immediate use.
8. When the default setup is known to be
suitable for the current task, go directly
to step14.
9. When it is not known if the default
setup is suitable, use the SETUP
option to display the current Set Up
screen and directory (see Figure 1).
10. When none of the listed setups are
suitable, use the REVIEW option on
the Set Up screen, edit an existing
setup as described in Chapter 11
before using it, then go to step 13.
11. When the default setup which has
been loaded for the mode (indicated by
), is found to be suitable, go directly
to step 13.
12. When one of the other listed setups for
the bandwidth is suitable, use
or
keys to select it followed by the LOAD
option to load it for use.
13. Press ESC key to display the current
Status screen
14. Press the REAL TIME key to display the
real time Stop screen.
15. If necessary, press RANGE keys one or
more times to obtain the correct range
for the task.
16. Press the RUN key to start calculation
and logging.
All data from the run is stored in a file
that is identified by its start date and
time. This file is held in the directory of
results for the current mode and
bandwidth.
Page 68 - Getting Started - CEL-553/573/593