Practical measurement, logging & printout – Casella CEL CEL-593 User Manual
Page 9
900049e
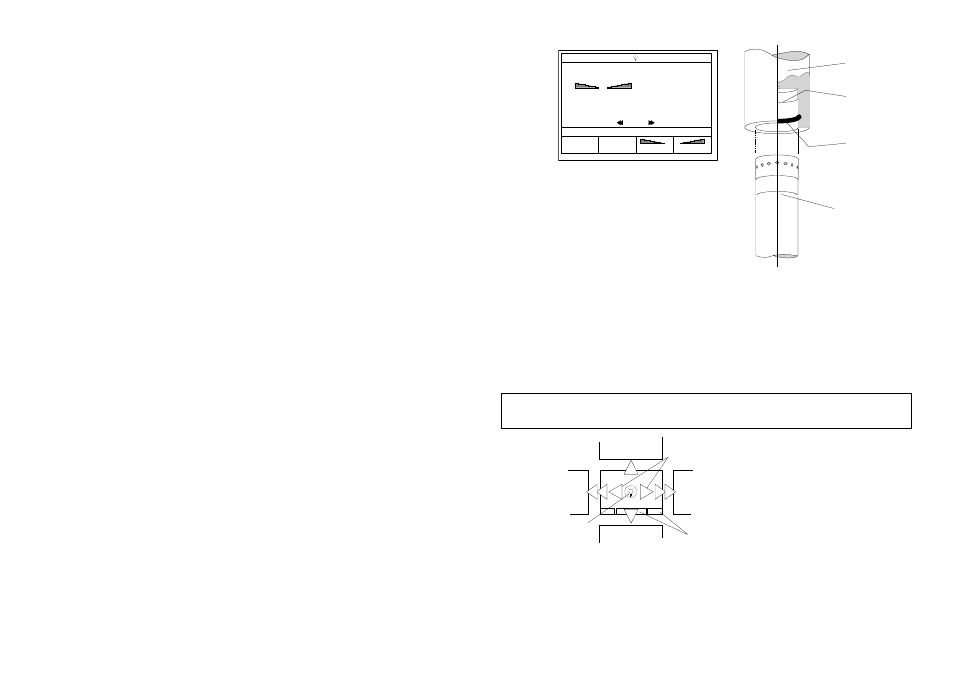
Microphone &
Preamplifier
Calibrator
'O' Ring
Shoulder
Figure 3: Fitting acoustic calibrator
CALIBRATION
ABORT
LIN LEVEL
ABORT TO USE LAST SETTING
65.Ø dB
SAVE
LEVEL
LEVEL
FIT CALIBRATOR AND USE
USE NEW SETTING OR PRESS
DIRECTION
CAL
GS-11
more
STANDARD CALIBRATION
PRESS SAVE-CAL TO SAVE AND
TO SET LEVEL
For the CEL-292 (due to differences in
cavity volume), adjust the indicated
level to 113.7 dB.
13. Once the correct level is indicated, use
the SAVE CAL option to store the
calibration for future use.
14. Press ESC key to display the current
Status screen to start measurement
and logging, then follow the
instructions in Chapter 7.
Previous
Screen
(Same
Setup)
Commands
Next
Screen
(Same
Setup)
Measurement - Screen Options
Previous Data
Stored in This Run
(When Available)
Next Data
Stored in This Run
(When Available)
980009e
Change
Frequency
Backlight
"Series 3 & 2"
7.
Practical Measurement, Logging & Printout
Observe the Warnings in Chapter 3.
With batteries, preamplifier, microphone
and interface installed as detailed in
Chapter 3, a field accuracy check
performed according to Chapter 6, and the
Configuration screen displayed, proceed as
follows.
1. When the Application, mode and
bandwidth shown in the status field
are suitable for the proposed
measurement task, press the USE
MODE key to display the Status
screen for the mode and bandwidth,
then proceed to step 6.
2. When the Application and bandwidth
shown in the status field, are not those
required for the proposed SLM
measurement task, press the
APPLICATION key to display the
Select Application screen.
Getting Started - CEL-553/573/593 - Page 67