Setup window screenshot – NEXCOM VMC 3000/ 3001 User Manual
Page 51
Copyright © 2012 NEXCOM International Co., Ltd. All rights reserved
35
VMC 3000/4000 Series User Manual
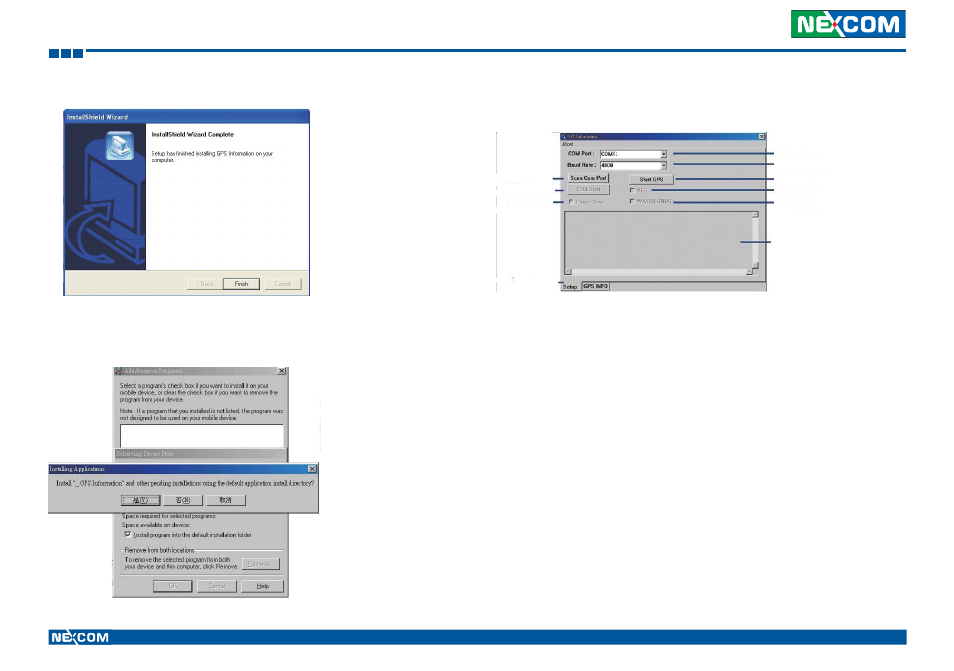
Chapter 3: Using the GPS Feature
4. When the setup complete, press <Finish>.
5. Once the installation is completed, installation of GPS Information onto
PDA device will be launched automatically. Select <Yes> to continue.
Setup Window Screenshot
Double click GpsInfo_Vista icon from Desktop to start GPS.
•
Scan Com Port” - Scan all available communication port for GPS recep-
tion
•
“Cold Start” - Cold start the GPS receiver
•
“Power Save” - Check the box to enable/disable the Power Save Mode
(the option is available only when a GPS device is found)
•
“Tab Menu” - Switch between Setup and GPSINFO windows
•
“Com Port Selection” - Select the appropriate communication port
where GPS receiver is configured (it may be necessary to try several com-
munication ports until the right one is found)
•
“Baud Rate Selection” - Select the appropriate transferring rate (Please
set the baud rate at 38400)
•
“Start GPS button” - Turn on/off the GPS device
•
“VTG check box” - Some navigation or map software requires to receive
VTG data output for during operation. Check the box to activate the
VTG data output.
Com Port Selection
Baud Rate Selection
Start GPS button
Cold Start
Scan Com Port
M a i n G P S d a t a
Window
VTG check box
WAAS/EGNOS
Power Save
Tab Menu