Lower looper, Upper looper – Baby Lock Evolve (Previous Model) (BLE8W) Instruction and Reference Guide User Manual
Page 22
T
H
R
E
A
D
I
N
G
20
Lower Looper
1. With the presser foot up and machine lock button in the locked position. See fig. A page 19. Set the thread-
ing port selector lever to "L" for lower looper threading. See fig. B, page 19.
2. Place the thread cone or spool on the "LOWER LOOPER" spool pin on the thread stand. Slip the thread into
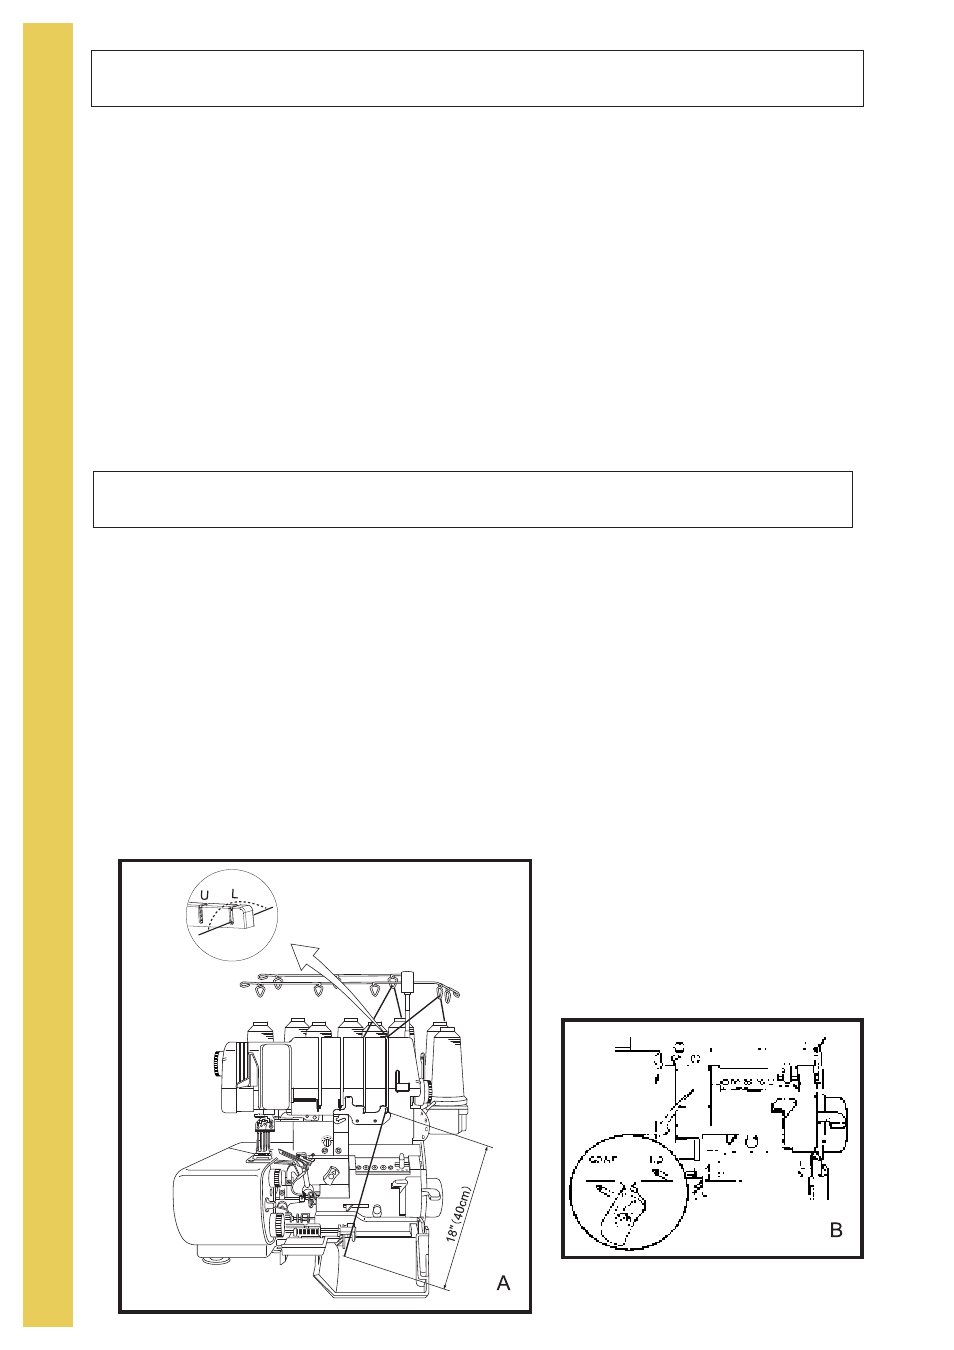
the telescopic antenna thread guide "L" directly above the spool. (See fig.C,page 19) Snap the thread into
the thread guide "L" at the top of the machine and through the slot above the front cover.(See fig. A).
3. Pull 18 inches (40cm) of thread through guide. Insert the end of the thread into the threading port "L" about
1 inch (2.5cm). Use the tweezers, if necessary, to insert the thread end more easily. see fig. E, page 21.
4. Depress the looper threading lever (fig. E page 21). If the thread does not go through the lower looper eye
with one push, depress the threading lever again until it does.
5. Clip the thread 4 inches (10cm) from the lower looper eye and leave it hanging loose.
6. Move the lock button release lever to the right.
Upper Looper
1. Set the upper looper positioning lever at "UP" position. See picture below for reference.
2. With the presser foot up and machine lock button in the locked position, see fig. A, page 19, set the thread-
ing port selector lever to "U" for upper looper threading. See fig. B, page 19.
3. Place the thread on the "UPPER LOOPER" spool pin on the thread stand. Slip the thread into the telescop-
ic antenna thread guide "U" directly above the spool. (See fig. C, Page 19 for reference.) Snap the thread
into the thread guide "U" at the top of the machine and through the slot above the front cover. (See fig. A)
4. Pull 18 inches (40cm) of thread through guide. Insert the end of the thread into the threading port "U", about
1 inch (2.5cm). Use tweezers, if necessary, to insert the thread end more easily. See fig. E, page 21.
5. Depress the threading lever (fig. E page 21). If the thread does not go through the upper looper eye with one
push, depress the threading lever again until it does, and leave thread hanging loose.
6. Move the lock button release lever to the right.
Note:
Make sure that the upper looper positioning lever is always set in the "UP" position whenever you sew
overlock or combination stitches.(fig B)