How to use the needle threader, Front cover seam guide – Baby Lock Evolve (Previous Model) (BLE8W) Instruction and Reference Guide User Manual
Page 26
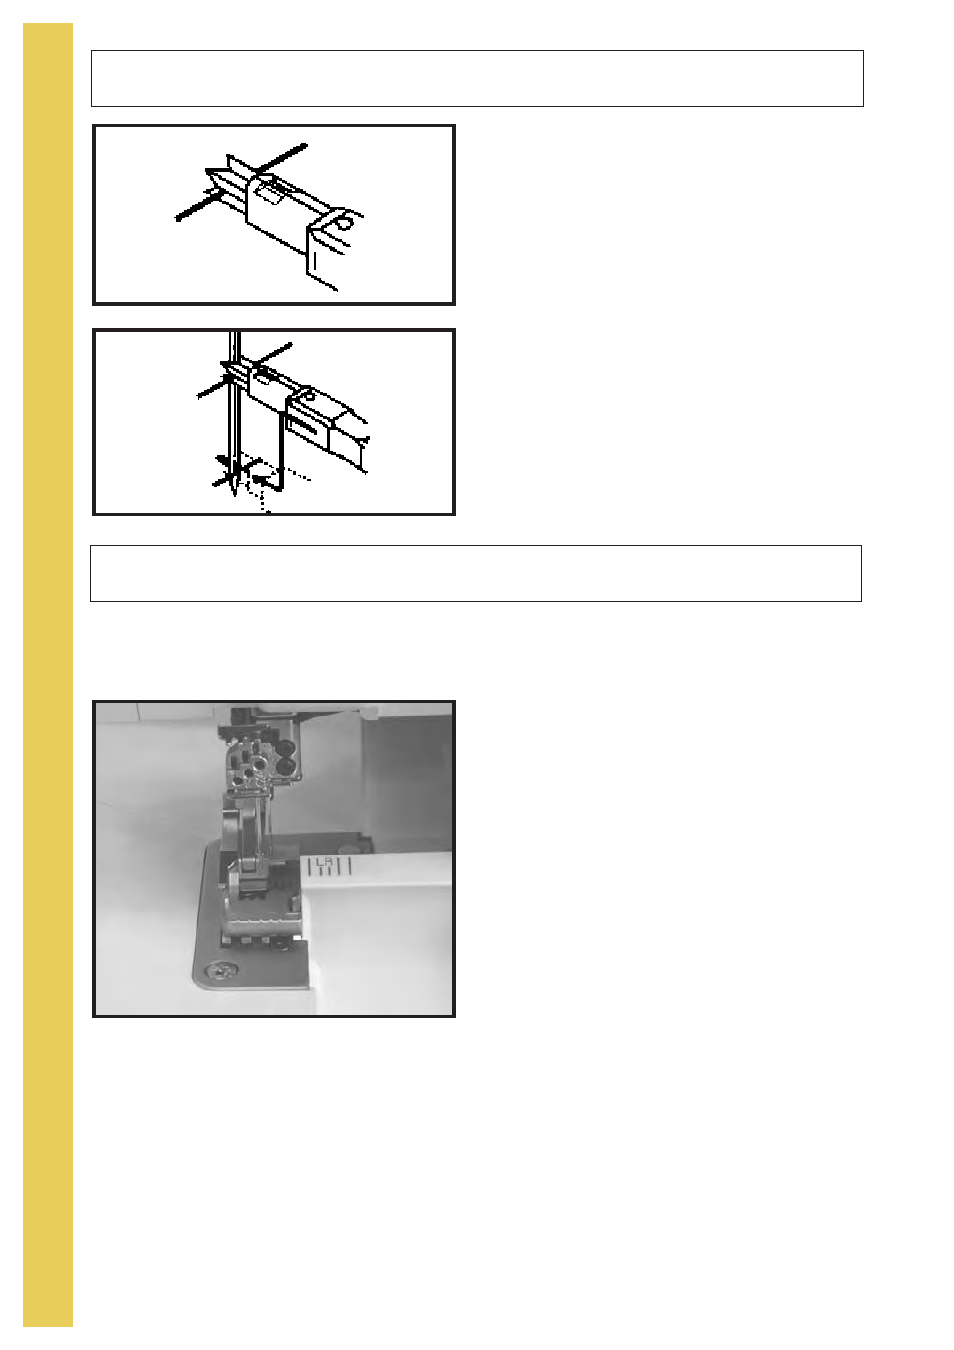
Use the marks on your serger's front cover to align the fabric the desired seam width.
Set the width dial at the "M" setting for accurate seam allowances.
T
H
R
E
A
D
I
N
G
24
How To Use The Needle Threader
A
B
1. Hold the needle threader with the arrow mark on
top. Place the thread in the groove of the needle
threader. (fig.A)
2. Push the needle threader against needle and
slide down the groove of the needle to the eye.
Push the thread into the eye of the needle.
3. With a point of the needle threader or the tweez-
ers pull the loop of thread from the back of the
needle, under the foot and to the back left.
Front Cover Seam Guide
1. The chain stitch (C-3) combined with the 3 thread
overlock is the most common 5-thread combination.
The mark closest to the needles indicates 5/8 inch
(16mm) from the cutting edge to the C-3 chain nee-
dle.
2. When using the left overlock needles (O-1) for either
a 3 or 4 thread overlock seam, the second mark from
the needles indicates 5/8 inch (16mm) from the cut-
ting edge to the O-1 overlock needle.
3. Use the right overlock needle (O-2) for 3 thread over-
lock seam and the third mark from the needles indi-
cates 5/8 inch (16mm) from the cutting edge to the
O-2 overlock needle.
4. Other marks on the front cover are for any custom
seam allowance.
Note: Be sure to set the width dial at the "M" setting for accurate seam allowances.