9 partitioning the old disk, 10 old and new disk partition layouts – Acronis True Image 9.1 Enterprise Server - User Guide User Manual
Page 99
Copyright © Acronis, Inc., 2000-2007 99
unallocated. Further, you will be able to use the unallocated space to create new partitions
or to enlarge the existing partitions with special tools, such as Acronis Disk Director Suite.
As a rule, "as is" transfers are inexpedient, as they leave much unallocated space on the new
disk. Using the "as is" method, Acronis True Image Workstation transfers unsupported and
damaged file systems.
If you transfer data proportionally, each partition will be enlarged, according to the
proportion of the old and new disk capacities.
FAT16 partitions are enlarged less than others, as they have a 4GB size limit.
Depending on the selected combination, you will proceed to either the old disk partitioning
window, or the disk partition layout window (see below).
13.3.9 Partitioning the old disk
If you selected Create a new partition layout earlier in the process, it is now time to
repartition your old disk.
During this step, you will see the current disk partition layout. Initially, the disk has
unallocated space only. This will change when you create new partitions.
Having completed the required steps, you will add a new partition. To create another one,
simply repeat those steps.
If you make a mistake, click Back to redo.
After you create the necessary partitions, uncheck the Create new partition in
unallocated space box and click Next.
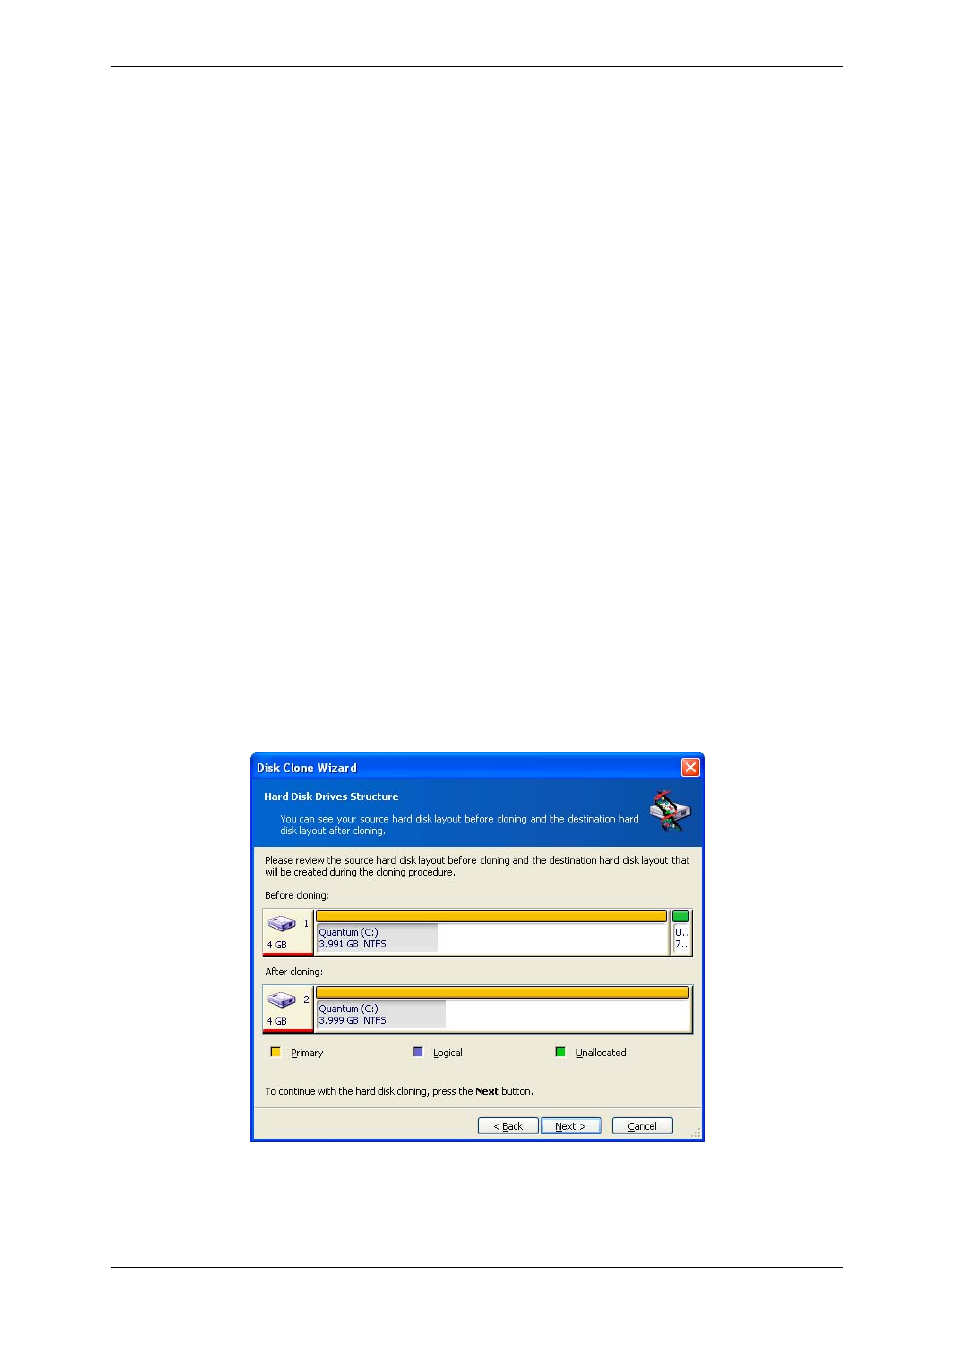
13.3.10 Old and new disk partition layouts
In the next window, you will see rectangles indicating the source hard disk, including its
partitions and unallocated space, as well as the new disk layout.
Along with the hard disk number, you will also see disk capacity, label, partition and file
system information. Different partition types, including primary, logical and unallocated
space are marked with different colors.