User manual – Bolide SVR9000s MO User Manual
Page 20
User Manual
17
auto-reboot function even if system has detected NO DISK FOUND.
Overwrite-When set to ENABLE the DVR will record over the oldest files on the hard drive. This is the
default setting. And probably the most useful, as the DVR will record the events as they happen. However,
it does mean that you’ll get import events off the DVR before they’re overwritten. If [Overwrite] is set to
DISABLE the DVR will stop record once HDD is full. Whilst you won’t lose old footage, you run the risk of
missing new events as they happen. Be sure you want to do this before selecting it.
Period – You can set the Overwrite period accordingly when OVERWRITE set to ENABLE.
HDD Format – Formatting the HDD will erase all the data (i.e. footage) which is stored on it, and re-create
the FAT (file allocation table).
USB Format - if you have a USB flash drive connected to the DVR, you can format that, too. This is also
erase all the data on the drive.
Unlike a VCR which records to a tape, your DVR records footage to the internal hard drive. Therefore, it’s
an important first step when configuring your DVR to make sure that the hard drive (HDD) options are correctly
set.
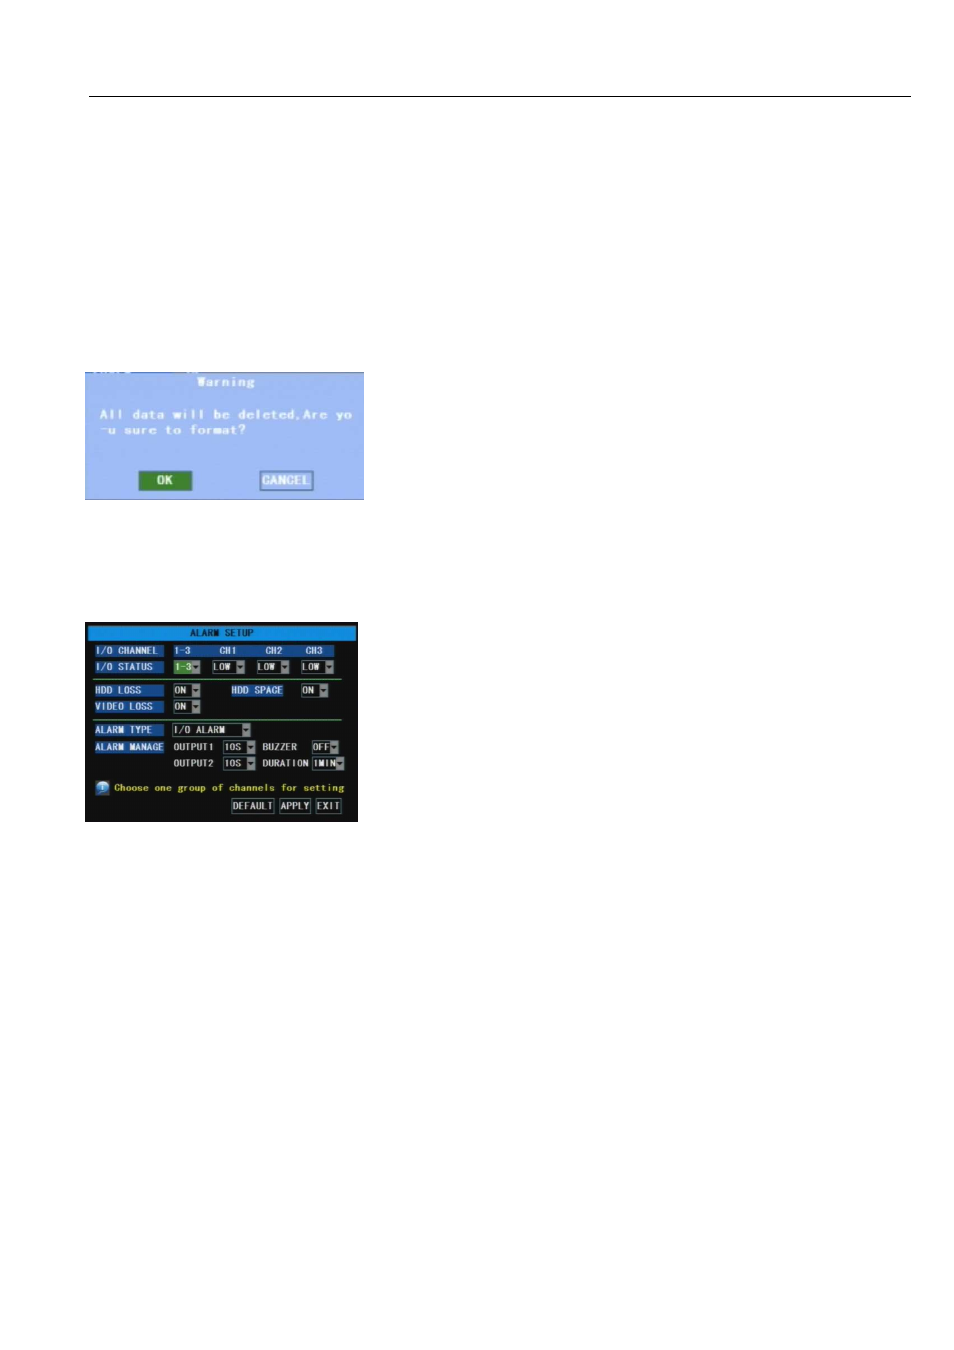
5.3.5.2 Alarm Setup
I/O STATUS:Options include High, Low and off. When set to “Low”, I/O status Alarm will be triggered once
sensor level is high, on the contrary, when set to “High”, sensor level is low; when set to “Off” there are no
alarm triggered.
HDD Loss: When the option is set to ON, buzzer will release the alarm sound and “H” mark will appear on the
screen once HDD loss or HDD not available; when set to OFF, “H” character still appear on the screen but have no
alarm sound heard.
HDD space: When the option is set to ON, the alarm will be triggered and release the alarm sound when HDD
space is not enough; or set to OFF, have no alarm sound heard.
Video Loss: When the option is set to ON, Live image will disappear on the screen and system will release the
alarm sound once video signal lost; when set to OFF, Live image will also disappear on the screen but have no
alarm sound heard.
Alarm Type: allow you select according alarm type
Alarm Manage: allow you set how to deal with alarms, including output 1 (off, 10s, 20s, 40s and 60s), output 2
(off, 10s, 20s, 40s and 60s), buzzer (off, 10s, 20s, 40s and 60s) and Duration (30s, 1min, 2min and 5min).
To format the HDD or USB, click the [HDD/USB Format] button
respectively and click [OK] button shown as left Picture 5-17.
Click [Main Menu
Device Management
Alarm Setup] option
and then enter into the below interface shown as Picture 5-18
Now you can perform the alarm settings for all the alarm modes.
Click pull-down menu beside [I/O status] option and select the I/O
Channel (1-3 or 4-6) as per your actual requirement.
Picture5-17
Picture5-18