Setup (cont’d.) – BUG-O Systems AGS-4000 User Manual
Page 15
15
4) REMOTE CONTACTOR WIRING
Connect to the Right Side of ARC GOUGING Control Box 120VAC outlet, see page 16.
Pins A and B ……………. Connection for Arc Gouger
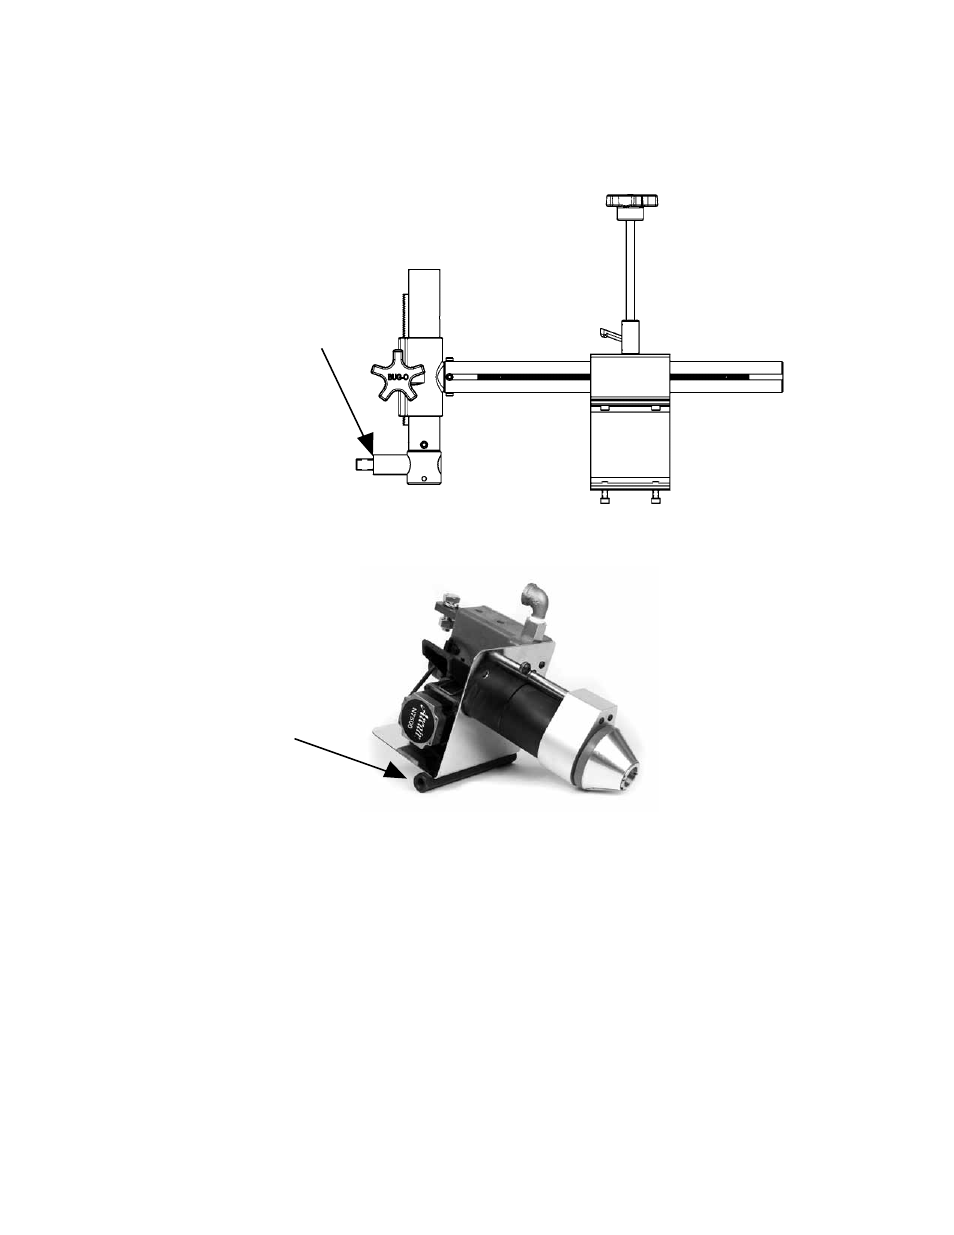
5) ARC GOUGING HEAD SET-UP
Install AGS-4172 Arcair® N7500 Mounting Group
to the front of the BUG-O Carriage.
AGS-4172 Arcair® N7500 Mounting Group
The “TORCH HEAD” of the N7500 Automatic Gouging System is mounted to BUG-5173 of
AGS-4172 Arcair® N7500 Mounting Group.
The attachment is
made at this location, from
either side of the head.
Arcair® “TORCH HEAD”
SETUP (CONT’D.)
BUG-5173
6) POSITION “TORCH HEAD”
a. Position the Torch Head above the work piece.
b. Using the Angle Gauge supplied with the N7500, adjust the Torch head to the work piece.
The angle gauge sets the torch angle and electrode stick-out and aligns the nozzle.
c. The air should flow between the electrode and the work piece.
Charts, graphs and other data in this manual are based on a 45° electrode angle, but you can
use electrode angles from 45° to 60°. Users should develop their own standards based on shop
conditions and application.