Firmware update change installer pin – Cloud Electronics 46-120 - CDI-46 User Manual
Page 18
CDI-46 Installation and Setup Guide V1.0
18
Firmware update
Download the CDI-46 firmware update fr
.
1. Read the update notes to check that the update is applicable to your unit.
2. Establish the Ethernet connection between the CDI-46 and your network switch. Launch your usual web browser and
connect to the CDI-46 in the usual way.
3. Log in using the Installer PIN.
4. Click
Menu > Config > Device Info.
5. Click
Upload.
6. Enter the Installer PIN again.
7. The CDI-46 will now enter
bootloader mode.
8. Close the browser page.
9. Run the Firmware Update application on a Windows® PC connected to the same network.
10. Click
Discover.
11. Click the IP Address listed in
BOLD font.
12. Check and confirm which settings you would like to overwrite on the
Update interface.
13. Click
Update.
14. Wait for the “
Firmware updated successfully” message.
15. Click
OK, then close the Firmware Update application
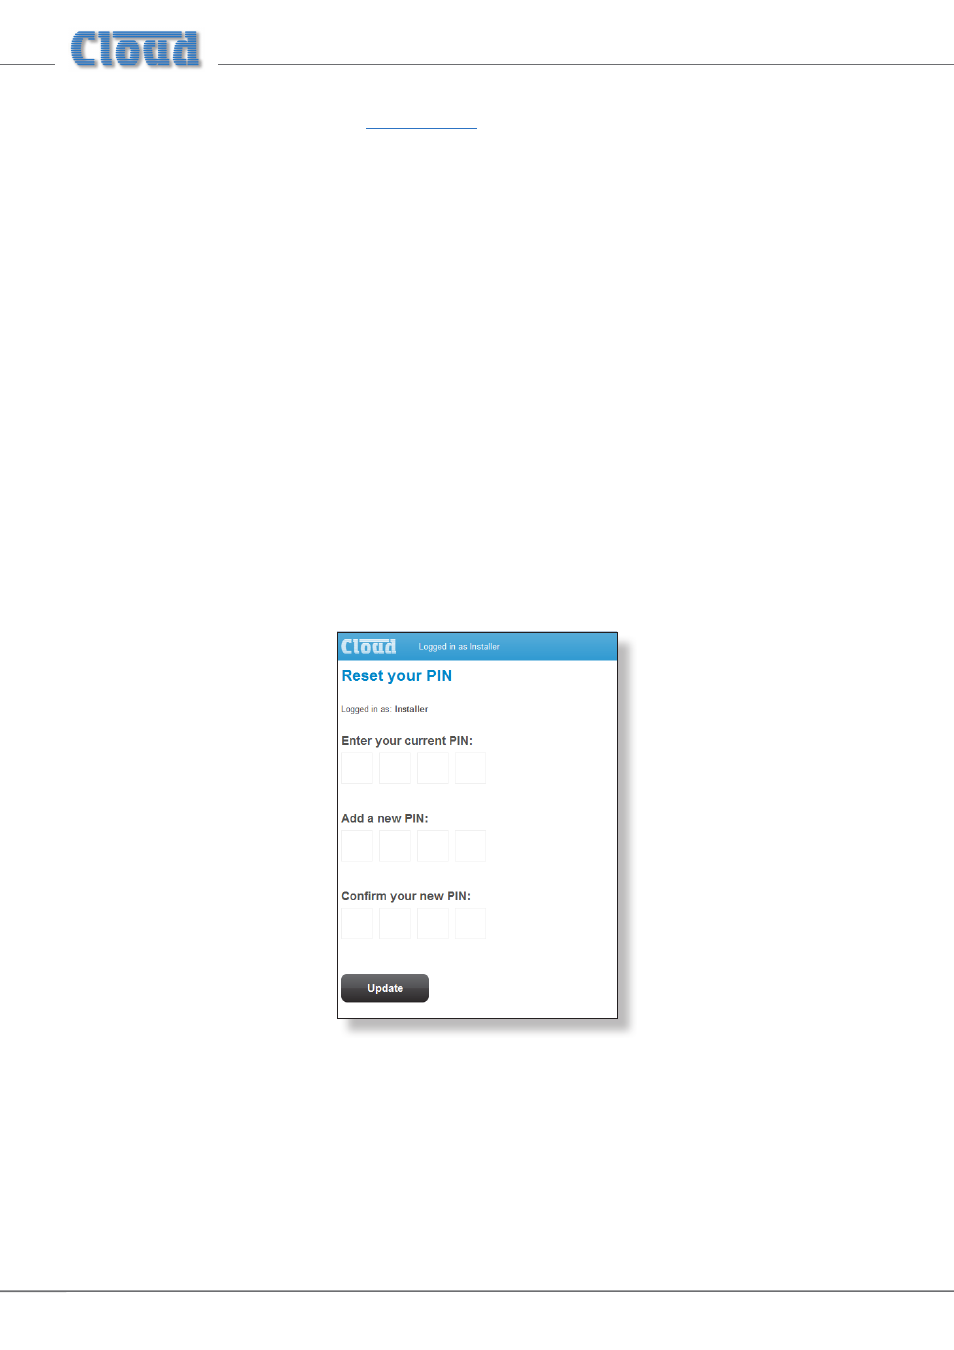
Change Installer PIN
Click the
Change PIN tab to open the Reset your PIN page.
This page lets you change the Installer PIN. You will need to confirm the current PIN in the
Enter your current PIN
field before proceeding to enter a new one in both the
Add a new PIN and the Confirm your new PIN fields, and Click
the
Update button.