MacroSystem Caladan User Manual
Page 17
16
17
in the middle). To do so, click on “New Box”,
place the cross in the top left corner of the DVD
spine and roll the trackball until the cross is
positioned in the bottom right corner. Confirm
this position.
If you move over the coordinate display, it will
automatically move out of the way to the top
edge of the screen.
You have now drawn three boxes, so now you
can edit all the components of the DVD cover.
Begin with the front of the cover. Use the
trackball to move the cross onto the right-hand
box and click briefly on the trackball button to
change the cross into a hand. Afterwards, click
on the Paint Can symbol. In the subsequently
appearing toolbar, select the “Scene Image”
function for the “Content” menu item.
Afterwards, click on the “Select” button to open
the scene bin of the currently selected project.
Open the scene that you feel best portrays the
video footage that is stored on the DVD and
then confirm your selection with “Ok”. After
a moment, the image of your scene appears
within the activated box.
(Before you start working with Caladan, you can
of course also edit scenes using other programs
in order to apply effects to them and thus create
an ideal picture for your DVD cover design.)
Note: Since the box is of a different format
to that of the scene, you might see the scene
displayed differently, e.g. the borders are cut
off. If you do not like the way it is displayed, go
back to the main Caladan menu and select the
“Settings” menu item. You will see the “Keep
Image Aspect Ratio” function, which is activated
by default. To deactivate it, click on the little tick
mark next to it so that a dash appears. Then
close the window by clicking on “Ok” and open
the “Content” menu again. Click the “Select”
function again to reactivate the scene image
that you selected. The image is replaced after a
moment – this time, it is displayed fully, though
it will appear a little distorted.
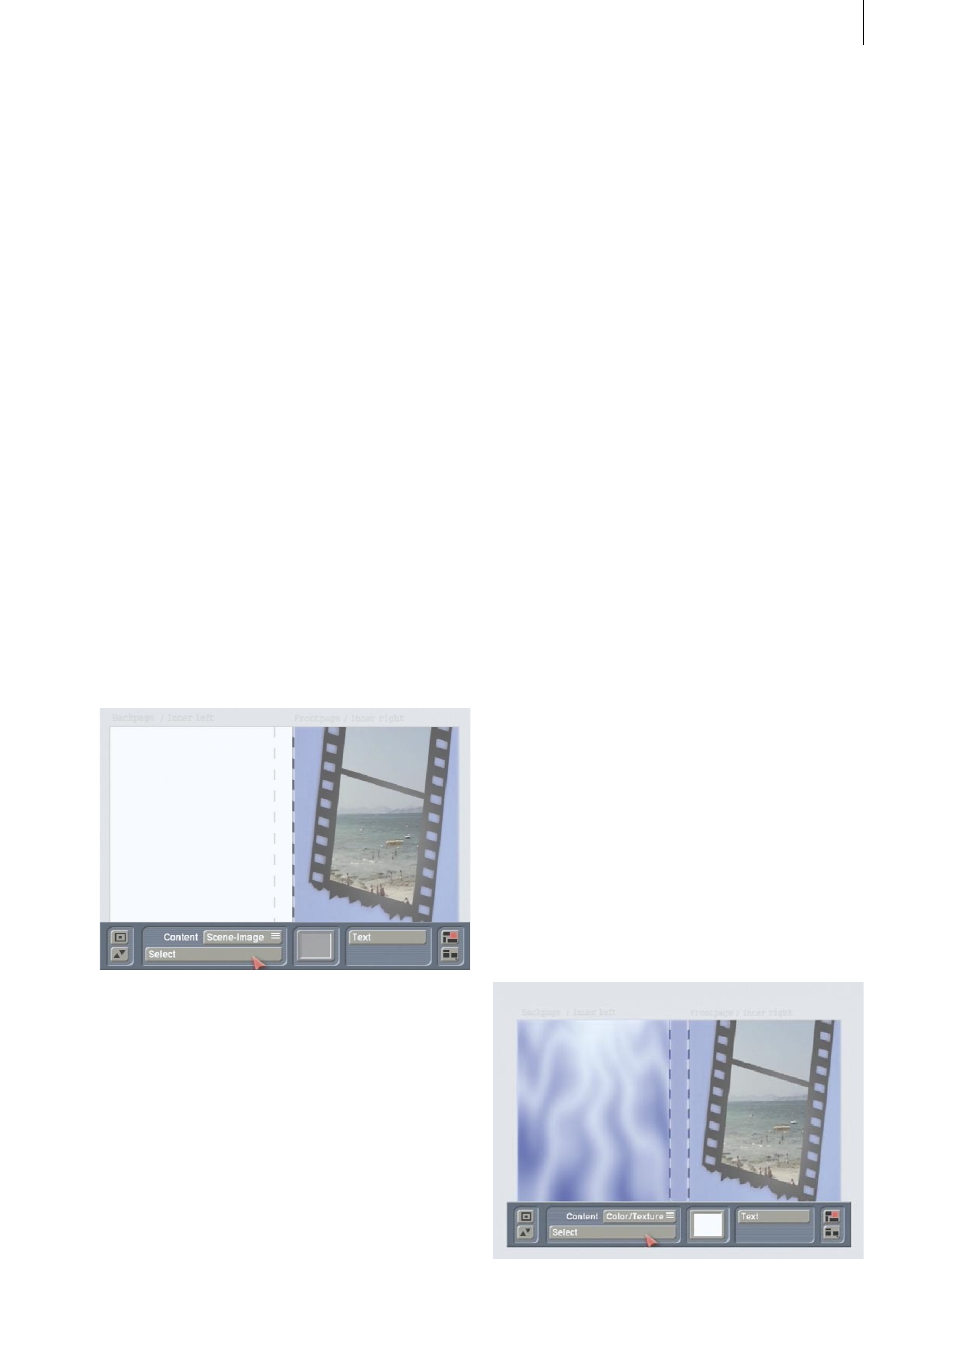
Afterwards, click on the left box to begin
designing the back of the DVD cover. Once the
box is activated, select the “Color/Texture”
option for the “Content” menu item. Next, click
on “Select” and, in the top right of the palette
window, select the “Color/Texture” button. The
image pool now opens and you can choose a
pattern in the usual way.
Use a pattern whose color complements the
design of the front of the cover.
In our example, we have decided to use the
“Waterfall” mask provided by the “Liquid
Images” program and we have colored it blue.
Confirm your selection with “Ok” and close the
palette window by clicking on “Ok” again. You
will see that the back of the cover is now filled in
with the mask that you selected.
Now you can move on to the content of the
DVD spine. To do so, activate the middle box,
select “Color/Texture” for the “Content” menu
item, click on the “Select” button and select the
“Change Color” button in the left area of the
palette window. In the subsequently appearing
color box, select a neutral color, e.g. blue. Once
you close the palette window by clicking on
“Ok” again, the DVD spine will appear filled in.