MacroSystem Caladan User Manual
Page 19
18
19
5.3 Designing a DVD/CD label with the
help of a mask
In this example exercise, you will design a
label for a DVD that you have burned. In this
example, you will be positioning a drawn box
so that it extends into the label’s cut-off area
– the purpose of this is to compensate for any
inaccuracies occurring during printing (e.g. if
the printer does not draw in the paper evenly).
In this example exercise we will be using the
“SplitX Image Collection” program. If you
do not have the “SplitX Image Collection”
program, you can also use the BDFA logo that
is located in the image pool in order to work
through this example.
Start the Caladan program and, in the program’s
main menu, select “DVD/CD Label” as the
“Label Type”. Afterwards, make sure that
the “Snap to Grid” and “Snap to boxes and
auxiliary lines” functions are deactivated. Now
click on the “Boxes” button so that you see the
round label in the background.
First of all, click on the “New Box” button and
draw a box that fits generously around the label.
You will notice at the top and bottom edges of
the screen that the box matches up precisely
with the auxiliary lines. To make the box also
match up with these borders in the cut-off
area, activate the box by clicking on it (a cross
appears) and move it a fair amount past the
bottom auxiliary line. After you confirm the
position, place the pointer at the top edge of the
box so that an arrow appears. Now click on the
left trackball button, move the top edge of the
box upwards using the trackball and confirm
the position. You will notice that the edge of the
box again matches up with the upper auxiliary
line. You can now click within the box again and
move the box up since it is now large enough to
extend past all of the auxiliary lines.
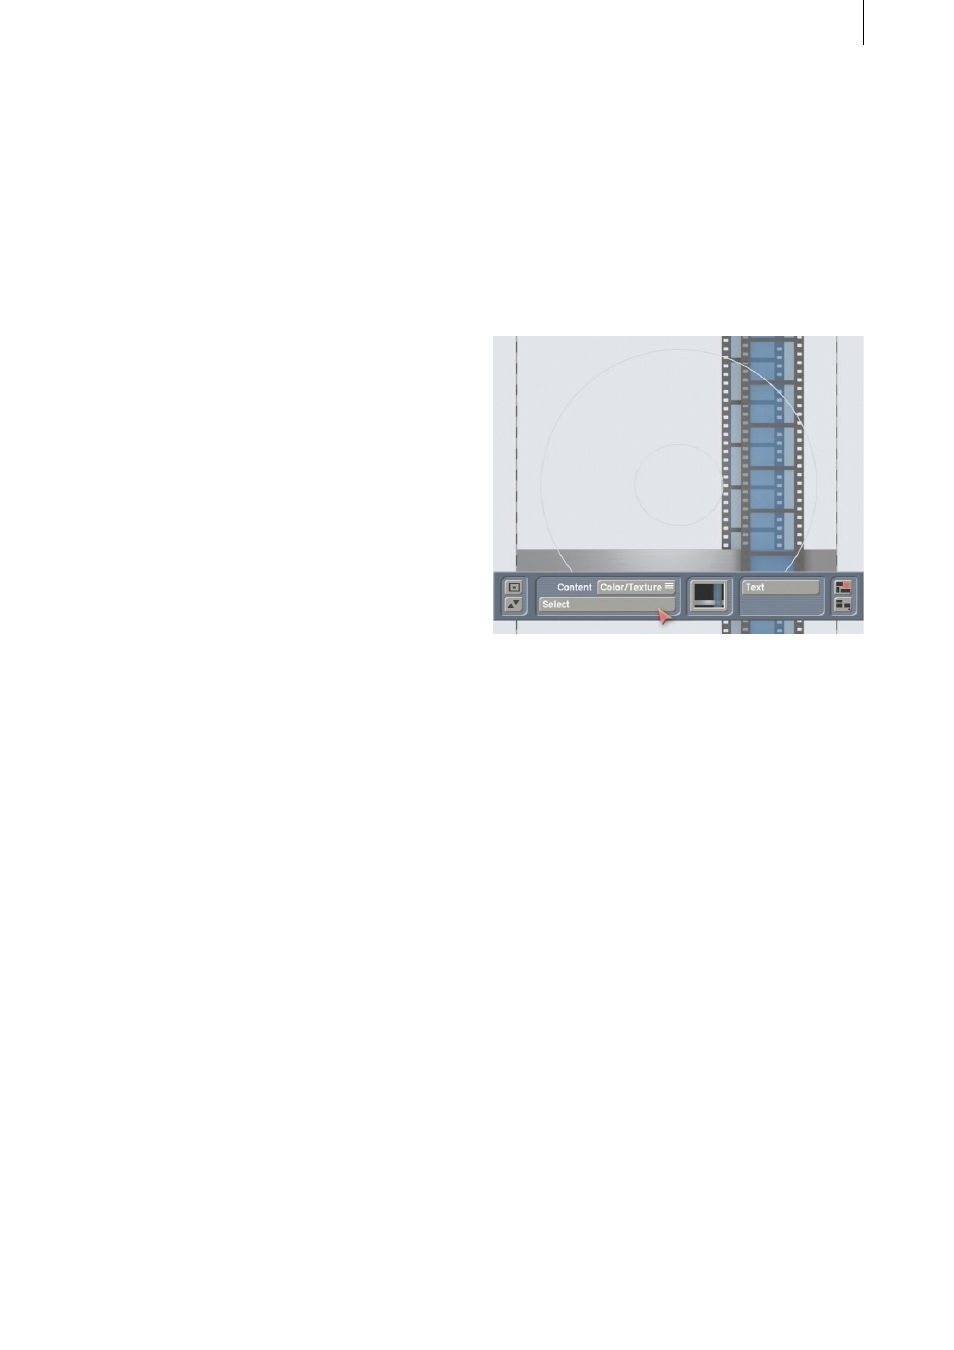
Next, click on the Paint Can symbol to open the
“Content” menu. Set the top selection button
to “Color/Texture” and use the “Select” button
to open the “Palette” window. In the top right,
select the “Color/Texture” button to open the
image pool. In the “Product” section, select the
“SplitX” program and choose the “Film 01”
mask. (If you do not have the “SplitX Image
Collection” program, you can alternatively
select the following: for “Product” select the
“Casablanca” option and for “Type” select the
“Images” setting. You can then select the BDFA
logo.)
Close the image pool and the palette window
again and open the “Boxes” menu again. Click
on the “Copy Box” button to create a copy of the
box you just drew – the copy appears slightly
offset. Position the new box so that it also
extends past the auxiliary lines into the cut-off
area.
Thereafter, open the “Content” menu again and
set the upper selection button to “Scene Image”.
Use the “Select” button to open the scene bin of
your currently active project and choose a scene
that suits your video footage that is stored on
the DVD.
Since you will now only see the box containing
the scene that you just inserted, open the
“Boxes” menu again and click on the “to back”
button.