English – Sim2 C3X1080 User Manual
Page 16
C3X 1080
ENGLISH
15
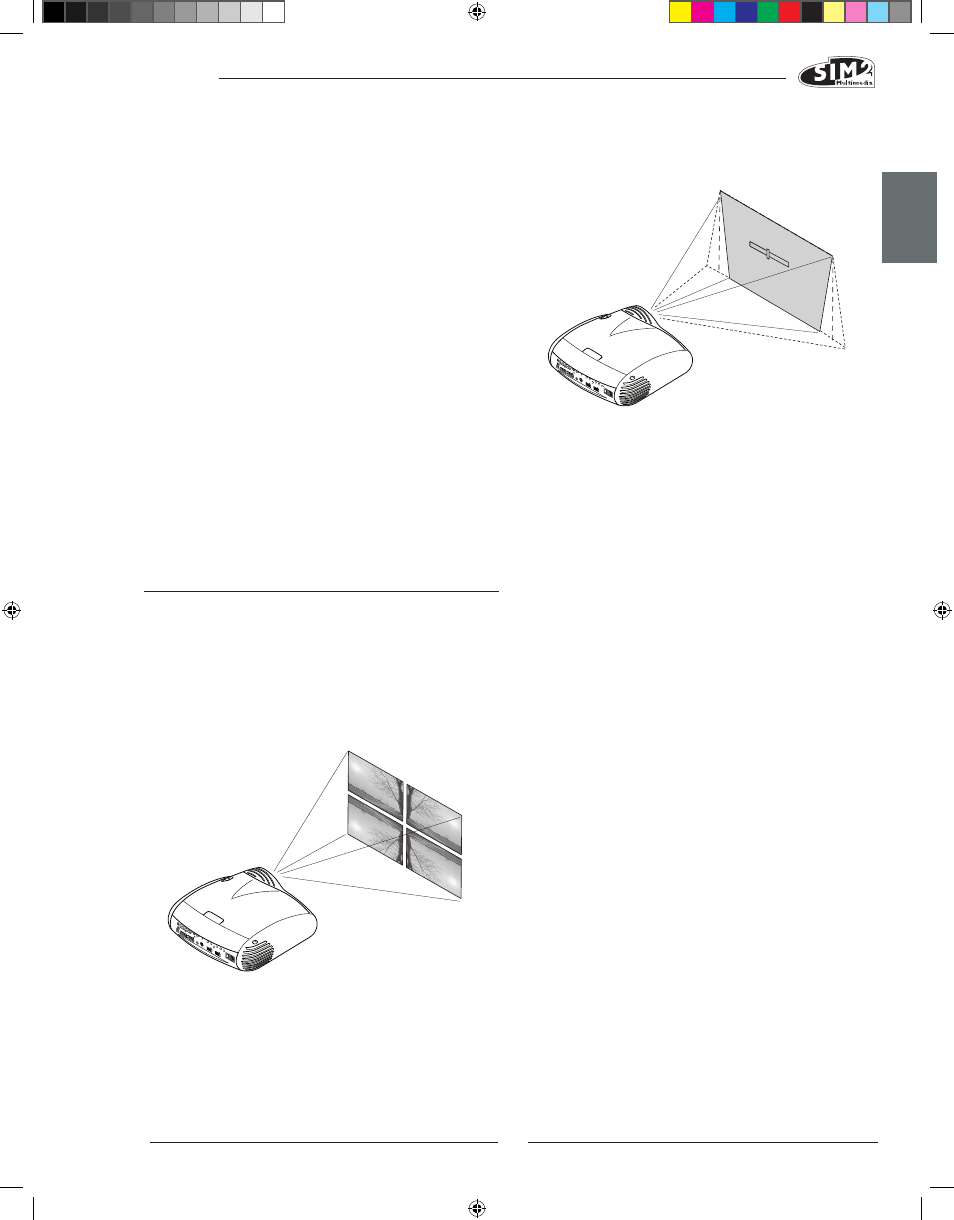
with the base of the projection screen (Fig.26).
If this adjustment is insufficient to centre the image, tilt the
projector and use the vertical/horizontal keystone adjust-
ment to compensate for the resulting distortion.
POwER ON
If selected (AUTO), this option permits the system to be
switched on whenever the projector is connected to the
mains power supply, provided that the mains switch next
to the fuse holder is turned on.
In STANDBY mode the projector remains in STANDBY mode
and awaits the power-up command from the remote
control or keypad.
VARIABLE IRIS
The C3X1080 features a variable iris which allows users to
choose between High Contrast or Optimum Picture modes.
The Iris control is accessed via the OSD. Press Menu +/-
on the remote control repeatedly, until the ‘Setup’ page
is displayed.
Open: Use this setting to get optimum performance from
the projector. This will give the ideal balance between
Contrast, Brightness & Colour. SIM2 recommends this set-
ting for Home Theatre applications.
Closed: Use this setting to achieve a higher contrast. By
closing the Iris, Brightness and Colour performance will
be reduced.
LAMP POwER
If your projection room is especially dark, the images
projected by the
C3X1080 system may appear to be excessively bright.
Use the LAMP POWER function to reduce the power used
to operate the lamp while achieving maximum image
quality. In this way, the brightness of the image will be
adapted to your projection conditions and a longer life
lamp will be guaranteed.
TEST PATTERNS
Displays a series of five test patterns, which are useful
when installing the system and checking basic functions.
Use the ◀ and ▶ keys to browse through the test patterns
(Fig. 27).
because the system checks the input signal and automati-
cally sets the most suitable values. If however the image
is disturbed (loss of resolution between equidistant vertical
bands or instability and lack of detail in thin vertical lines) it
may help to ask the system to rerun the input signal analysis
and set the best parameters by requesting the automatic
adjustment function with button A on the remote control
or AUTO on the keypad.
OVERSCAN
Eliminates irregularities around the outer borders of the
image.
Some less accurate sources may produce an image with
uneven borders; thanks to the overscan function these
imperfections can be moved outside the displayed area.
Setting the parameter to 2.2, typically yields pleasant,
well-contrasted images. For most common video sources,
the overscanning setting may be from 0 (no overscan) to
32 (highest setting). The resulting image always maintains
the selected aspect irrespective of the selected overscan
setting.
Y/C DELAY
Where Video and S-Video signals are concerned, it may
be necessary to correct horizontal colour misalignment
within the projected image. For a given video standard
(e.g. PAL or NTSC) the stored value does not normally re-
quire further fine-tuning, unless the source or connection
cable is changed.
SETUP
The setup menu contains less frequently used adjust-
ments that may be required during installation (e.g. On
Screen Display language selection or the display of Test
Patterns).
ORIENTATION
Reverses the image vertically and horizontally to best fit
the installation: i.e. desktop front, ceiling front, desktop rear
and ceiling rear (Fig.25).
VERTICAL KEYSTONE
To achieve the maximum image quality, we recommend
installing the projector on a surface which is perpendicular
to the screen. If the projected image is not level, adjust
the feet on the bottom of the projector to bring it into a
level position, lining up the base of the projected image
KEYS
TON
E
20%
Fig.25
Fig.26