English, Switching the projector on and off, Switching on from standby – Sim2 C3X1080 User Manual
Page 8
C3X 1080
ENGLISH
7
6
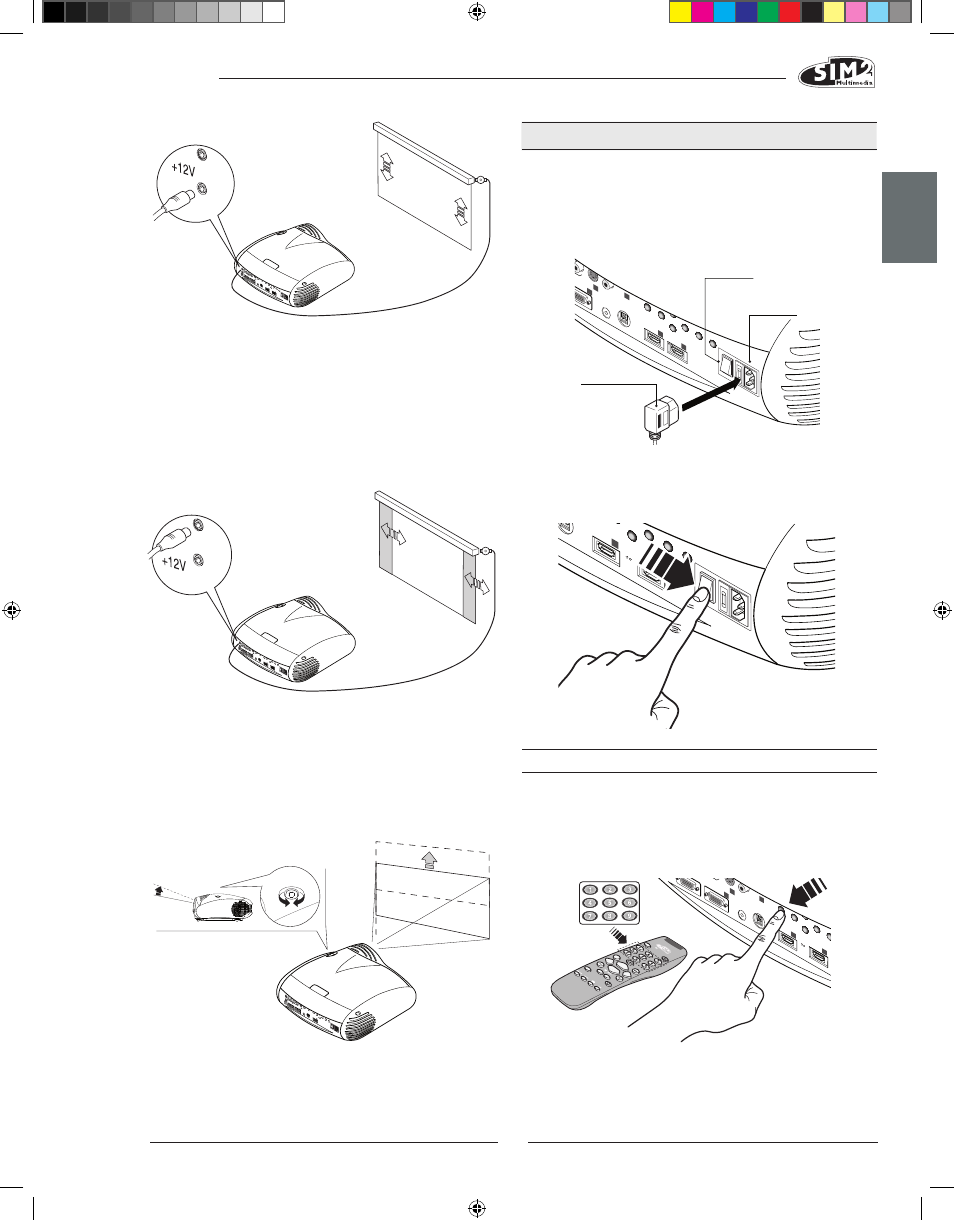
SwITChINg ThE PROJECTOR ON AND Off
wARNINg: Connect the projector to a power supply with
a rated voltage within the following values: 110-240 V
AC, 50/60 hz. It must be earthed (fig. 12).
GRAPHICS RGB
HV
S-VIDEO
AUDIO OUT
HDMI 1
REMOTE
2
S-VIDEO
MENU
ESC
INPUT
1
5
4
0
I
HDMI 1
5
Power Switch:
Position I: On
Position 0: Off
Fused
Power Socket
Power Plug
In position I the projector will initialise itself (red and green LEDs
on) and then go into standby mode (red LED on) (Fig. 13).
HDM
I 1
MENU
ESC
INPUT
5
HDM
I 2
6
0
I
SwITChINg ON fROM STANDBY
Press one of the keys on the remote control (Fig. 14):
- 0 to select the last input selected.
- 1-9 to directly select the corresponding input.
- with the keypad: press the ON/Off button.
When the unit is switched on from standby the lamp
switches on; after a brief period of warming up, the im-
Preferably use a unit gain screen; high gain screens are
only effective when used with a small group of viewers
close to the screen’s centre. Prevent any lighting in the
room from shining directly onto the screen during projec-
tion as this will reduce the contrast of the projected image.
The screen should not be placed close to furniture and
other objects with reflecting surfaces, or to light-coloured
walls.
The manual lens shift adjustment allows the projected
image to be moved upwards vertically, in relation to the
centre of the screen; the maximum adjustment being
equal to half the height of the image. (Fig. 11b).
Image shift range: + 50% image.
Fig. 11a
Fig. 11b
Fig. 13
Fig. 12
Fig. 14
Fig. 10
232)
GRAP
HICS RGB
HV
S-VID
EO
AUDIO OUT
HDM
I 1
REMO
TE
2
S-VID
EO
MEN
U
ESC
1
5
4
HDM
I 2
6