3 external device connections (optional) – ARM Electronics RT8-16CD User Manual
Page 17
BASIC OPERATION
-12-
3.3 External Device Connections (Optional)
3.3.1 Independent Disk Array
For the connected IDA to be correctly detected by your DVR, please don’t install HDD in the “HDD3” position. For
connection details, please refer to "APPENDIX 1 INSTALL HDD" at page 85.
1) Install HDDs: Install HDDs in the IDA. Please set the HDD to “Master” mode (do not use “Slave” mode). After all HDDs
are installed, please lock the HDD tray by using the HDD key supplied in the IDA package.
2) Connect all IDA with SCSI cables (hub IDA only):
Connect from one of the three “DEVICE PORT” at one IDA rear panel to the host port of another disk array.
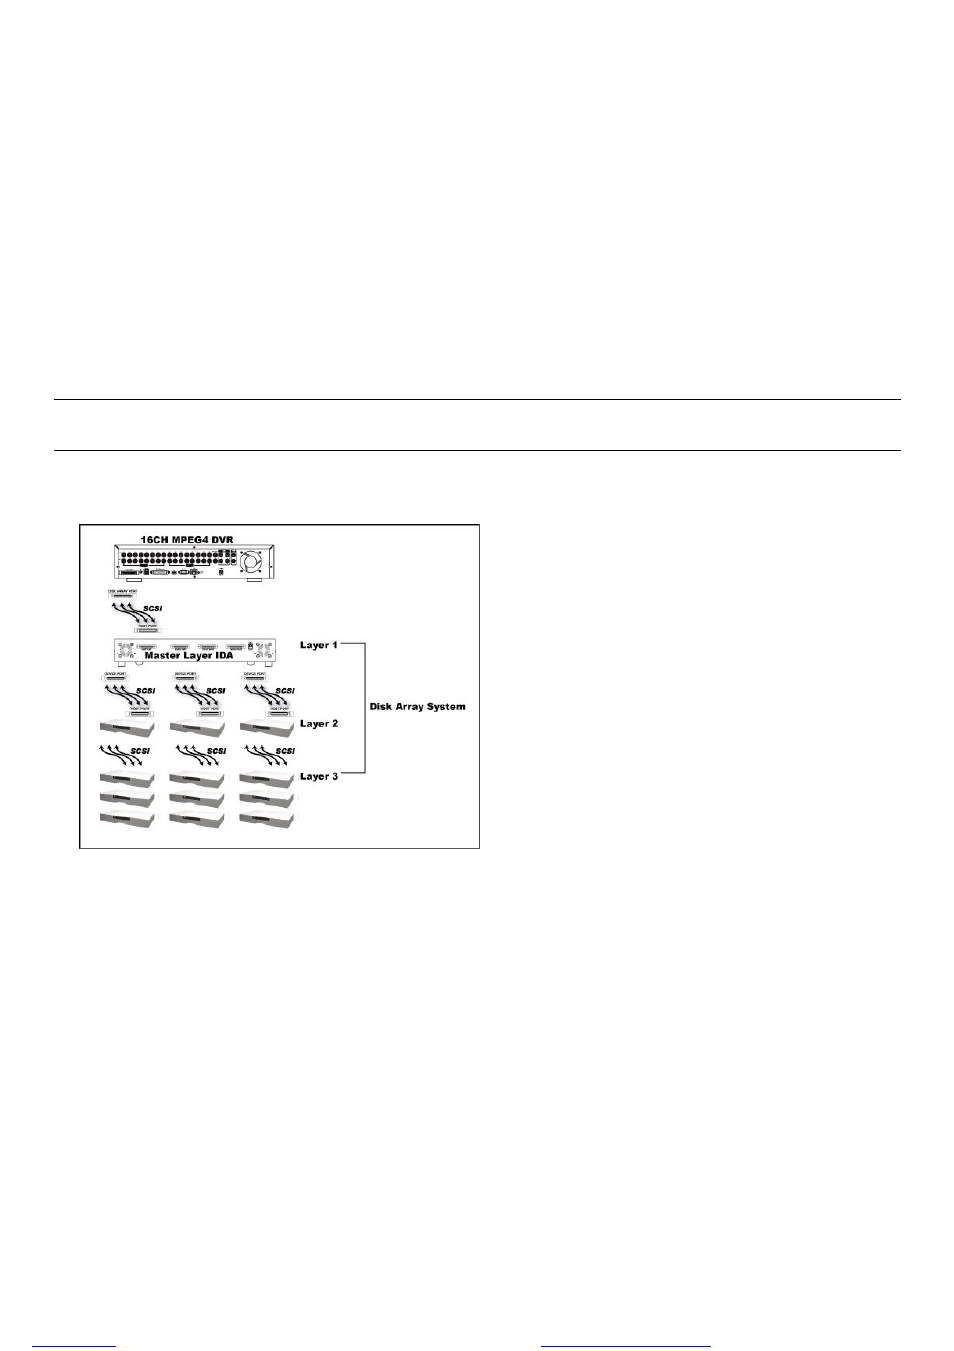
One IDA (as the master layer) can connect up to 3 IDA as the second layer, and each IDA in the second layer can
respectively connect up to 3 IDA as the third layer. Please refer to the illustration below for details.
Note: In order to accurately detect all the connected disk arrays, please make sure to turn on the power of
all the disk arrays after the connection is completed. The maximum layer number is 3, totally 13 IDA.
3) Connect the master IDA to your DVR with a SCSI Cable (IDE interface): Connect the host port of the master IDA to the
“DISK ARRAY” port of your DVR. Please refer to the illustration below for details.
files without this message by purchasing novaPDF printer (