ARM Electronics RT8-16CD User Manual
Page 75
LICENSED SOFTWARE AP
-70-
(2) Detection
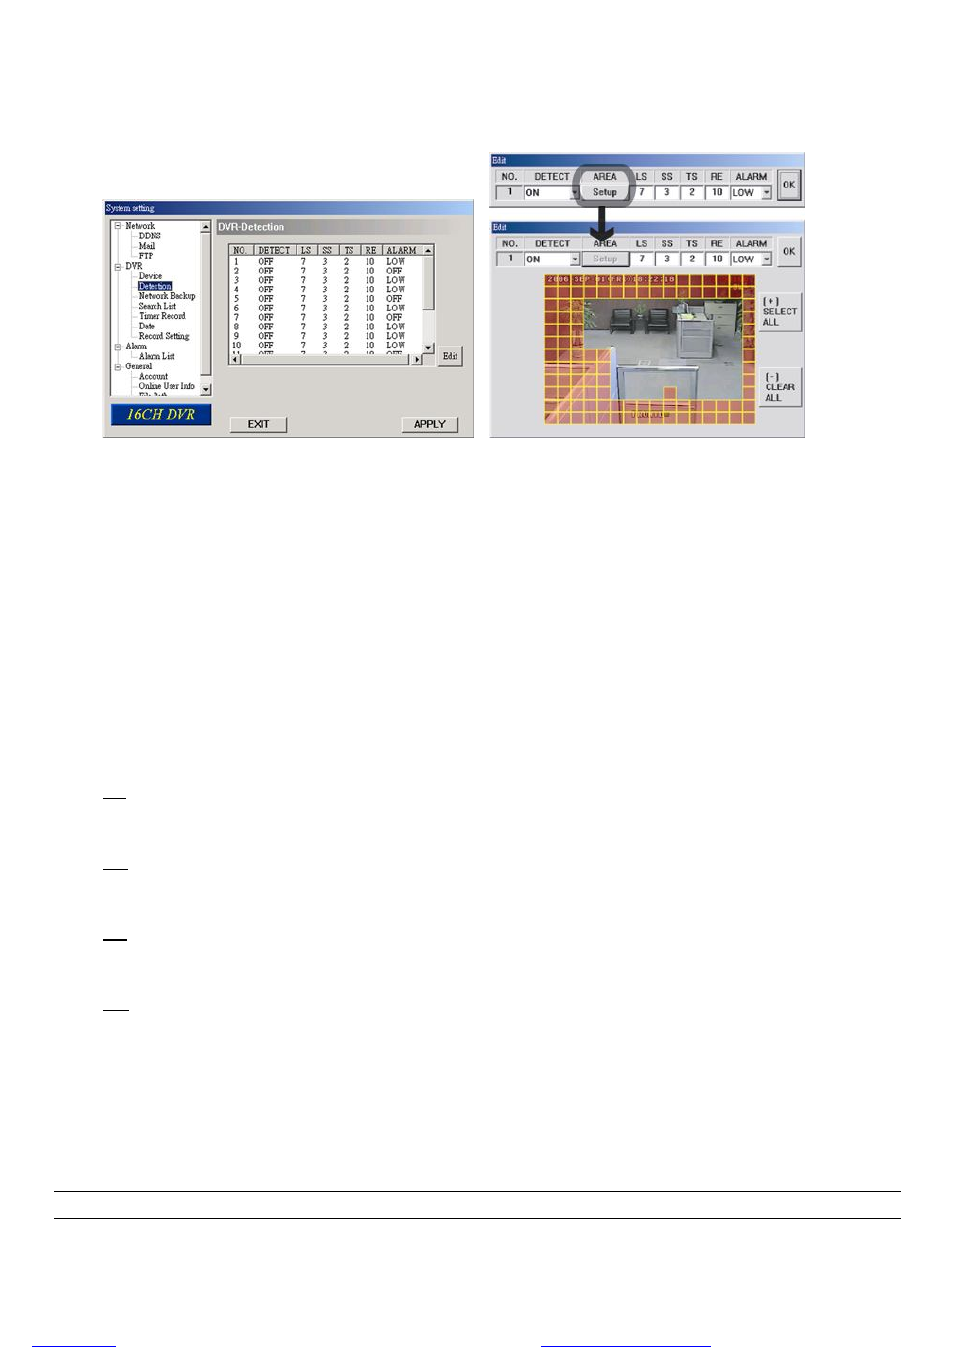
Select the desired channel, and press “Edit” button to enter the motion detection sensitivity and area-setting page.
‧ The submenu items are described below:
a. DETECT (motion detection):
Select motion detection function ON / OFF.
b. AREA (motion detection area):
Set the motion detection area by selecting the area grids with your mouse. Pink blocks represent the area that is
not being detected while the transparent blocks are the area under detection.
Press “
-” to set the whole area under detection.
Press “
+” to set the whole area undetected.
b. Motion Detection Sensitivity:
Set the detection sensitivity in 4 different adjustable factors.
LS:
”LS” is to set the sensitivity of comparing two different images. The smaller the value is, the higher the sensitivity for
motion detection.
SS:
”SS” is to set the sensitivity for detecting the size of one object (the number of the grids) on the screen. The smaller
the value is, the higher the sensitivity for motion detection.
TS:
”TS” is to set the sensitivity regarding how long one object stays in the detection area and triggers the detection.
The smaller the value is, the higher the sensitivity for motion detection.
RE:
”RE” is to set a reference for detection. The default value is 10, which means the DVR will compare 10 continuous
images at one time according to the sensitivity of LS, SS, TS simultaneously. The bigger the value is, the higher the
sensitivity for motion detection.
c. Alarm:
Select LOW / HIGH for the alarm polarity.
d. After setting, press “OK” and then press “APPLY” button to confirm.
Note: This function can also be set up at the DVR side. Please refer to section “6.4.2 Detection” at page 34.
files without this message by purchasing novaPDF printer (