Installing the switch in the rack, Installing, The switch in the rack – H3C Technologies H3C S5820X Series Switches User Manual
Page 45: To the rack, as shown in, Figure 31
35
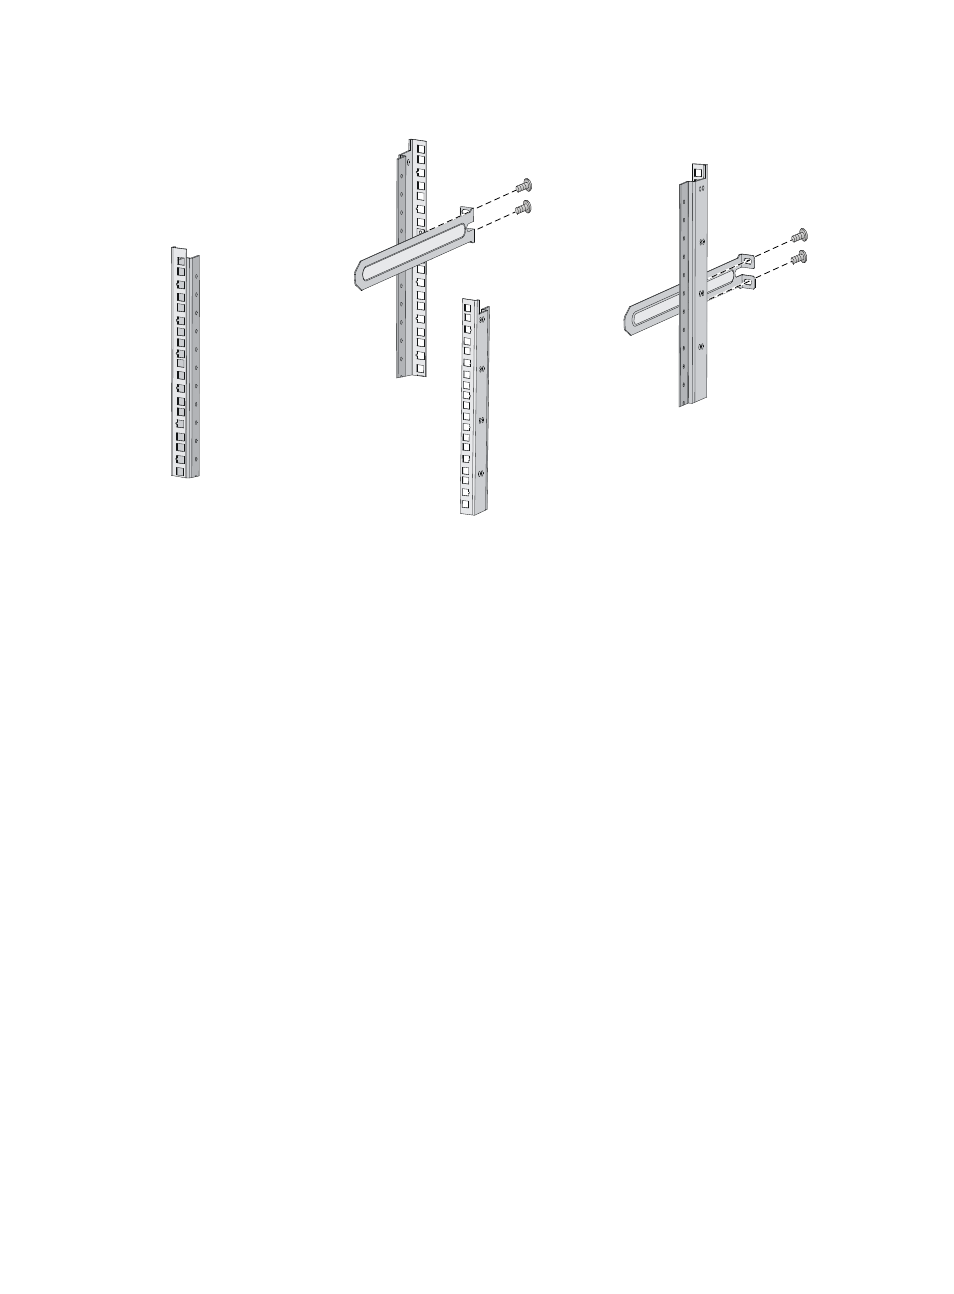
Figure 31 Install the slide rails
Installing the switch in the rack
This installation task requires two persons.
1.
Wear an ESD-preventive wrist strap and make sure it makes good skin contact and is well
grounded.
2.
Check that the mounting brackets and chassis rails have been securely fixed on the two sides of the
switch. See "
Attaching the mounting brackets, chassis rails, and grounding cable to the switch
."
3.
Check that the slide rails have been correctly installed on the rack posts. See "
."
4.
Install cage nuts (user-supplied) to the front rack posts and make sure they are at the same height
with the slide rails.
5.
Supporting the bottom of the switch, align the chassis rails with the slide rails on the rack posts, as
shown in
. Work with another person to move the switch and slide the chassis rails along
the slide rails until the mounting brackets flush with the rack posts.
6.
Use appropriate anti-rust screws (user-supplied) to fix the switch to the rack through mounting
brackets, as shown in
.