Installing/removing a power module, Installing a power module – H3C Technologies H3C S5820X Series Switches User Manual
Page 55
45
Installing/Removing a power module
The S5820X-26S switch comes with both power module slots empty and the power filler modules as
accessories, and all other S5820X switches come with power module slot 1 empty and power module
slot 2 covered by a filler panel. You can install one or two power modules for these switches as needed.
For more information about the power modules available for the switches, see "
."
To avoid damage to the device and bodily injury, always follow the power module installation and
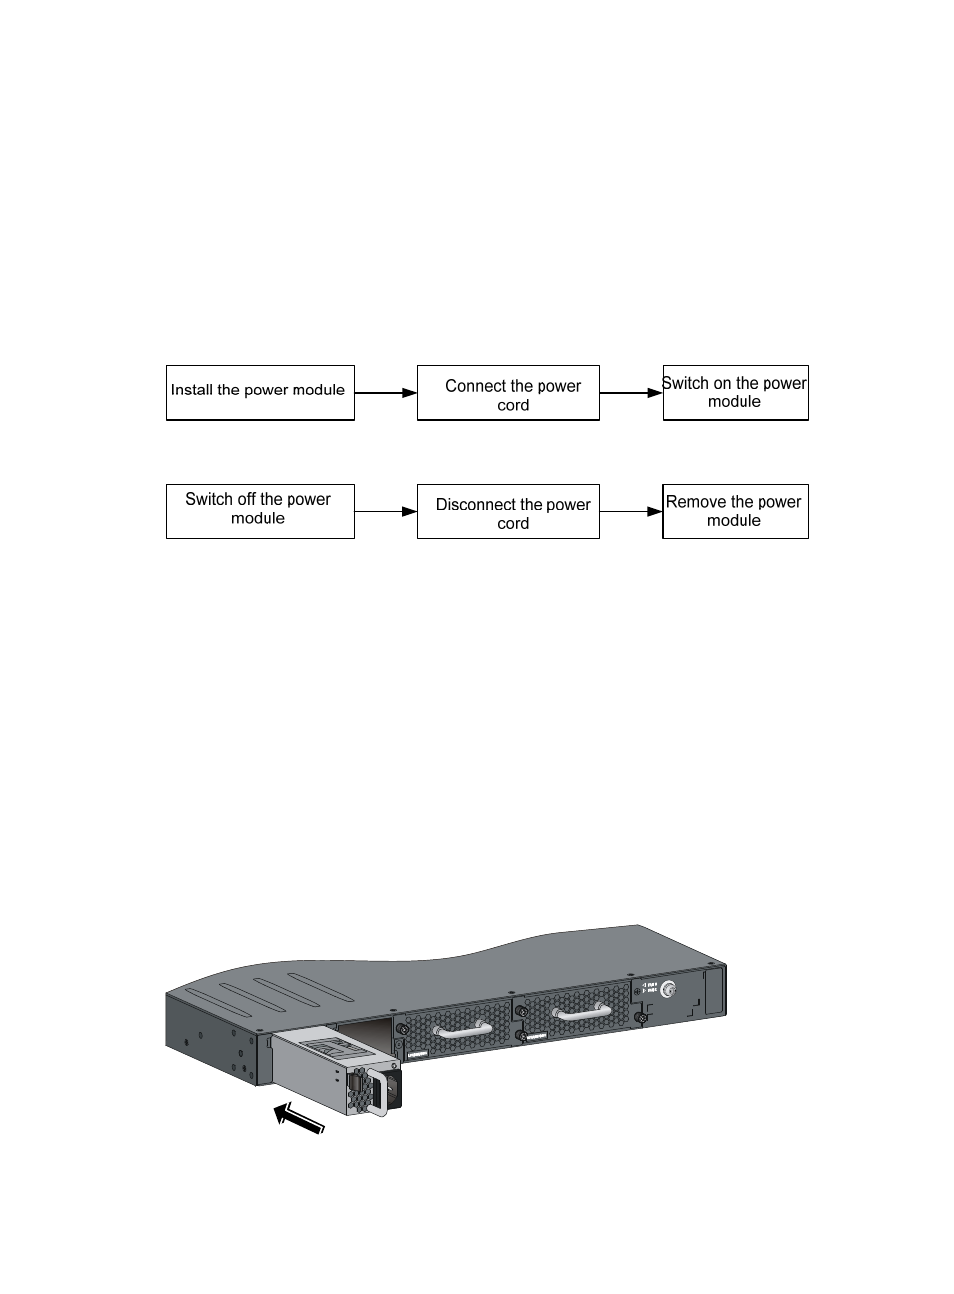
Figure 42 Installation procedure
Figure 43 Removal procedure
Installing/Removing a power module (for the S5820X-26S)
Installing a power module
To install an LSVM1AC650, LSVM1DC650, LSVM1AC300, or LSVM1DC300 power module into the
S5820X-26S switch:
1.
Wear an ESD-preventive wrist strap and make sure it makes good skin contact and is correctly
grounded.
2.
Unpack the power module and check that the power module model is correct.
3.
Correctly orient the power module with the power module slot (see
of the module with one hand and support the module bottom with the other, and slide the module
slowly along the guide rails into the slot. The slot is foolproof. If you cannot insert the power module
into the slot, re-orient the power module rather than use excessive force to push it in.
Figure 44 Install a power module