Grass Valley EDIUS Pro v.7.0 User Manual
Page 37
29
Creating/Exiting Project
EDIUS -
User Guide
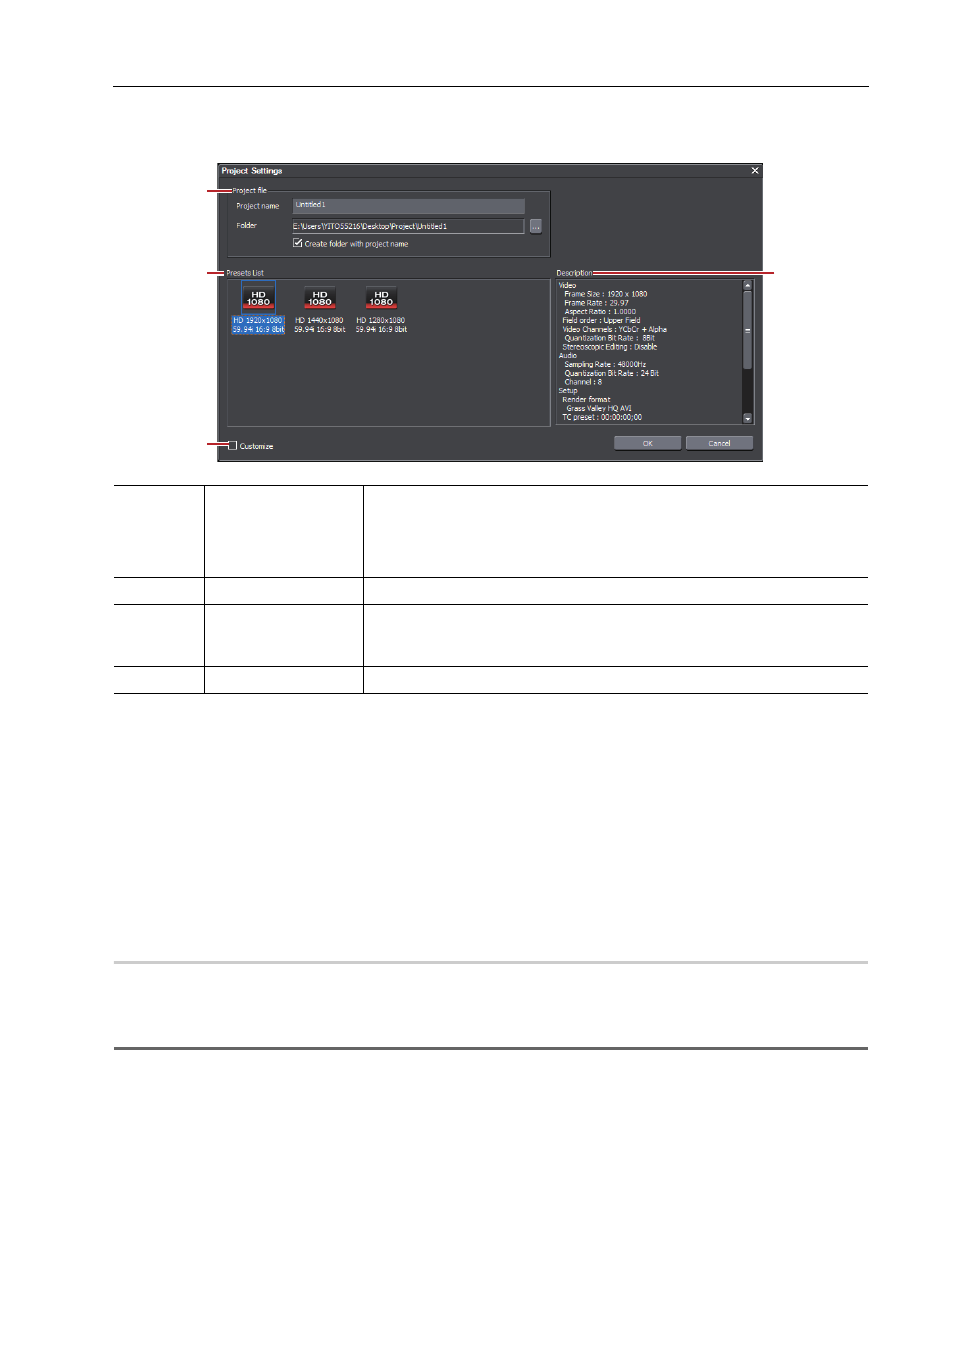
1 Click [New Project] in the [Start Project] dialog box.
The [Project Settings] (Simple Settings) dialog box appears.
3
•
At the first startup, the [Create Project Presets] wizard will start up.
Creating Project Preset at the First Startup
2 Enter a project name in [Project name] of [Project file].
3 Select a project preset in [Presets List].
4 Click [OK].
EDIUS will start up.
3
•
[Recent Project] in the [Start Project] dialog box shows recently used project files. You can simply select the file
that has been edited halfway.
Creating Project with Different Settings from Project Preset
You can create projects with different settings from that set in detail as a project preset (rendering formats, track
numbers, etc.)
1
Note
• This section describes how to customize project preset settings to create a project. This procedure does not change
the original project preset. For how to create new project presets and how to change the project preset settings, see
the Reference Manual.
1 Perform steps 1 to 3 in “Creating Project Using Project Preset”.
Creating Project Using Project Preset
2 Check [Customize], and click [OK].
The [Project Settings] (Detailed Settings) dialog box appears.
(1)
[Project file]
[Project name]
Click the input field to enter a project name.
[Folder]
Set the destination to save projects.
(2)
[Presets List]
Display registered project presets in a list.
(3)
[Customize]
Check this item to change the detailed project preset settings (rendering for-
mat, the number of tracks, etc.) and create a new project file.
Creating Project with Different Settings from Project Preset
(4)
[Description]
Display the settings of the project preset selected in [Presets List].
(1)
(4)
(2)
(3)