Adjusting the volume/pan of clip, Adjusting entire volume/pan, Adjusting volume/pan partly – Grass Valley EDIUS Pro v.7.0 User Manual
Page 81
73
Audio
EDIUS -
User Guide
3
•
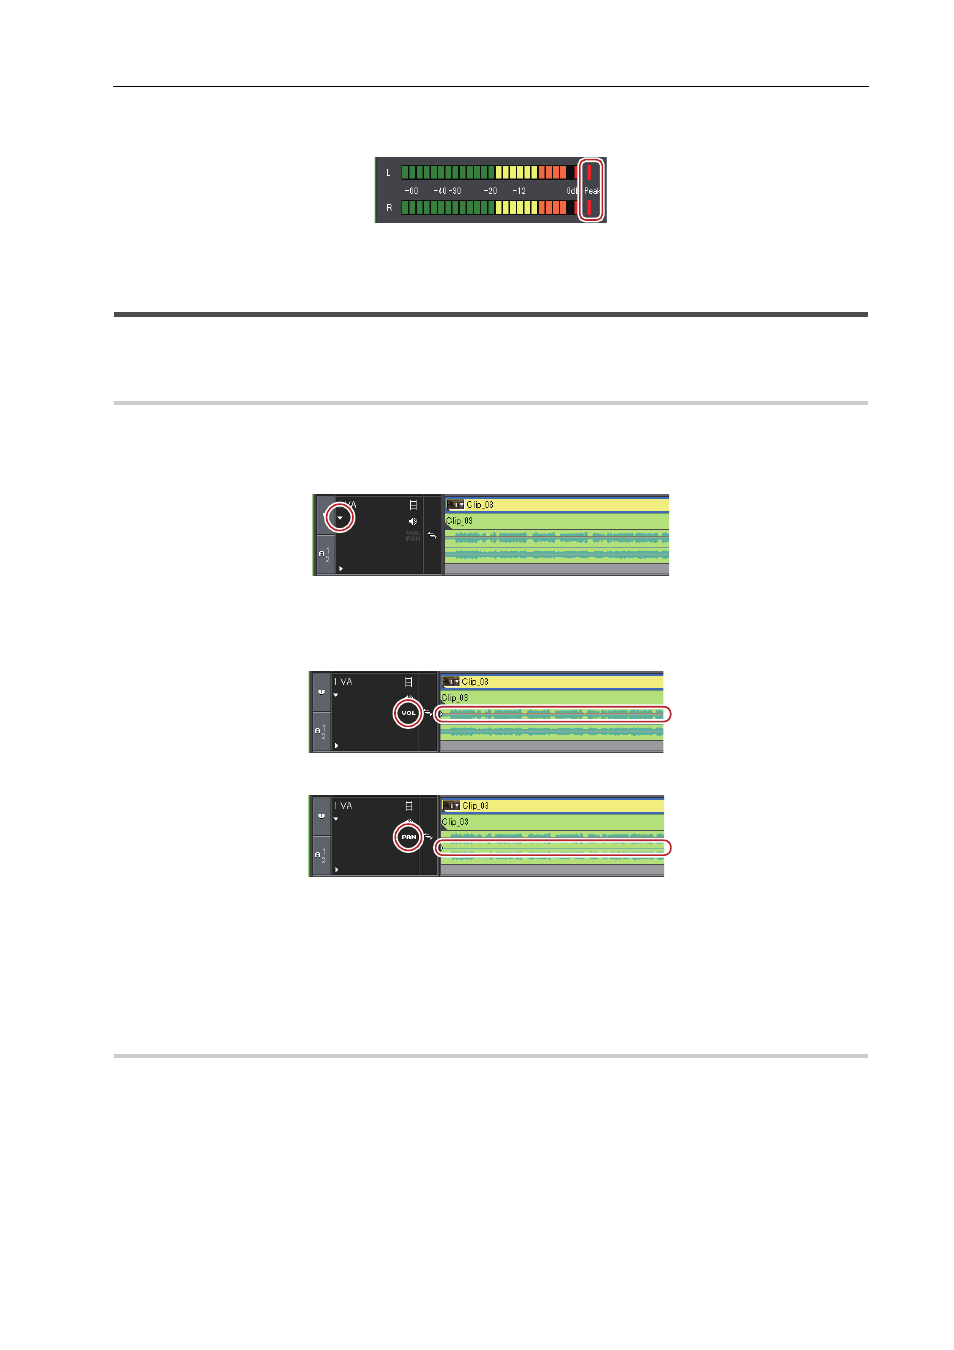
The white line on the right side of the level meter changes to red when the volume exceeds 0 dB. Clicking the
line returns it to its original setting.
• If playback of the timeline does not catch up the playback speed and is stopped, recording is also stopped.
Adjusting the Volume/Pan of Clip
Adjust the volume of a clip and L/R (left and right) balance of the stereo.
Adjusting Entire Volume/Pan
1 Click the expand button for the audio on the track panel.
The track expands and the rubber band and the waveform are displayed. For stereo audio, a waveform is displayed in
each channel.
2 Click [Volume/Pan].
Each click switches the status between volume, pan, and lock.
The rubber band of volume is displayed with an orange line.
The rubber band of pan is displayed with a blue line.
3 Drag the rubber band upward or downward while holding down [Shift] on the keyboard.
The shape of the mouse cursor will change and the entire rubber band can be adjusted.
Dragging the rubber band of the volume upward increases the volume, and downward decreases the volume.
Dragging the rubber band of the pan upward spreads the sound to the L side, and downward spreads the sound to the
R side.
Adjusting Volume/Pan Partly
1 Perform steps 1 to 2 in “Adjusting Entire Volume/Pan”.
Adjusting Entire Volume/Pan
2 Click on a rubber band at the position where you want to apply a change.
A rubber band point is added.
3 Drag the point up, down, to the right, or to the left.