HP OfficeJet Pro 7740 User Manual
Page 91
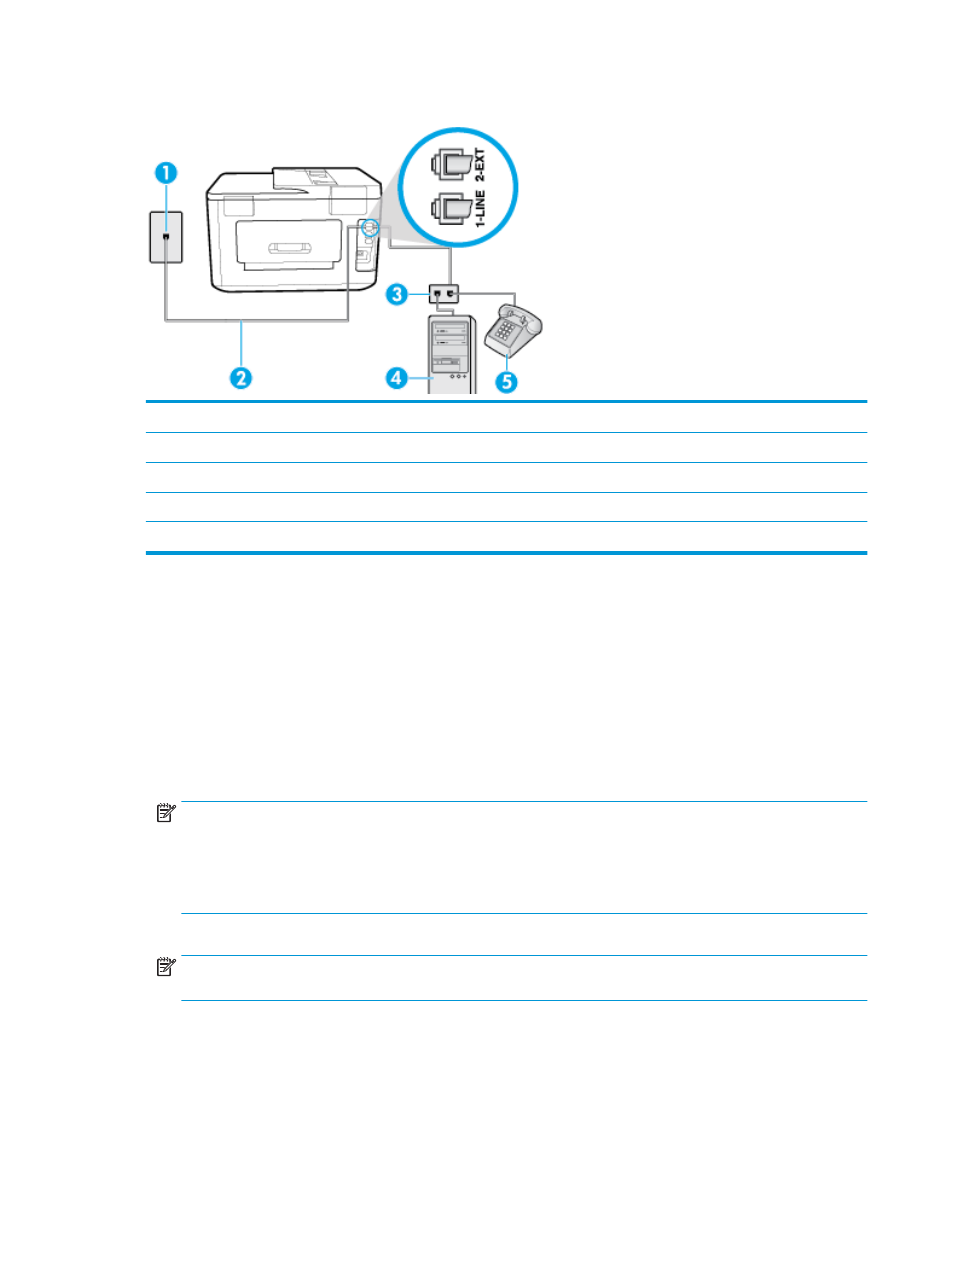
Figure 5-9
Back view of the printer
1
Telephone wall jack.
2
Use the phone cord supplied in the box with the printer to connect to the 1-LINE port.
3
Parallel splitter.
4
Computer with modem.
5
Telephone.
To set up the printer on the same phone line as a computer with two phone ports
1.
Remove the white plug from the port labeled 2-EXT on the back of the printer.
2.
Find the phone cord that connects from the back of your computer (your computer dial-up modem) to a
telephone wall jack. Disconnect the cord from the telephone wall jack and plug it into the port labeled 2-
EXT on the back of the printer.
3.
Connect a phone to the "OUT" port on the back of your computer dial-up modem.
4.
Using the phone cord supplied in the box with the printer, connect one end to your telephone wall jack,
then connect the other end to the port labeled 1-LINE on the back of the printer.
NOTE:
You might need to connect the supplied phone cord to the adapter provided for your country/
region.
If you do not use the supplied cord to connect from the telephone wall jack to the printer, you might not
be able to fax successfully. This special phone cord is different from the phone cords you might already
have in your home or office.
5.
If your modem software is set to receive faxes to your computer automatically, turn off that setting.
NOTE:
If you do not turn off the automatic fax reception setting in your modem software, the printer
cannot receive faxes.
6.
Now you need to decide how you want the printer to answer calls, automatically or manually:
●
If you set up the printer to answer calls automatically, it answers all incoming calls and receives
faxes. The printer cannot distinguish between fax and voice calls in this case; if you suspect the call
78
Chapter 5 Fax
ENWW