Controls and functions, Projector – BenQ TH670s User Manual
Page 11
Introduction 11
Controls and functions
Projector
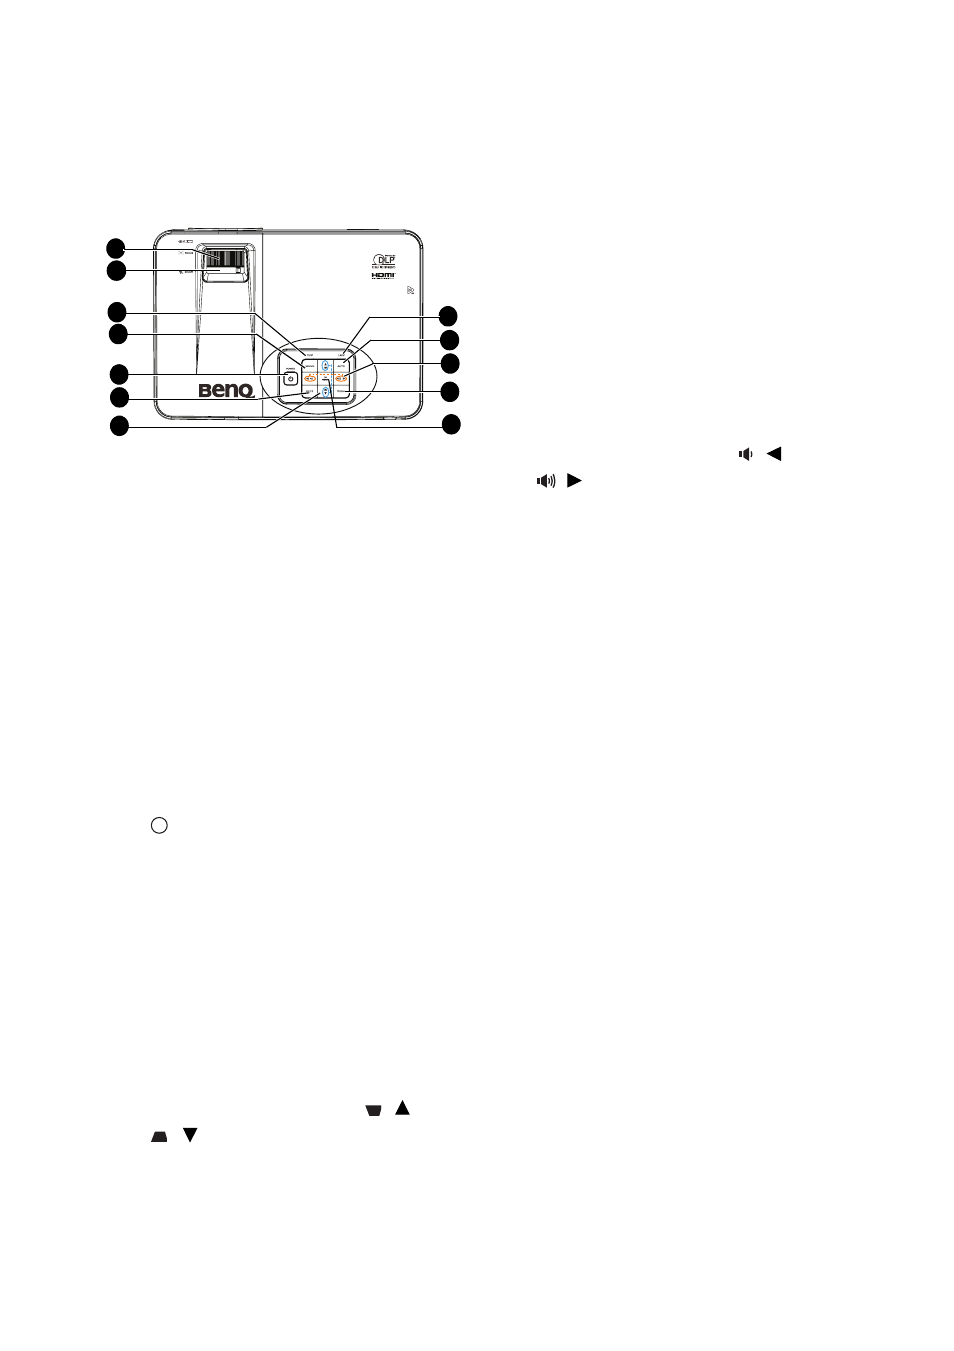
8.
OK/MODE
Activates the selected On-Screen
Display (OSD) menu item.
See
for details.
Selects an available picture setup
mode. See
for details.
9.
MENU
Turns on or off the On-Screen Display
(OSD) menu.
10. Volume/Arrow keys (
/
Left,
/
Right)
Adjusts the sound level.
When the On-Screen Display (OSD)
menu is activated, the #7, and #10 keys
are used as directional arrows to select
the desired menu items and to make
adjusents. See
for details.
11. AUTO
Automatically determines the best
picture timings for the displayed image.
See
"Auto-adjusting the image" on page
for details.
12. LAMP indicator light
Indicates the status of the lamp. Lights
up or flashes when the lamp has
developed a problem. See
for details.
1.
Focus ring
Adjusts the focus of the projected
image.
2.
Zoom ring
Adjusts the size of the image.
3.
TEMPerature indicator light
Lights up red if the projector's
temperature becomes too high. See
for details.
4.
SOURCE
Displays the source selection bar. See
"Switching input signal" on page 33
for
details.
5.
POWER/POWER indicator light
Toggles the projector between standby
mode and on. See
for details.
Lights up or flashes when the projector
is under operation. See
for detail.
6.
BACK
Goes back to previous OSD menu, and
closes projector OSD menu when it's
on the top level.
7.
Keystone/Arrow keys (
/ Up,
/ Down)
Displays Keystone page and adjusts the
vertical keystone values. See
for details.
2
1
5
12
8
3
4
6
7
10
9
11
I
I