d&b Vi User Manual
Page 20
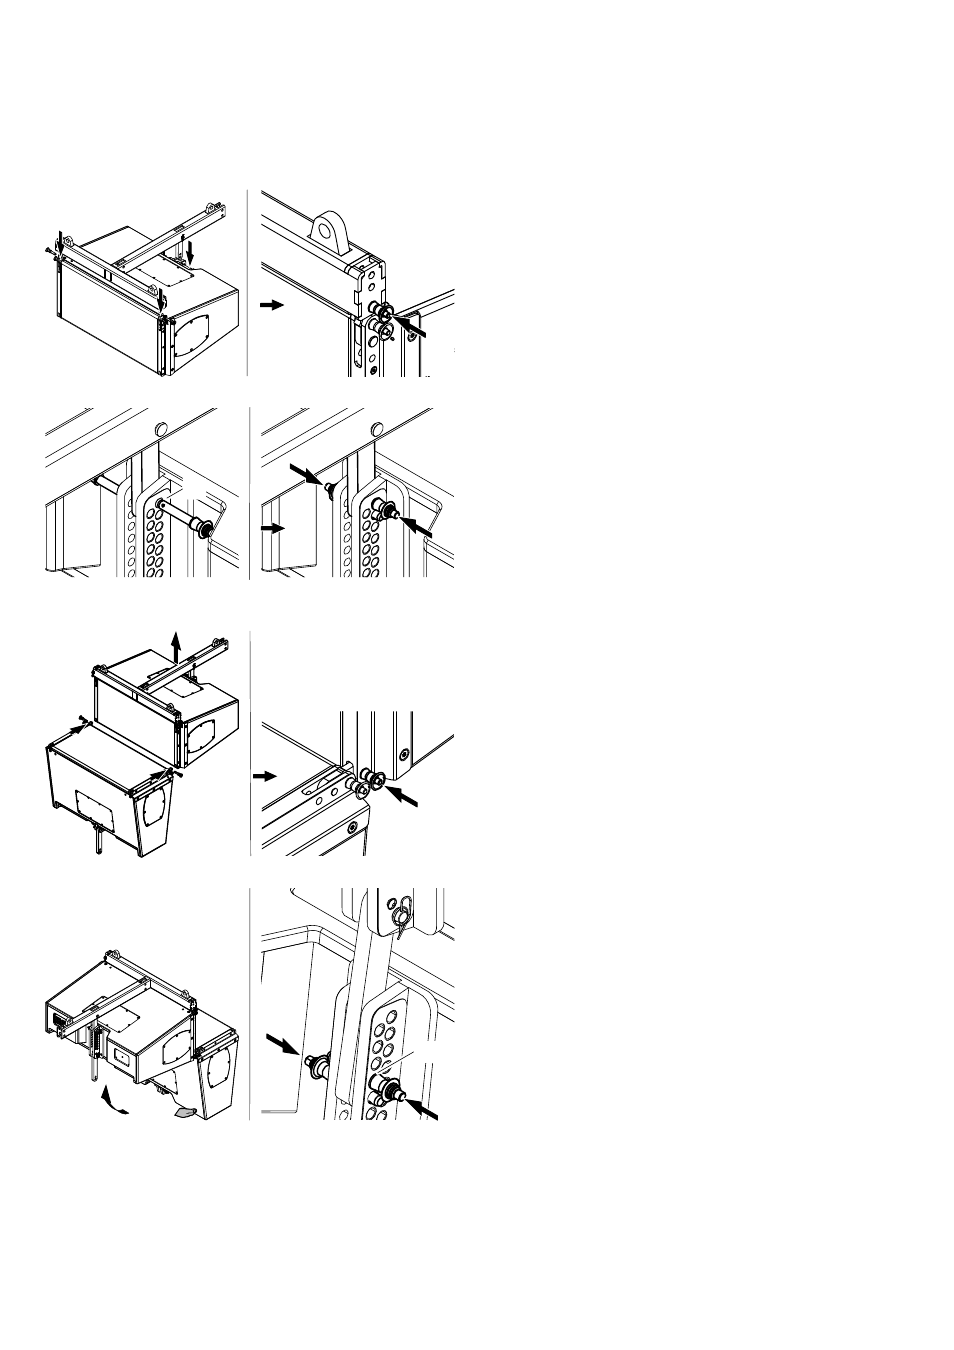
2. Attach the Mounting frame to the first cabinet
1. Lower the frame onto the cabinet until ...
– the Front links fit into the slots at the front of the frame.
– the Rear link of the frame fits into the rear rigging strand of
the cabinet.
2. Insert and lock the second Locking pins of the cabinet's Front
links on both sides.
3. At the rear, align the inner hole of the Rear link with the
[0°]
hole of the rear rigging strand.
4. Insert the first Locking pin to the
[0°] hole.
5. Insert the second Locking pin (Safety pin).
3. Add further cabinets
1. Prepare the Front and Splay links of the next cabinet as
described in Þ Chapter 2. "Rigging concept and
components", Þ "Cabinet's rigging mechanism" .
2. Lift the assembly to a suitable working height.
3. Attach the prepared cabinet to the corresponding slots on the
front of the upper cabinet.
4. Insert and lock the second Locking pins of the cabinet's Front
links on both sides.
5. Raise the bottom cabinet until the Splay link of the upper
cabinet fits into the rear rigging strand of the bottom cabinet.
6. Align the inner hole of the Splay link with the appropriate hole
for the desired splay angle (e.g.
[7°]).
7. Insert the first Locking pin to fix the angle and cabinet in place.
8. Insert the second Locking pin (Safety pin).
To add further cabinets, proceed in the same manner until the
assembly is completed.
[0°]
[7°]
d&b Vi Rigging manual (1.2 EN)
20