Caution, Changing the embroidery foot, Removing the embroidery foot – Baby Lock Spirit (BLPY) Instruction and Reference Guide User Manual
Page 48: Attaching the embroidery foot
CHANGING THE EMBROIDERY FOOT
B-46
The embroidery foot is attached to the machine when purchased, with the connector of the embroidery
foot “W+” with LED pointer unplugged from the machine.
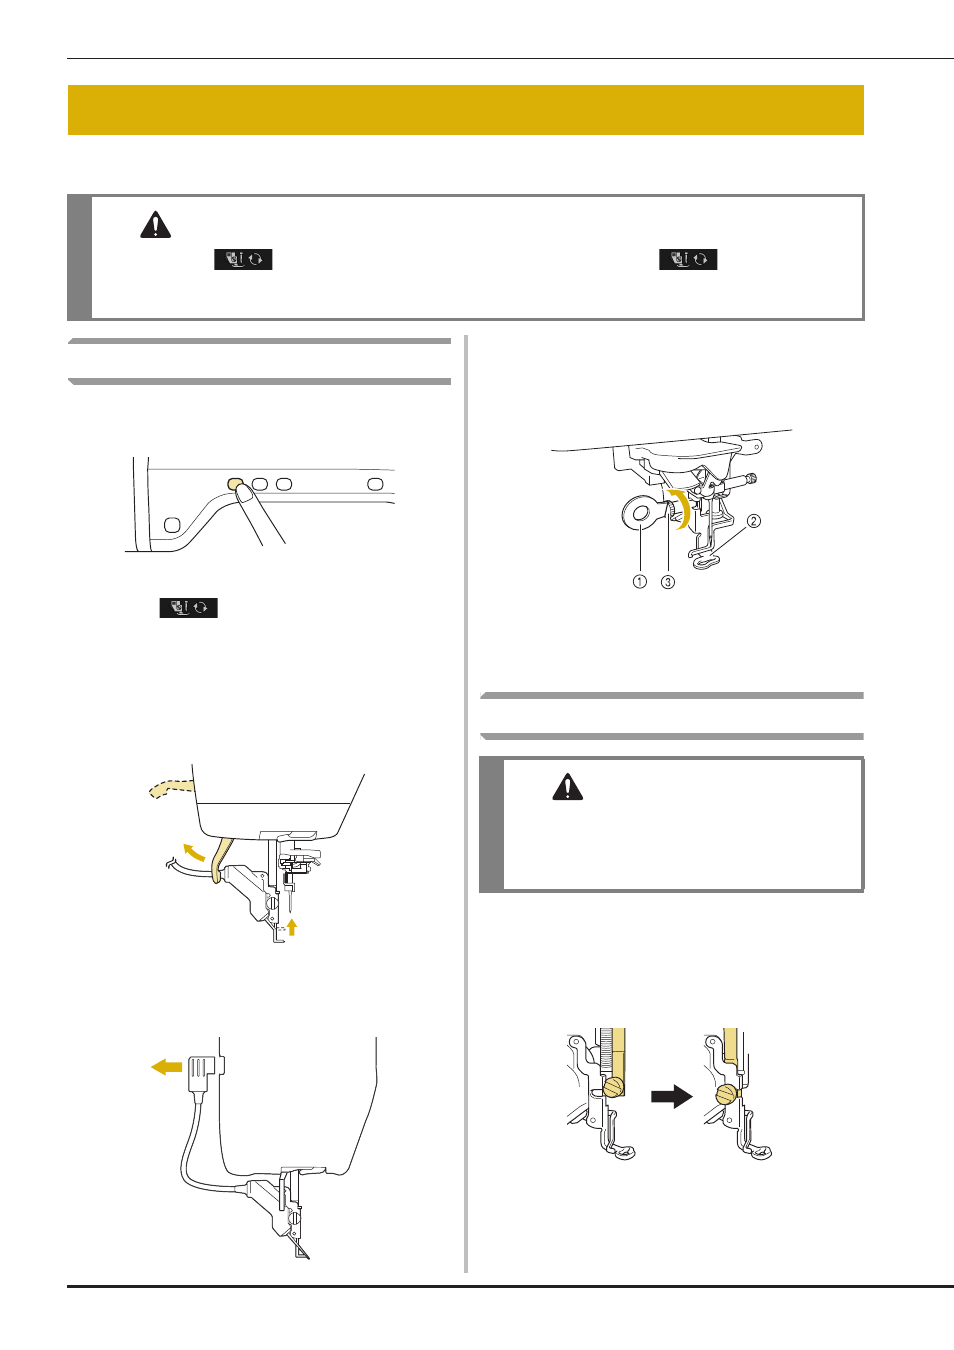
Removing the Embroidery Foot
a
Press the “Needle Position” button to raise
the needle.
b
Press .
*
If the message “OK to automatically lower the
presser foot? ” appears on the LCD screen, press OK
to continue.
→ The entire screen becomes white, and all keys and
operation buttons are locked.
c
Raise the presser foot lever.
d
Unplug the connector of the embroidery
foot “W+” from the jack on the back of the
machine.
e
Use the included screwdriver to loosen the
screw of the embroidery foot, then remove
the embroidery foot.
a Screwdriver
b Embroidery foot
c Embroidery foot screw
→ Remove the embroidery foot.
Attaching the Embroidery Foot
a
Position the embroidery foot “W+” with
LED pointer on the presser foot bar by
aligning the notch of the presser foot to the
large screw.
Side view
CHANGING THE EMBROIDERY FOOT
CAUTION
• Always press
on the screen before changing the embroidery foot. If
is not pressed and
the “Start/Stop” button or another button is pressed, the machine will start and may cause injury.
• Only use embroidery feet made for this machine. Using other presser feet may lead to accident or injury.
CAUTION
• Make sure that the embroidery foot is installed
in the correct direction, otherwise the needle
may strike the embroidery foot, breaking the
needle and causing injuries.