Caution, Changing the needle – Baby Lock Spirit (BLPY) Instruction and Reference Guide User Manual
Page 51
CHANGING THE NEEDLE
G
ettin
g R
ea
d
y
Basic operations B-49
B
1
a
Press the “Needle Position” button to raise
the needle.
b
Press .
*
If the message “OK to automatically lower the
presser foot? ” appears on the LCD screen, press OK
to continue.
→ The entire screen becomes white, and all keys and
operation buttons are locked.
c
Use the screwdriver to turn the screw
toward the front of the machine and loosen
the screw. Remove the needle.
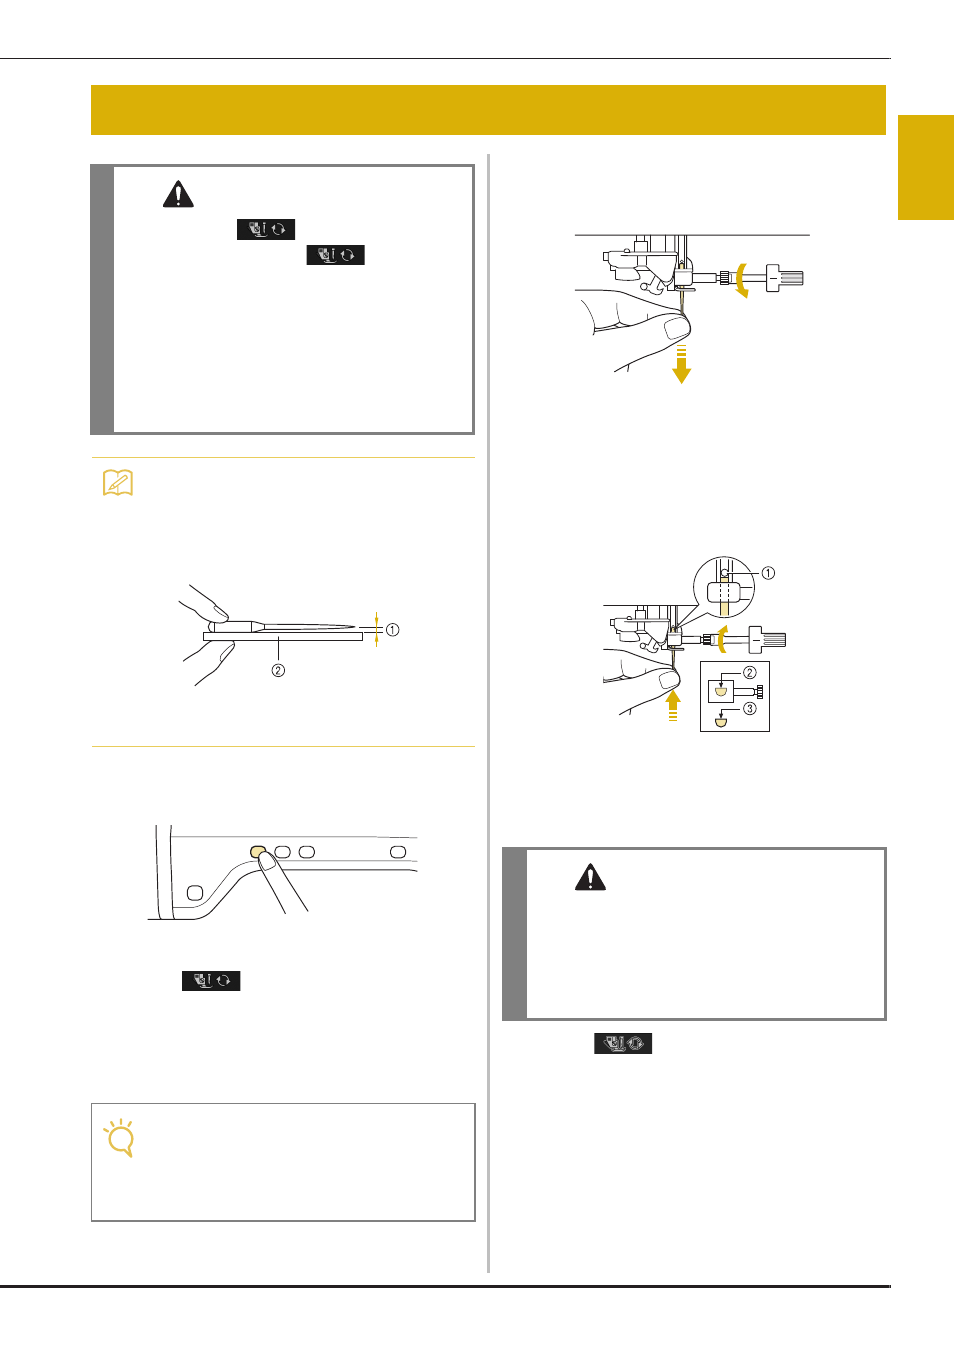
d
With the flat side of the needle facing the
back, insert the new needle all the way to
the top of the needle stopper (viewing
window) in the needle clamp. Use a
screwdriver to securely tighten the needle
clamp screw.
a Needle stopper
b Hole for setting the needle
c Flat side of needle
e
Press
to unlock all keys and
buttons.
CHANGING THE NEEDLE
CAUTION
• Always press
on the screen before
changing the needle. If
is not pressed
and the Start/Stop button or another operation
button is pressed accidentally, the machine
will start and injury may result.
• Use only embroidery machine needles made
for home use. Other needles may bend or
break and may cause injury.
• Never sew with a bent needle. A bent needle
will easily break and may cause injury.
Memo
• To check the needle correctly, place the flat
side of the needle on a flat surface. Check
the needle from the top and the sides.
Throw away any bent needles.
a Parallel space
b Level surface (bobbin cover, glass, etc.)
Note
• Before replacing the needle, cover the hole
in the needle plate with fabric or paper to
prevent the needle from falling into the
machine.
CAUTION
• Be sure to push in the needle until it touches
the stopper, and securely tighten the needle
clamp screw with a screwdriver. If the needle
is not completely inserted or the needle clamp
screw is loose, the needle may break or the
machine may be damaged.