Caution – Baby Lock Spirit (BLPY) Instruction and Reference Guide User Manual
Page 49
CHANGING THE EMBROIDERY FOOT
G
ettin
g R
ea
d
y
Basic operations B-47
B
1
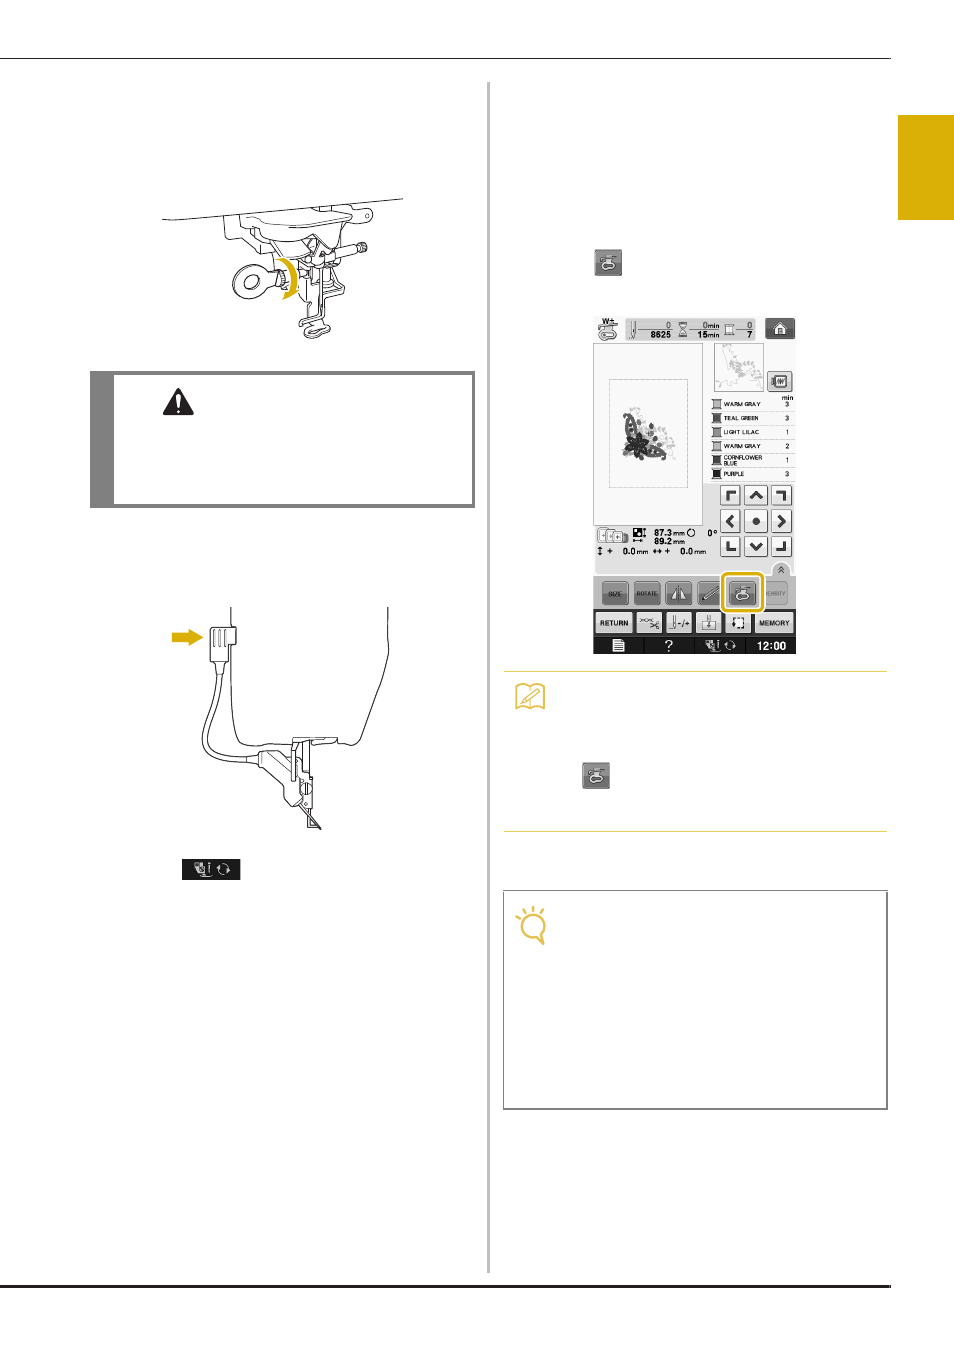
b
Hold the embroidery foot in place with
your right hand, and then use the included
screwdriver to securely tighten the
embroidery foot screw.
c
Plug the connector of the embroidery foot
“W+” with LED pointer into the jack on the
back of your machine.
d
Press
to unlock all keys and
buttons.
→ All keys and operation buttons are unlocked, and
the previous screen is displayed.
■ Checking the Needle Drop Point
With the Embroidery Foot “W+”
with LED Pointer
Before beginning to embroider when using the
embroidery foot “W+” with LED pointer, carefully
read the procedures described in the “Embroidery”
and “Embroidery Edit” chapters.
a
Press
in the embroidery screen.
→ The LED pointer indicates the needle drop point.
*
The LED pointer turns off automatically by lowering
the presser foot or returning to the previous page.
CAUTION
• Use the included screwdriver to firmly tighten
the screw of the embroidery foot. If the screw
is loose, the needle may strike the embroidery
foot and possibly cause injury.
Memo
• When the LED pointer is turned on, the
presser foot height is automatically adjusted
according to the fabric thickness.
• If
is pressed again, the fabric thickness
is remeasured and the presser foot is set to
the optimum height.
Note
• With bulky fabrics, the position may not be
accurate due to the various depths of the
fabrics. In this case, manually adjust the
position according to the thickness of the
fabric.
• With fabric that has a very uneven surface
such as quilting, the fabric thickness may
not be correctly measured. In this case, the
pointer indication should be used only as a
reference.