Daktronics AB-1600-1.5,2.5 User Manual
Page 41
Electrical Installation
3-15
3.11 Display Continuity Check
Prior to turning on the power to the display, a continuity check should be done to ensure that no short
circuits have occurred due to shipping vibration.
Caution: Before performing the following steps, be sure all the breakers are off!
1. Remove the cover from the panelboard.
2. Using an ohmmeter, place one probe on the neutral terminal and one probe to each of the taps on
the breaker wire terminal. Repeat the same test for each of the breakers.
3. Place one probe to earth ground and one to each of the breaker wire terminals and repeat for each
of the breakers.
All tests should result in a reading of infinity or indicate an open circuit.
3.12 First Time Power Up
After all connections are made, turn on the display for a first-time field test.
1. Set all breakers to the OFF position.
2. Turn power ON to the display at the main disconnect.
3. Carefully check the voltage between the hot lines and neutral. Normal voltage range is between
230VAC and 125VAC.
4. If there are problems with voltage, check with your local electrician or power company.
5. Reset the breakers to the ON position.
6. Turn power ON to the display at the main disconnect (if it was turned off).
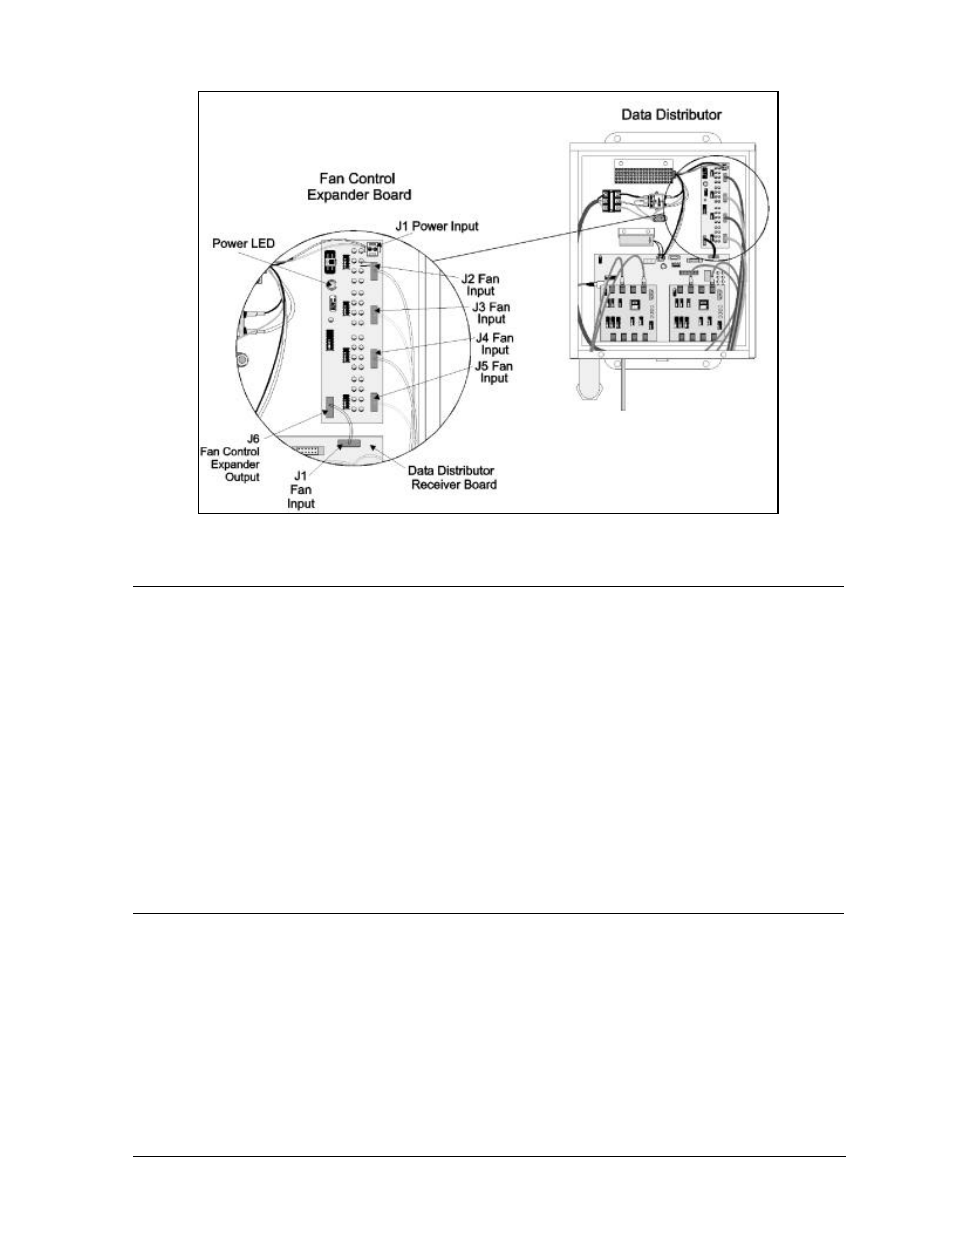
Figure 38: Close-up of the Fan Controller Expander Card in the Data Distributor.