Daktronics AB-1600-1.5,2.5 User Manual
Page 53
Maintenance & Troubleshooting
4-9
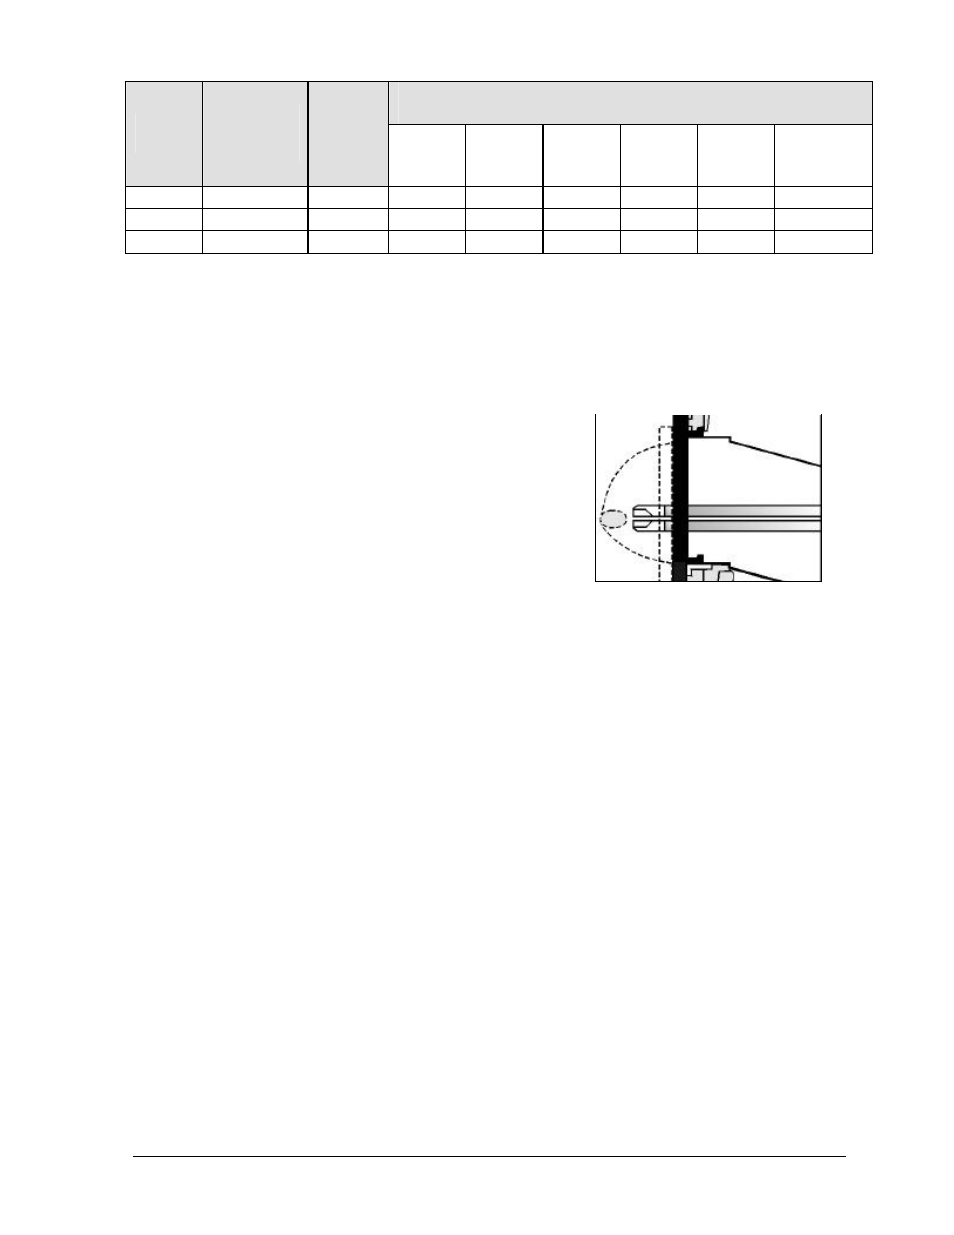
Lamps in this display are accessed either by removing the lampbank to which the lamps are attached
or by removing the lens in front to the lamp. If just a few lamps here and there need replacing it is
easier to remove the lenses in front of them. If there are many lamps that need replacing on a single
lampbank (five or more) it is easier to remove the lampbank from the lens assembly. Both methods of
lamp removal/lamp replacement are addressed in this sub-section.
Complete the following steps to access and service lamps by
removing a lens:
1. Remove the necessary lenses as explained in Section 4.4.
2. As illustrated in Figure 49, remove the bad lamps with the
lens/lamp extractor tool found in the tool kit.
3. Replace the necessary lamps. Use the lens/lamp extractor if
the lamps are hot. Use only Daktronics-approved lamps
of the same wattage.
4. Replace the lenses as explained in Section 4.4.
The Diagnostics Method of Lamp Testing & Replacement
A qualified individual who is capable of operating the controller equipment should do lamp testing.
The Venus 7000 Diagnostics program provides two ways to check for bad lamps. If the display is
not visible from the controller, you must use the Pattern Test method. If the display is visible from
the controller, you can use the Pixel Locator method that allows you to locate bad lamps without
leaving the controller.
Pattern Test Method The Pattern Test method turns on the lamps in a pattern that makes it
easy to spot bad lamps and record their location. When using the Pattern Test function, make
photocopies of the test form in Appendix C. (Keep the original copy in Appendix C.) Complete
one of these forms each time you test and replace lamps. Lamp test forms for your display size are
available upon request.
To run the Test Pattern:
1. From the Venus 7000 Shell, open the Monitor program.
2. Open the Diagnostics program.
3. In the Diagnostics text box, select Lamp Test.
4. Be sure to select the sign you are testing in both the Diagnostics and the Monitor programs.
5. Under Lamp Test Type , select Pattern Test.
6. Click on Start Test. This will light up every other column, making it easy to spot any bad
lamps. The monitor screen will indicate this pattern. To change to the alternate columns press
# Of Lamps Predicted To
Fail For Selected Display Sizes
%
Failure
# Of Hours
In
Operation
# Of
Days In
Service
24x96
2,304
lamps
40x112
4,480
lamps
48x128
6,144
lamps
64x128
8,192
lamps
96x224
23,424
lamps
128x256
32,768
lamps
3
5,950
250
69
134
184
246
703
984
10
11,900
500
230
448
614
819
2,342
3,277
50
17,000
722
1,152
2,240
3,072
4,096
11,712
16,384
Figure 49: Lamp Removal