Multiplayer - audio port configuration – Digital Alert Systems DASAMS User Manual
Page 8
Digital Alert Systems
AMS Installation /Operation & Integration Guide
Revision 1.1
Page 8 of 28
MultiPlayer - Audio Port Configuration
Once the MultiPlayer’s network configuration is complete the next step is to configure the audio signals to match the wiring
descibed above. The MultiPlayer can support different audio signals per port.
MultiPlayer Audio Signals (per port)
Designation
Description
AES3 AES digital with input (stereo pair) – locks to incoming AES signal for clock reference (Factory default)
ORIG AES digital without input (stereo pair) – uses internal reference clock, generates AES silence when not playing
ANALOG Analog mono – balanced audio input and output
SLAVE Analog stereo – combination – ties playout with prior port ANALOG channel, creating an analog stereo pair.
Table 4 MultiPlayer supported audio signals and designations
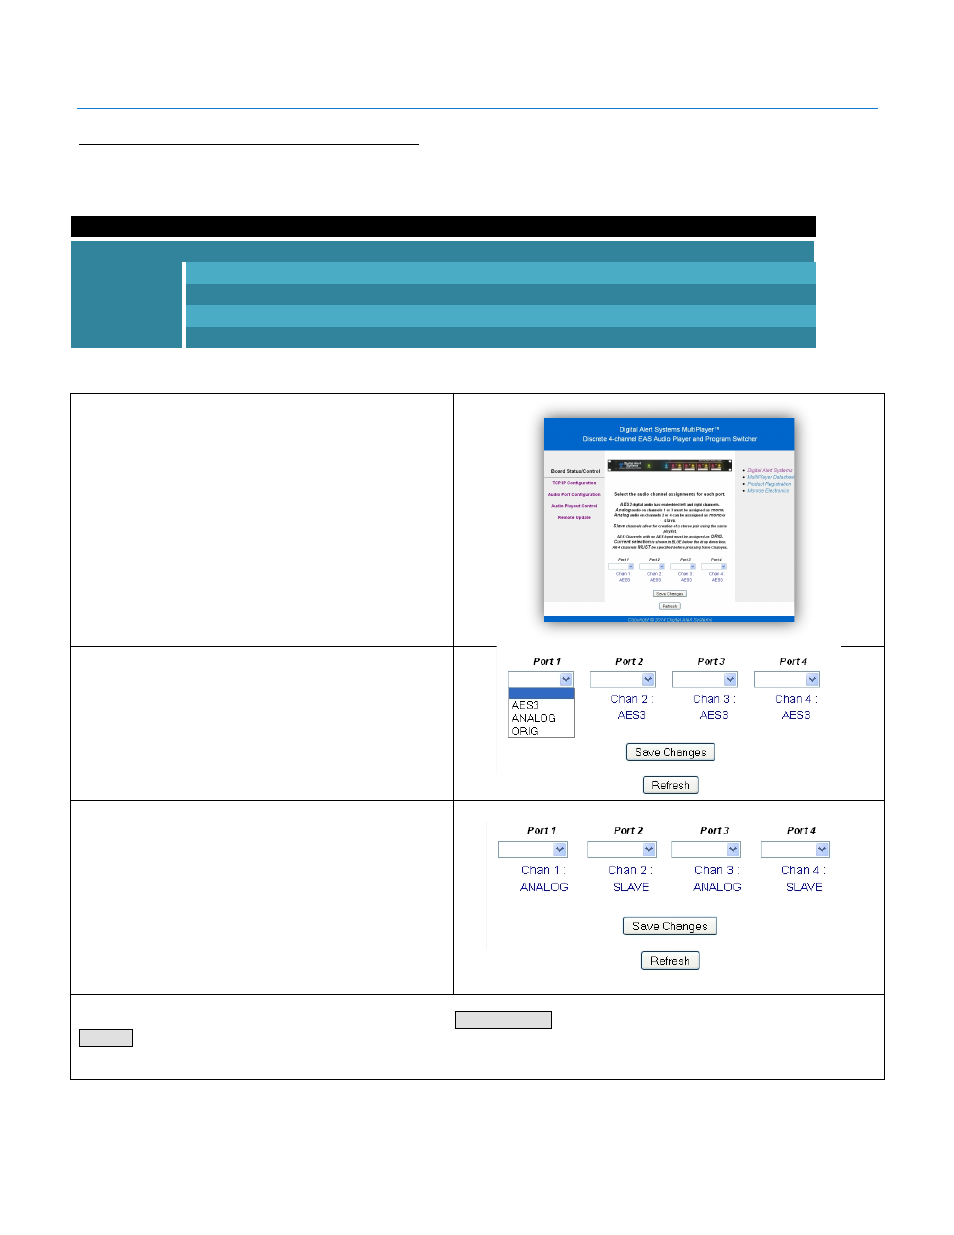
Type the IP address of the MultiPlayer’s IP address into a
network connected web browser to display the MultiPlayer
home page.
Click
Audio Port Configuration
text link on the left to
navigate to the Audio Port Configuration page.
In the factory configuration, all channels are set as AES
digital channels. Each port operates independently and is
not bonded to another port.
The current signal type for each port is shown in the text
below Chan x: (where “x” is the associated port number).
To change audio signals use the pull down menus as
shown under Port 1 to the right. Refer to Table 4
MultiPlayer supported audio signals and designations for
more information about each selection.
In the analog mode each port is a single audio channel. to
create a stereo pair, select, Port 1 as “ANALOG” and Port
2 as “SLAVE”. This forms a bonded pair for Left and Right
audio. Similarly setting ports 3 & 4 in the same way
creates a second stereo analog pairing forming a second
bonded pair.
NOTE: The “SLAVE” option in only selectable for
Ports 2 and 4
IMPORTANT NOTE: Selections must be made for each Port regardless if they differ with the current settings.
Once a selection has been made for all of the ports, click on Save Changes. To ensure all settings have saved, click the
Refresh button. If the configuration remains as desired the settings have been properly stored. If not repeat the selection of
each port as outlined above.