Getting started with the cs-duo, The overview screen – Digital Audio Labs Livemix CS-DUO Personal Mixer User Guide User Manual
Page 13
LIVEMIX CS-DUO
11
GETTING STARTED WITH THE CS-DUO
THE OVERVIEW SCREEN
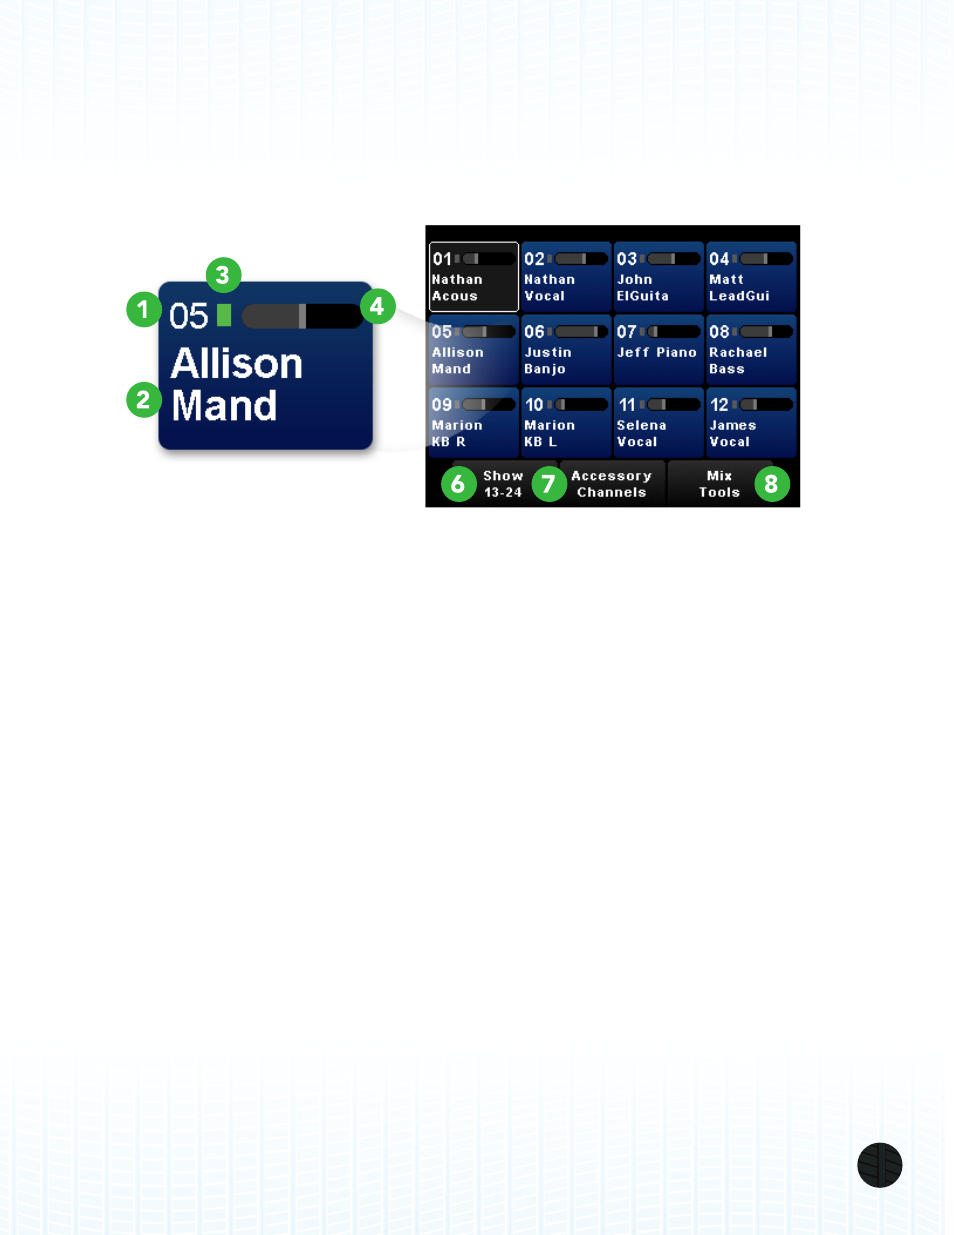
The default view when the CS-DUO is powered up is the Channel Overview. Each channel in the
overview screen shows the following information:
1.
CHANNEL NUMBER: This is the number of the audio channel on the network. The Livemix
system allows up to 24 input channels.
2.
CHANNEL NAME: This is the custom channel name. See Naming a Channel in the next section
for details.
3.
SIGNAL LEVEL INDICATOR: This small colored square serves as a signal level meter for the
channel. It is colored gray if no signal is present, then illuminates in green, yellow, and finally red
as the signal increases in level. Turn down your source volume if you see red.
4.
VOLUME LEVEL: This horizontal strip shows the current volume level of the channel
5.
PAN LEVEL (NOT SHOWN): The volume strip switches to pan by pressing the ADJUST knob.
6.
SHOW 13-24: PRESS this button to switch the Channel Overview display to channels 13-24.
PRESS it again to switch back to channels 1-12.
7.
ACCESSORY CHANNELS: PRESS this button to view the Accessory Channels screen, where
you can adjust levels for other audio sources such as the built-in intercom, metronome, ambient
microphones, and the auxiliary input. See the “Accessory Channels” section for more details.
8.
MIX TOOLS: PRESS this button to go to the Mix Tools page, where you can perform other
advanced mixing functions. See the Mix Tools section for more details.