Starting the pump, Running the pump, Running the pump (5.8) – Flowserve Durco Mark 3 ISO Frame Mounted User Manual
Page 23: Starting the pump (5.7)
DURCO MARK 3 ISO FRAME MOUNTED ENGLISH 85392719 12-14
Page 23 of 52
flowserve.com
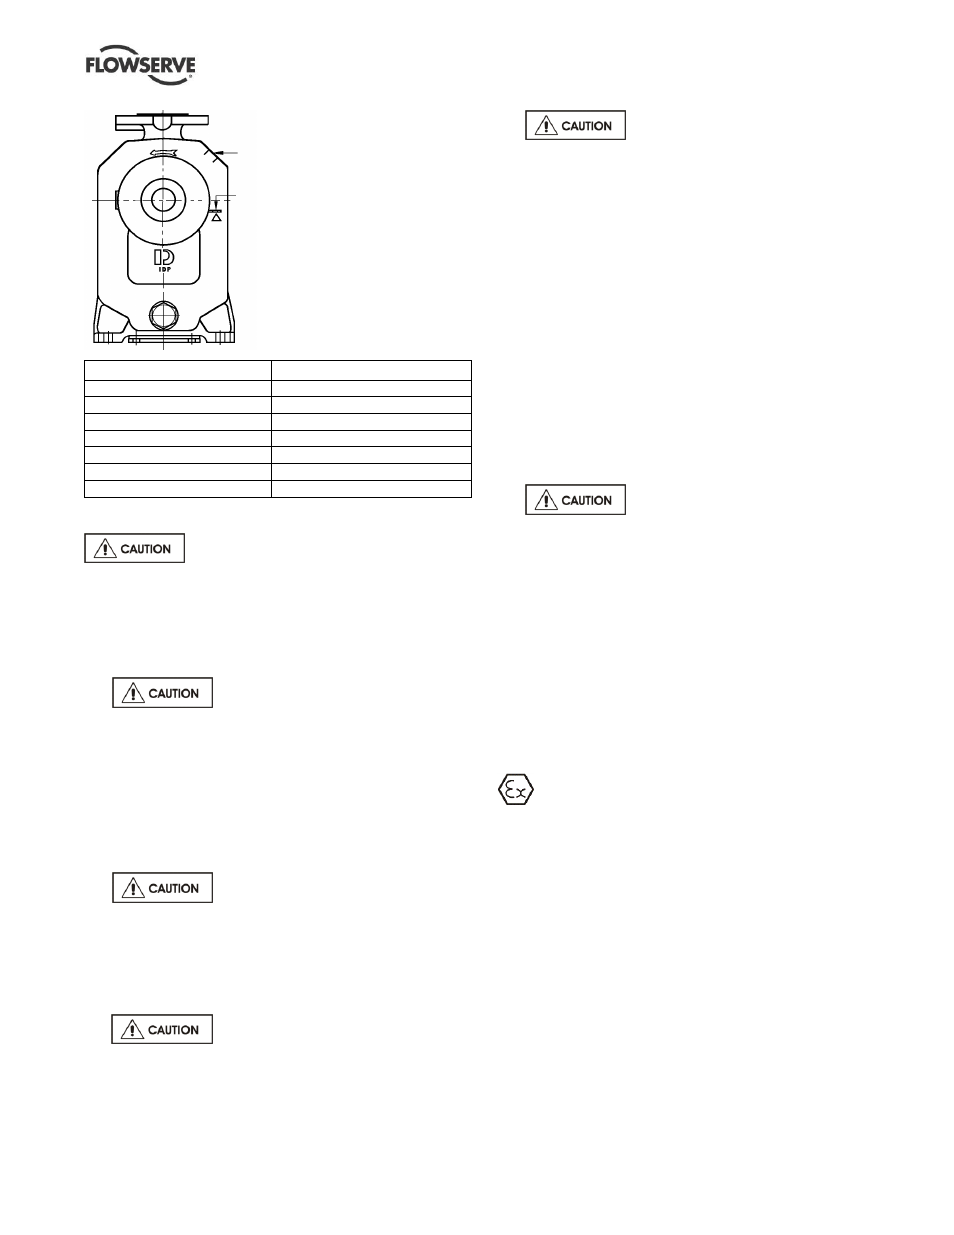
Pump housing
filling hole.
When the initial fill
reaches the suction
pipe, excess liquid will
flow out of the casing.
Pump size
Initial fill litre (US gal.)
40-40-125
2.5 (0.65)
80-80-125
6.0 (1.60)
40-40-160
3.0 (0.80)
80-80-160
6.5 (1.75)
40-40-200
5.0 (1.30)
65-65-200
8.5 (2.25)
80-80-250
12.0 (3.20)
5.6.3
Auxiliary supplies
Ensure all electrical, hydraulic,
pneumatic, sealant and lubrication systems (as
applicable) are connected and operational.
5.7
Starting the pump
5.7.1
Starting the non self-primer casing pump
a)
Ensure flushing and/or cooling/
heating liquid supplies are turned ON, before
starting pump.
b)
CLOSE the outlet valve.
c)
OPEN all inlet valves.
d)
Prime the pump, ensure the air within the pump has
a route to escape.
e)
Start motor and check the outlet pressure.
f) If the pressure is satisfactory, SLOWLY open the
outlet valve.
g)
Do not run the pump with the outlet
valve closed for a period longer than 10 seconds.
h) If NO pressure, or LOW pressure, STOP the pump.
Refer to section 7, Faults; causes and remedies, for
fault diagnosis.
5.7.2
Starting the self-priming casing pump
a)
Ensure flushing and/or cooling/
heating liquid supplies are turned ON, before
starting pump.
b) CLOSE the outlet valve.
c) OPEN all inlet valves.
d)
Prime the pump. (See section
5.6.2.) The pump casing must initially be filled with
compatible liquid before starting the unit.
e) Damage will occur if the pump is run dry or for
prolonged periods with no incoming liquid.
f)
Subsequent filling should not be necessary unless the
pump has been emptied or drained of fluid.
g) Start the motor and, if no specific provision has been
made in the delivery pipework for evacuating the
primed air, open the delivery valve by approximately
10 % to allow priming air to escape.
h) When the pump has primed, check outlet pressure.
i)
If the pressure is satisfactory, SLOWLY open the
outlet valve.
j)
It is recommended that the priming time is noted.
Priming times in excess of 5 minutes will indicate a
pump or system fault. Any noticeable increases in
priming time on subsequent starts will also indicate
a fault. Irregular use could lead to the risk of
'evaporation' of the priming fluid.
k)
Do not run the pump with the outlet
valve closed for a period longer than 30 seconds.
l)
If the pump has to fill the system it may take a short
time before the outlet is pressurized.
m) If NO pressure, or LOW pressure, STOP the pump.
Refer to section 7, Faults; causes and remedies for
fault diagnosis.
5.8
Running the pump
5.8.1
Pumps fitted with packed gland
If the pump has a packed gland there must be some
leakage from the gland. Gland nuts should initially be
finger-tight only. Leakage should take place soon after
the stuffing box is pressurized.
The gland must be adjusted evenly to give visible
leakage and concentric alignment of the gland ring to
avoid excess temperature. If no leakage takes place
the packing will begin to overheat. If overheating takes
place the pump should be stopped and allowed to cool
before being re-started. When the pump is re-started,
check to ensure leakage is taking place at the packed
gland.
If hot liquids are being pumped it may be necessary to
slacken the gland nuts to achieve leakage.
The pump should be run for 30 minutes with steady
leakage and the gland nuts tightened by 10 degrees at a
time until leakage is reduced to an acceptable level,
normally 30 to 120 drops per minute. Bedding in of the
packing may take another 30 minutes.