Step 5: install hood panels – Greenheck Hooded Propeller Fans Exhaust and Supply (455601) User Manual
Page 3
3
Hooded Propeller Roof Fans • Exhaust and Supply
®
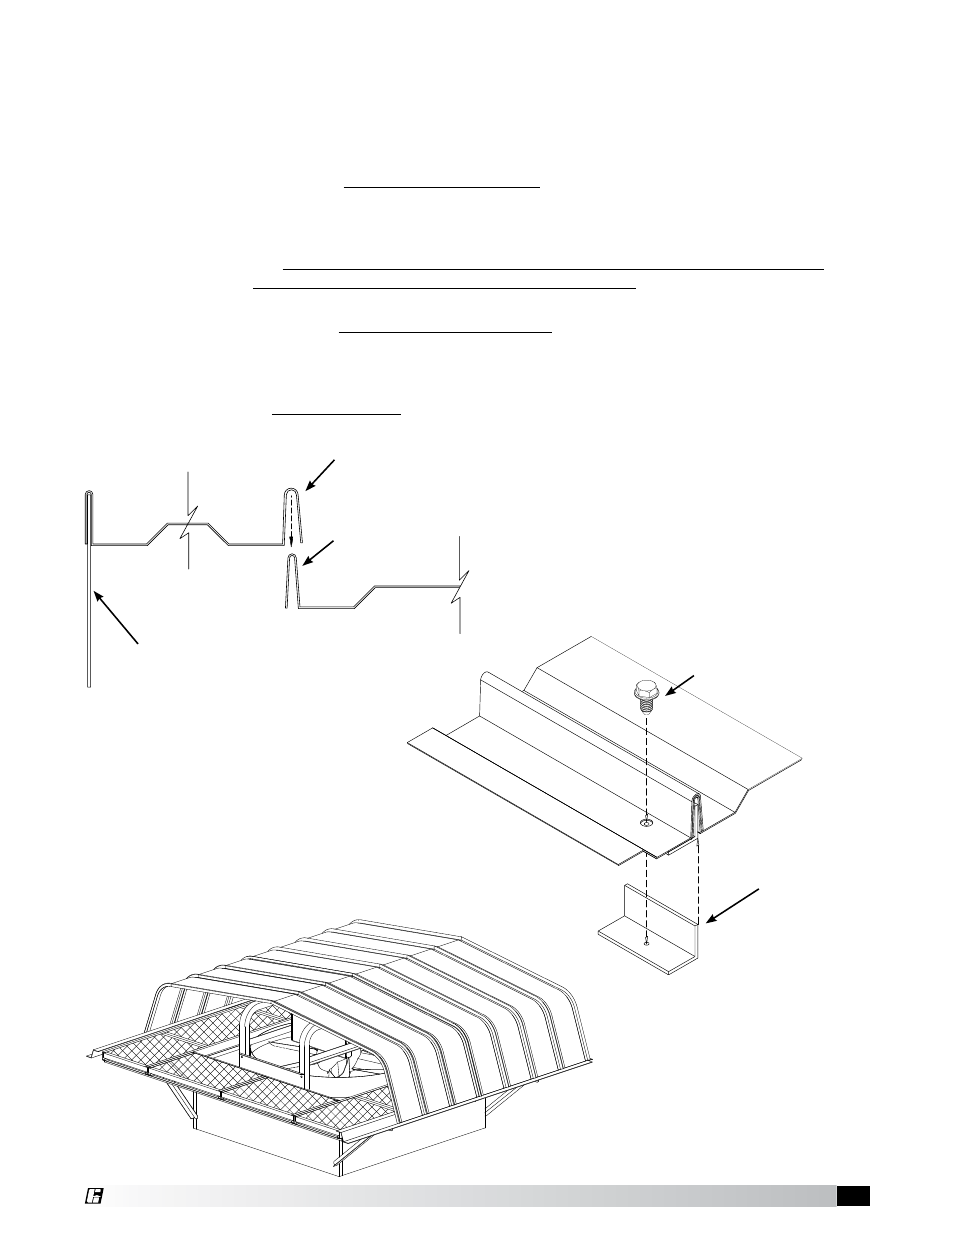
Detail 5A
Hood
Enclosure
Panel (Female)
Female Rib
Male Rib
Detail 5B
Hood Clip
(Fan Sizes 54 and
Larger)
Two on each
interlocking rib
#12 x 3/8” Sheet Metal Screw
with Sealing Washer
Step 5: Install Hood Panels
Hardware Required:
Hardware Package #816527
#12 x 3/8” Sheet Metal Screws with Washer
Quantity: 75 pieces required for 72” fan, less required for smaller sizes.
Instructions:
A) Locate the (MALE) hood enclosure panel. This panel has a label that reads “Male hood
enclosure panel. Start with this assembly first.” This is the starter panel. Place this panel on the
hood rails and fasten tight with (4) screws.
B) Install the intermediate panels one at a time. The panels have interlocking ribs. (see detail
5A). For fan sizes 54 and larger, hood clips must also be installed on each panel. Each
panel is predrilled for hood clip installation (see detail 5B). Secure each hood clip with
a screw and secure each intermediate panel to the hood rails with (4) screws.
C) Install the (FEMALE) hood enclosure panel. Secure this panel to the hood rails with (4)
screws. To install the hood clips, remove the short birdscreen section by loosening the quick
release fasteners to gain access to the underside of the hood. Reinstall the end
birdscreen after hood clips are installed.
D) WRENCH TIGHTEN the (4) bolts that secure the hood rails to the hood support rails.