Sequence of operation, Powermax1000 – Hypertherm Powermax1000 Service Manual User Manual
Page 38
MAINTENANCE
1
powermax1000
Service Manual
3-5
Sequence of operation
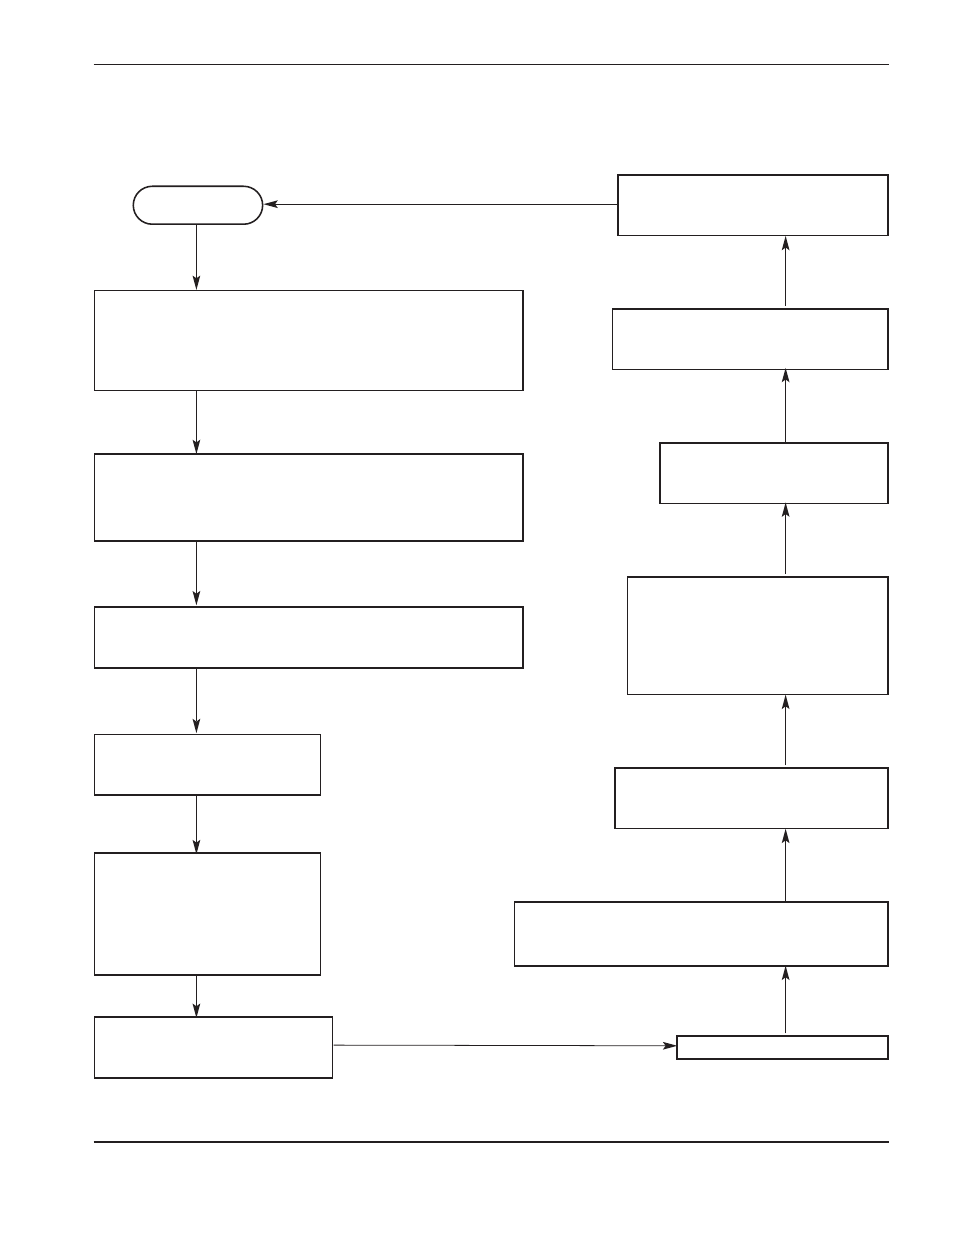
Power OFF
• Connect the gas supply to the filter on the power unit.
• Connect the torch to the power supply.
• Connect the work lead to the workpiece.
• Apply power at the line-voltage disconnect box.
• Set the ON/OFF switch (S1) to ON (I)
Set the power switch (S1) to OFF (O).
• The gas solenoid valve (V1) closes.
• The gas flow stops.
• The arc extinguishes.
• Postflow continues for
10 seconds.
• Move the torch to make a cut.
• The workpiece drops after the cut.
• Release the plasma start trigger on
the hand torch or the remote start
switch for the machine torch.
• The gas solenoid valve (V1) opens.
• The gas flow starts.
• The cutting arc starts.
• Position the torch above the workpiece.
• Pull the plasma start trigger on the hand torch or
press the remote start switch for the machine torch.
The power circuits are ready.
• Gas solenoid valve (V1) closes.
• The gas flow stops.
• Set the gas pressure (see the
Setup section in the Operator
Manual).
• Select the desired cutting
amps with the current
adjustment knob.
The gas solenoid valve (V1)
opens to purge the system and
to allow the setting of pressure.
• Turn the current adjustment knob fully counterclockwise, to
the gas test position.
• Check the air pressure setting.
• The power ON LED and the gas pressure LED illuminate
green, indicating the system is ready for operation.
• The fault LEDs should be extinguished (see
Troubleshooting guide for more information).