Assembly – Kreg DB210 Foreman Pocket-Hole Machine User Manual
Page 7
Assembly
4.
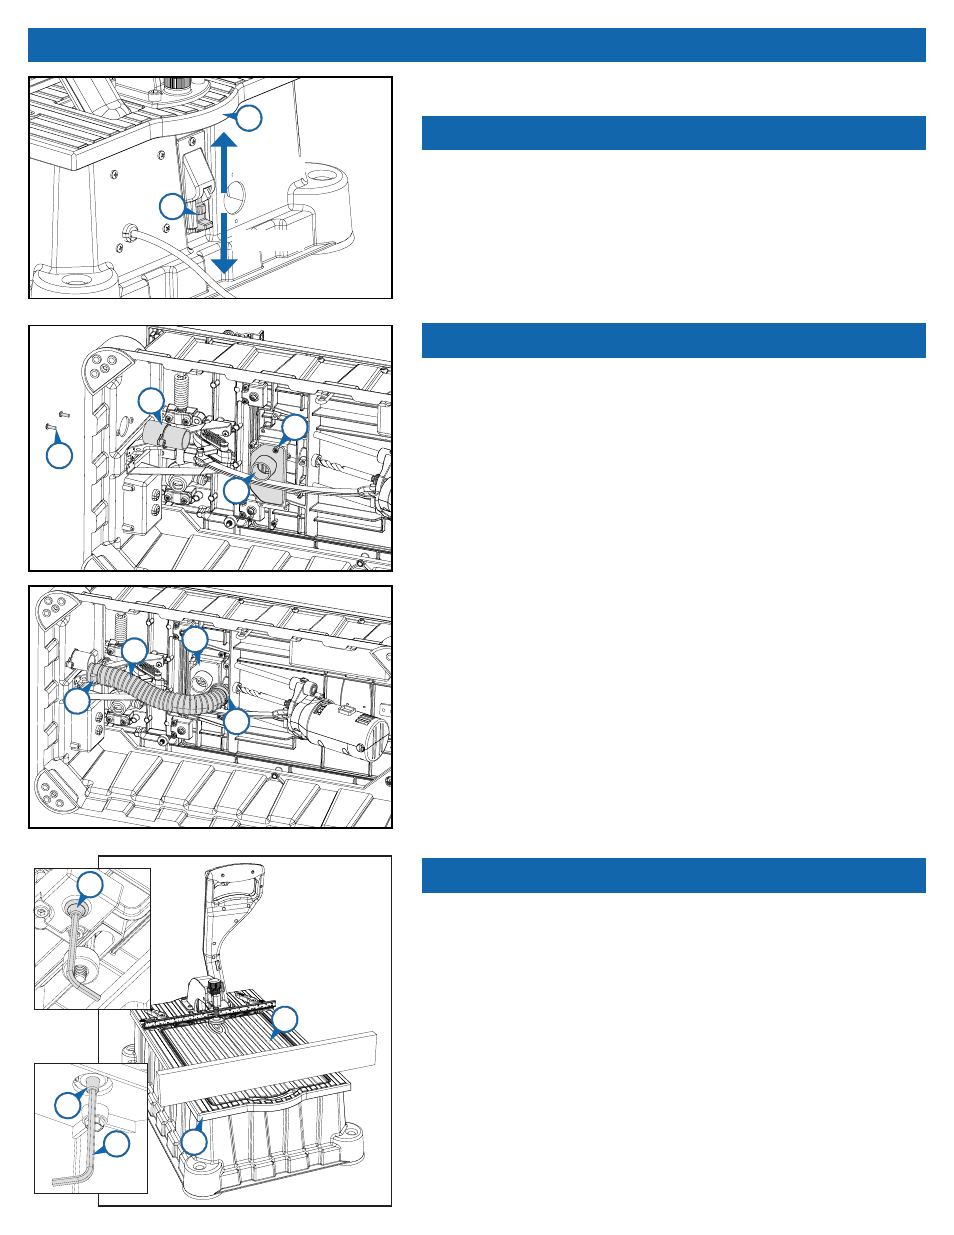
Push down on the control arm (1), release the arm lock (2) at the
back of the machine base (3), and guide the control arm to the full-
up position. Do not let the arm snap into the full-upright position.
For transportation and storage, push down on the control arm and
engage the arm lock.
Release the control arm
The Foreman is supplied with a chip-removal system that includes a
1
1
⁄
4
" vacuum port (5) and self-tapping screws (6), vacuum shroud (7)
and machine screws (8), hose clamps (9), and vacuum hose (10). In
addition to helping keep your work area clean, efficient chip removal
speeds drilling time and reduces heat build-up, extending the life of
your drill bit. A Foreman with the chip-removal system installed must
be connected to a shop vacuum when in use. Not connecting the
chip-collection system to a shop vacuum causes chips to collect in
the hose and vacuum shroud and eventually clog the drill bit. The
Foreman can be used without the chip-collection system in place.
If you install the system and find that you must use your Foreman
without a shop vacuum, simply disconnect the vacuum hose from the
vacuum shroud.
To install the chip-removal system, turn the Foreman onto one side
and from the inside of the machine base (3), insert the vacuum port
(5) into the hole in the back of the base and secure it from the outside
with two self-tapping screws (6). Fasten the vacuum shroud (7) to the
machine with four truss-head machine screws (8).
Slip the hose clamps (9) over the ends of the vacuum hose (10) and
slip the vacuum hose ends onto the vacuum port and vacuum shroud.
To make it easy to disconnect the vacuum hose from the vacuum
shroud when working through the access panel (11), orient the front
hose clamp with the screw head facing the front of the machine.
Tighten the clamps and turn the Foreman upright.
Install the chip-removal system
9
8
7
6
10
5
7
9
Always disconnect the machine from power before assembly,
opening the access cover, or making any adjustments.
Never lift or carry the machine by the control arm. Always use the
handles (4) at the front and rear of the machine.
The access panel should be flush with the machine top right out of
the box. Should it need adjustment, use the following procedure:
Place the machine on saw horses so you have access to the bottom
of the machine. Lay a straight edge across the machine top (12) and
access panel (11). Use the 3mm hex wrench (13) supplied with the
machine to turn the cover levelers (14).
Level the access panel
11
12
Engage
Release
2
14
13
4
14