Operation, 3) set the drilling depth, Drilling pocket holes – Kreg DB210 Foreman Pocket-Hole Machine User Manual
Page 9: 4) adjust the workpiece clamp
6.
Operation
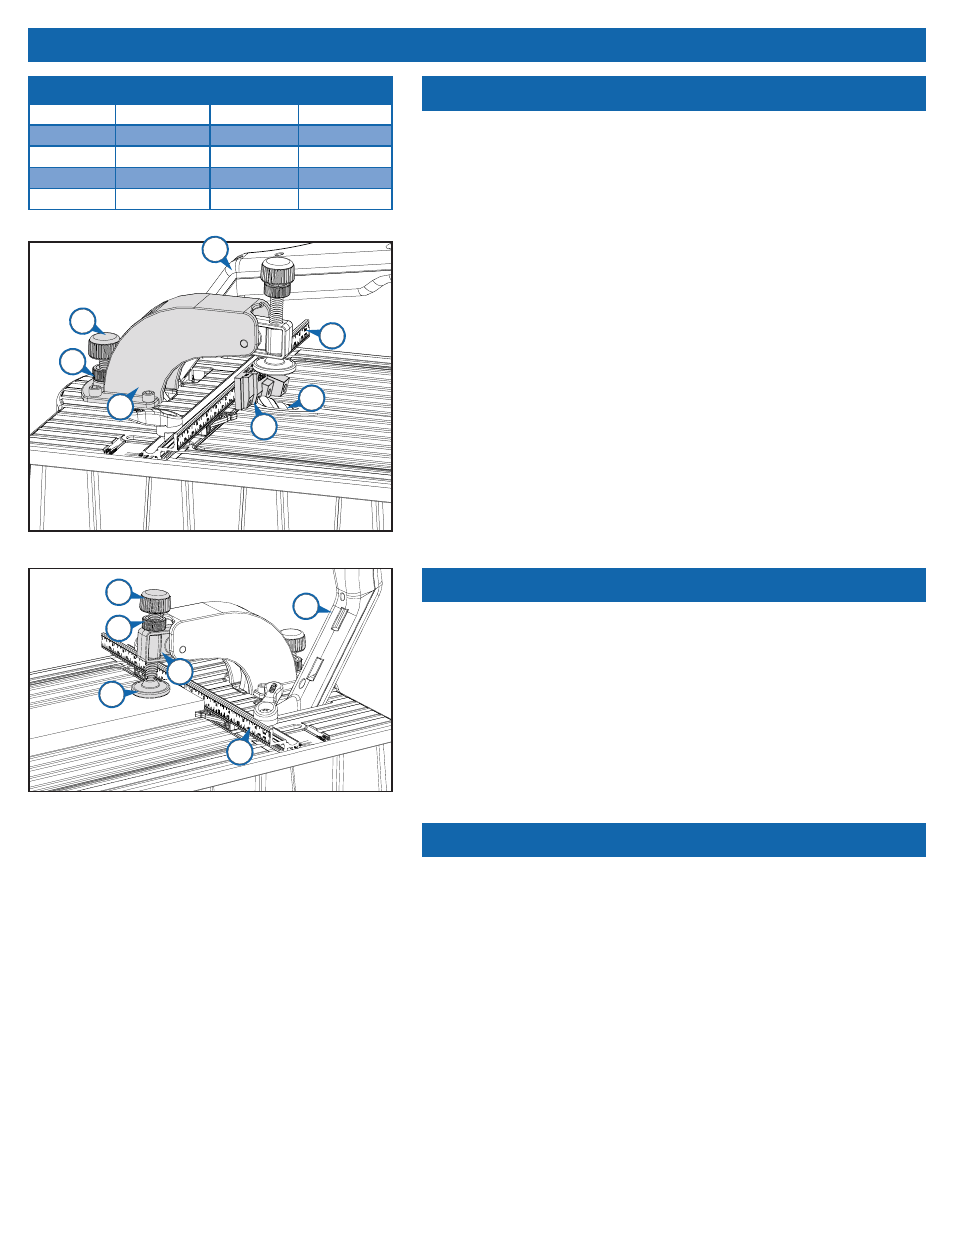
Pull the control arm (1) down, advancing the drill bit (20) until the tip
touches the fence (16). If necessary, turn the drilling-depth stop knob
(21) counterclockwise. Return the control arm to the full-up position,
retracting the bit.
Place the drilling-depth setting block (22) against the fence with the
screw-length marks facing up. Center the block step that corresponds
to the length of screw you’ll be using on the drill guide (23). Pull down
on the control arm, inserting the drill-bit pilot tip into the hole in the
step. With the drill-bit shoulder against the block step, turn the drilling-
depth stop knob (21) clockwise until it stops. Tighten the depth-stop
jam nut (24) against the base of the clamp-arm housing (25). Return
the control arm to the full-up position.
Note: When re-locking the control arm for transportation or
storage, turn the depth-stop knob counterclockwise to allow the
arm to return to the full-down position.
(3) Set the drilling depth
20
16
21
1
25
22
24
Using the Drilling-Depth Setting Block
Drill Guide & Bit
Material Thickness
Screw Length
Setting Block Step
Micro*
½"
¾"
¾"
Micro* & Standard
⅝" – 1⅛"
1", 1¼", 1½"
1", 1¼", 1½"
Standard
1¼" – 1⅜"
2"
2"
Standard & HD*
1½"
2½"
2½"
*optional accessories
When using the chip-collection system, connect a shop vacuum
to the vacuum port (5) and turn it on. Hold the workpiece securely
against the fence (16) with the pocket-hole location centered on
the drill guide (23). Depress the switch lock-out button (30) on the
control arm (1) and pull the switch (31), turning on the drill motor.
Let the motor reach full speed and pull the control arm down in
a smooth motion until the depth stop makes contact. Return the
control arm to the full-up position and release the switch.
Drilling pocket holes
Raise the control arm (1) to the full-up position. Place the workpiece
against the fence (16) and under the clamp pad (26). Turn the clamp
adjustment knob (27) clockwise until the clamp pad contacts the
workpiece. Now turn the knob counterclockwise one-half turn. Tighten
the clamp jam nut (28) against the clamp arm (29). The clamp is now
positioned so lowering the control arm applies sufficient pressure to
secure the workpiece before the drill bit enters the wood.
(4) Adjust the workpiece clamp
16
1
27
28
26
29