English, Audio dvd, Optical cable (not supplied) – Marantz DV6600 User Manual
Page 13
– 13 –
EN
English
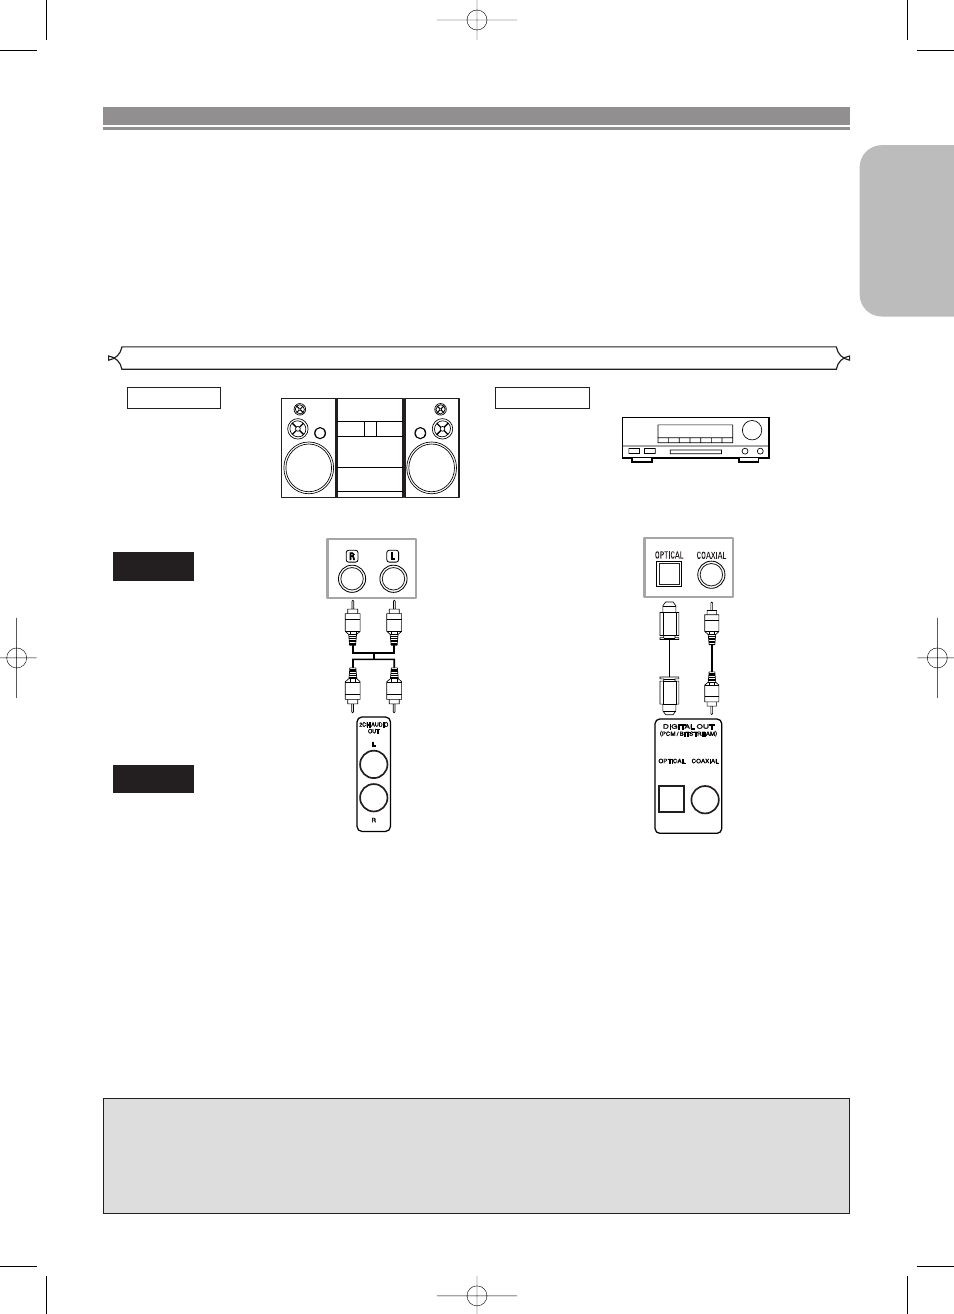
Connection to an Audio System
Stereo system
NOTES (for method 2 only):
• When using an AV amplifier with a built-in decoder (Dolby Digital or DTS decoder) as shown in the Method 2, set “DOLBY
DIGITAL” or “DTS” to “BITSTREAM” accordingly for audio output in the setup menu (refer to pages 28-29). Set it to “PCM” for
the decoder that is not used currently. Playing a DVD using incorrect settings may generate noise distortion, and may also
damage the speakers.
• The audio source on a disc in a Dolby Digital 5.1 channel surround format cannot be recorded as digital sound by an MD
deck or DAT deck.
• Set “DOLBY DIGITAL” and “DTS” to “PCM” for audio output in the setup menu for connecting to an MD deck or DAT deck
(refer to pages 28-29).
• Harsh noise that could harm your ears or the speakers is generated when a DVD recorded in DTS is played while using a
decoder, etc., that is not DTS-compatible.
• When playing back a copyright-protected over 96kHz (88.2kHz) PCM DVD, the digital sound will be down-sampled at 48kHz
(44.1kHz), even if you set “DOWN SAMPLING” to “OFF” (refer to page 28).
• Super Audio CD sound is not output from the DIGITAL OUT.
AUDIO
DVD
Audio Input
Jacks
Digital Audio
Input Jacks
AUDIO OUT
(Analog)
DIGITAL OUT
• Method 1 DVD Player + Stereo system
• Method 2 DVD Player + Dolby Digital decoder or DTS decoder
Dolby Digital decoder
or DTS decoder
Method 1
Method 2
CONNECTIONS
The following show examples of connections commonly used to connect the DVD player to the TV and other
components.
If using this DVD player to play back a DVD in a Dolby Digital 5.1 channel surround or DTS surround format,
the DVD player outputs a Dolby Digital or DTS data stream from its OPTICAL or COAXIAL DIGITAL OUT jacks.
By hooking the player up to a Dolby Digital or DTS decoder, you can enjoy a more convincing, realistic ambi-
ence with powerful and high-quality surround sound of a professional standard, which can be heard in movie
theaters. Use an audio coaxial digital or optical cable (commercially available) for the audio connections.
NOTES:
•
Be sure to turn off the power of all components in the system before connecting another component.
•
Refer to the instruction manuals for your TV, Stereo system and any other components to be connected to the
DVD player.
Optical cable (not supplied)
• Optical cable (not supplied) may be damaged when bent at sharp angles. Ensure cables are coiled in loops with a diame-
ter of 6 inches (15cm) or more when storing them.
• Use a cable which is 9.8 feet (3m) or shorter.
• Insert cable plugs firmly into the connectors when making connections.
• If a plug has dust or is dirty, clean it with a soft cloth before inserting it into a connector.
Audio Cable
(supplied)
Optical Cable
(commercially
available)
Audio Coaxial
Digital Cable
(commercially
available)
or
E61M5UD(EN).qx3 05.9.14 5:08 PM Page 13