Installation – Montigo 34FID - Linear User Manual
Page 24
Page 24
XG0514-150204
I-Series Indoor Gas Fireplace
Installation
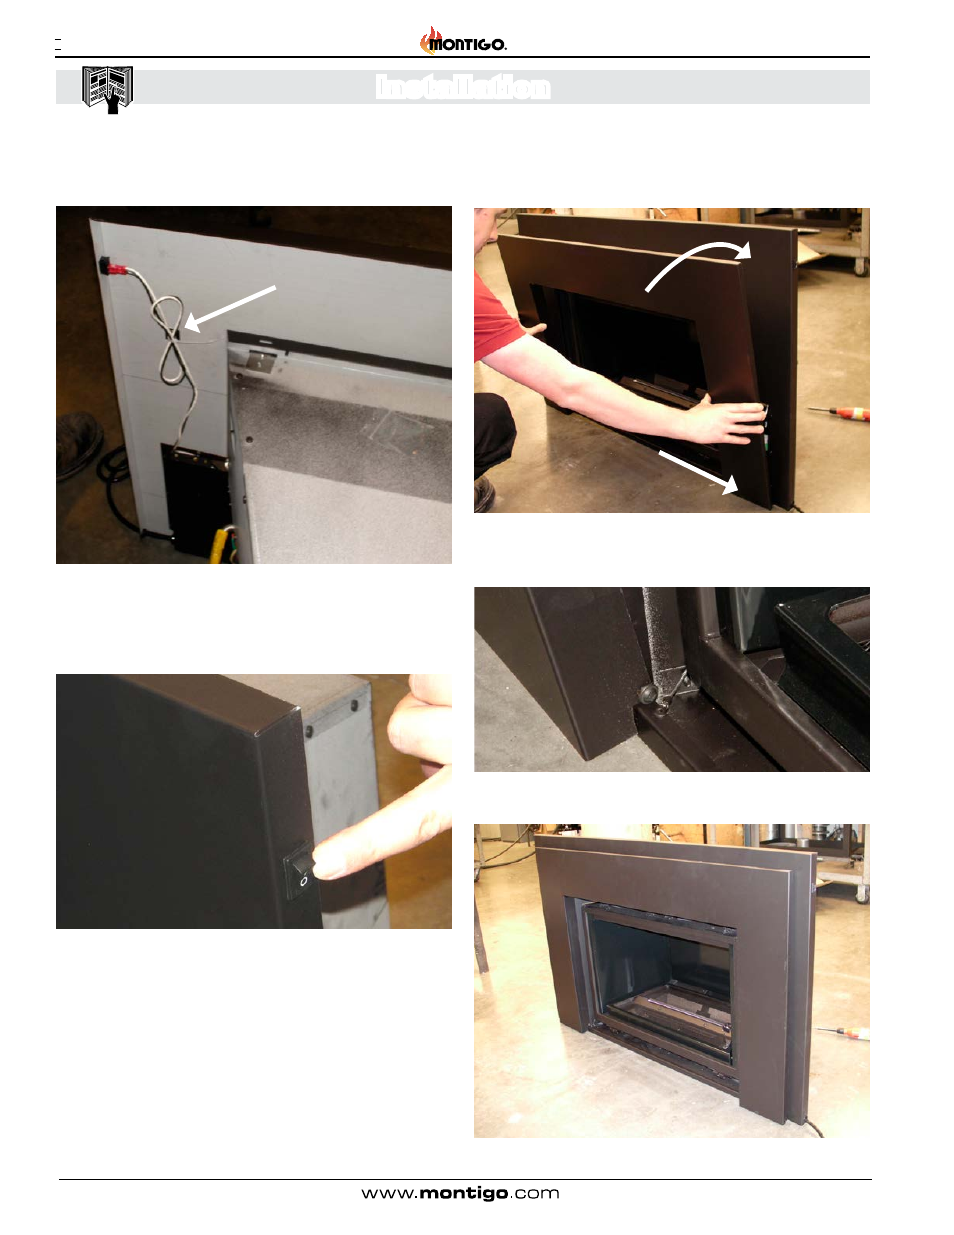
10). Place the Zip Strap through the hole in the Plastic Stick on
Retainer on the back of the Rear Faceplate. Zip the wires together
in one tidy package as shown.
Figure 56 Sec.4
11). Place the master override switch in the OFF position. Until
the remote is synced to the control board, this switch acts as a
master. If you apply gas and power to the unit while this switch is
in the ON position, it will initiate lighting.
Figure 57 Sec.4
13). The Front trim is now installed. It has two fasteners at the
bottom which must be engaged in the bottom right and left of the
Front Faceplate. Magnets hold it at the top right and left.
Figure 58 Sec.4
14) Screws to secure the Front Faceplate at the bottom left and
right.
15). Trim installation completed.
Figure 59 Sec.4
Figure 60 Sec.4
12). At this stage it is easiest to install the batteries. See section
on battery installation and replacement.