Accent light replacement, Maintenance – Montigo 34FID - Linear User Manual
Page 48
Page 48
XG0514-150204
I-Series Indoor Gas Fireplace
Maintenance
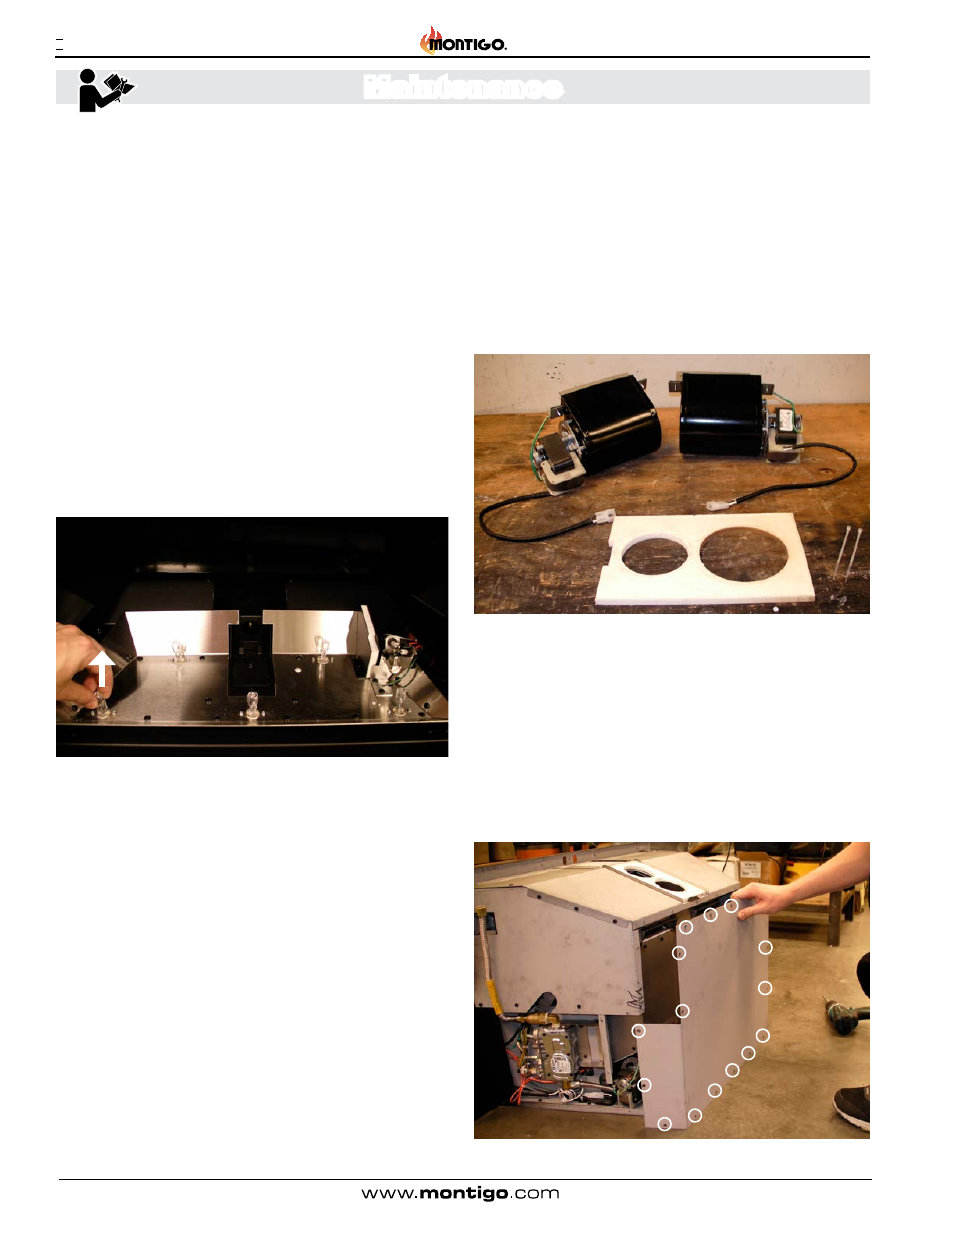
Accent Light Replacement
Replacement of the fireplace accent lights can be performed
with a few simple steps. The accent lights are located beneath
the burner. We recommend that if you need to replace one
light, that you replace them all at the same time. Another
option would be to replace them at the same time as your
annual service.
Figure 13 Sec.6
Figure 37b.
1). Disconnect the electrical and gas supply to the unit.
2). Remove the door / safety barrier from the unit.
3). Remove the burner assembly.
4). There are 5 light bulbs in this appliance. They are removed by
pulled them straight up out of their receptacles. New bulbs can be
bought at most national hardware stores or through your Montigo
dealer. See specs page for information on bulbs. If you supply your
own bulbs, do not use greater than 20 watt bulbs.
5). When installing the new bulbs, try to not contaminate the bulb with
your hands. Using gloves or some type of paper during installation
will help to prolong the life of the bulb.
Optional Fan / Blower Replacement
The Optional Fans or Blowers supplied with your fan kit are the
best quality available. These Fans should provide years and years
of trouble free service. There are 2 blowers for this appliance, one
which has the motor on the right side and the other on the left side.
** If the fireplace is installed, the Gas Supply may need to be
disconnected from the Appliance. If this is the case, a license gas
fitter will need to provide this service.
**
Figure 14 Sec.6
1). If installed, disconnect Electrical Power. Always disconnect
the power when servicing any appliance.
2). Remove Front and Rear Faceplate. See the section on
Faceplate installation for details.
3). Remove the Flue Collar Slide Plate. See the section on Vent
Connection for details.
4). Remove the Fireplace from the cavity.
5). Remove all screws necessary to remove the Outer Shell Back.
Figure 15 Sec.6