NavCom LAND-PAK Quick Start Rev.B User Manual
Install uhf radio, Sf-3040 battery installation, Land-pak quick-start guide
LAND-PAK Quick-Start Guide
96-310039-3001, Rev. C
1 of 7
Follow this guide to set up the standard configuration for the
LAND-PAK base and rover, and the internal radio modem.
With minimal setup time, LAND-
PAK™ can be configured and
operating to the point of collecting positions with
RTK/UltraRTK
™.
By opening, assembling, and using this product, you
agree to the terms of the License Agreement contained
in the LAND-PAK Product User Guide.
Important: This device will not track satellites until after
the option file is loaded in the receiver. See instructions
contained in this guide.
Refer to the supplied LAND-PAK User Guide to check
inventory, charge batteries, and set up hardware.
Refer to these supplied guides for complete instructions for
optimum performance:
NavCom LAND-PAK User Guide
NavCom SF-3040 GNSS Receiver Product User Guide
MicroSurvey Nautiz X7 User Guide
MicroSurvey FieldGenius User Guide
SATELLINE-3ASd Radio Modems User Guide
StarPoint User Guide
NavCom Customer Support:
Telephone: +1 (310) 381-2000
W
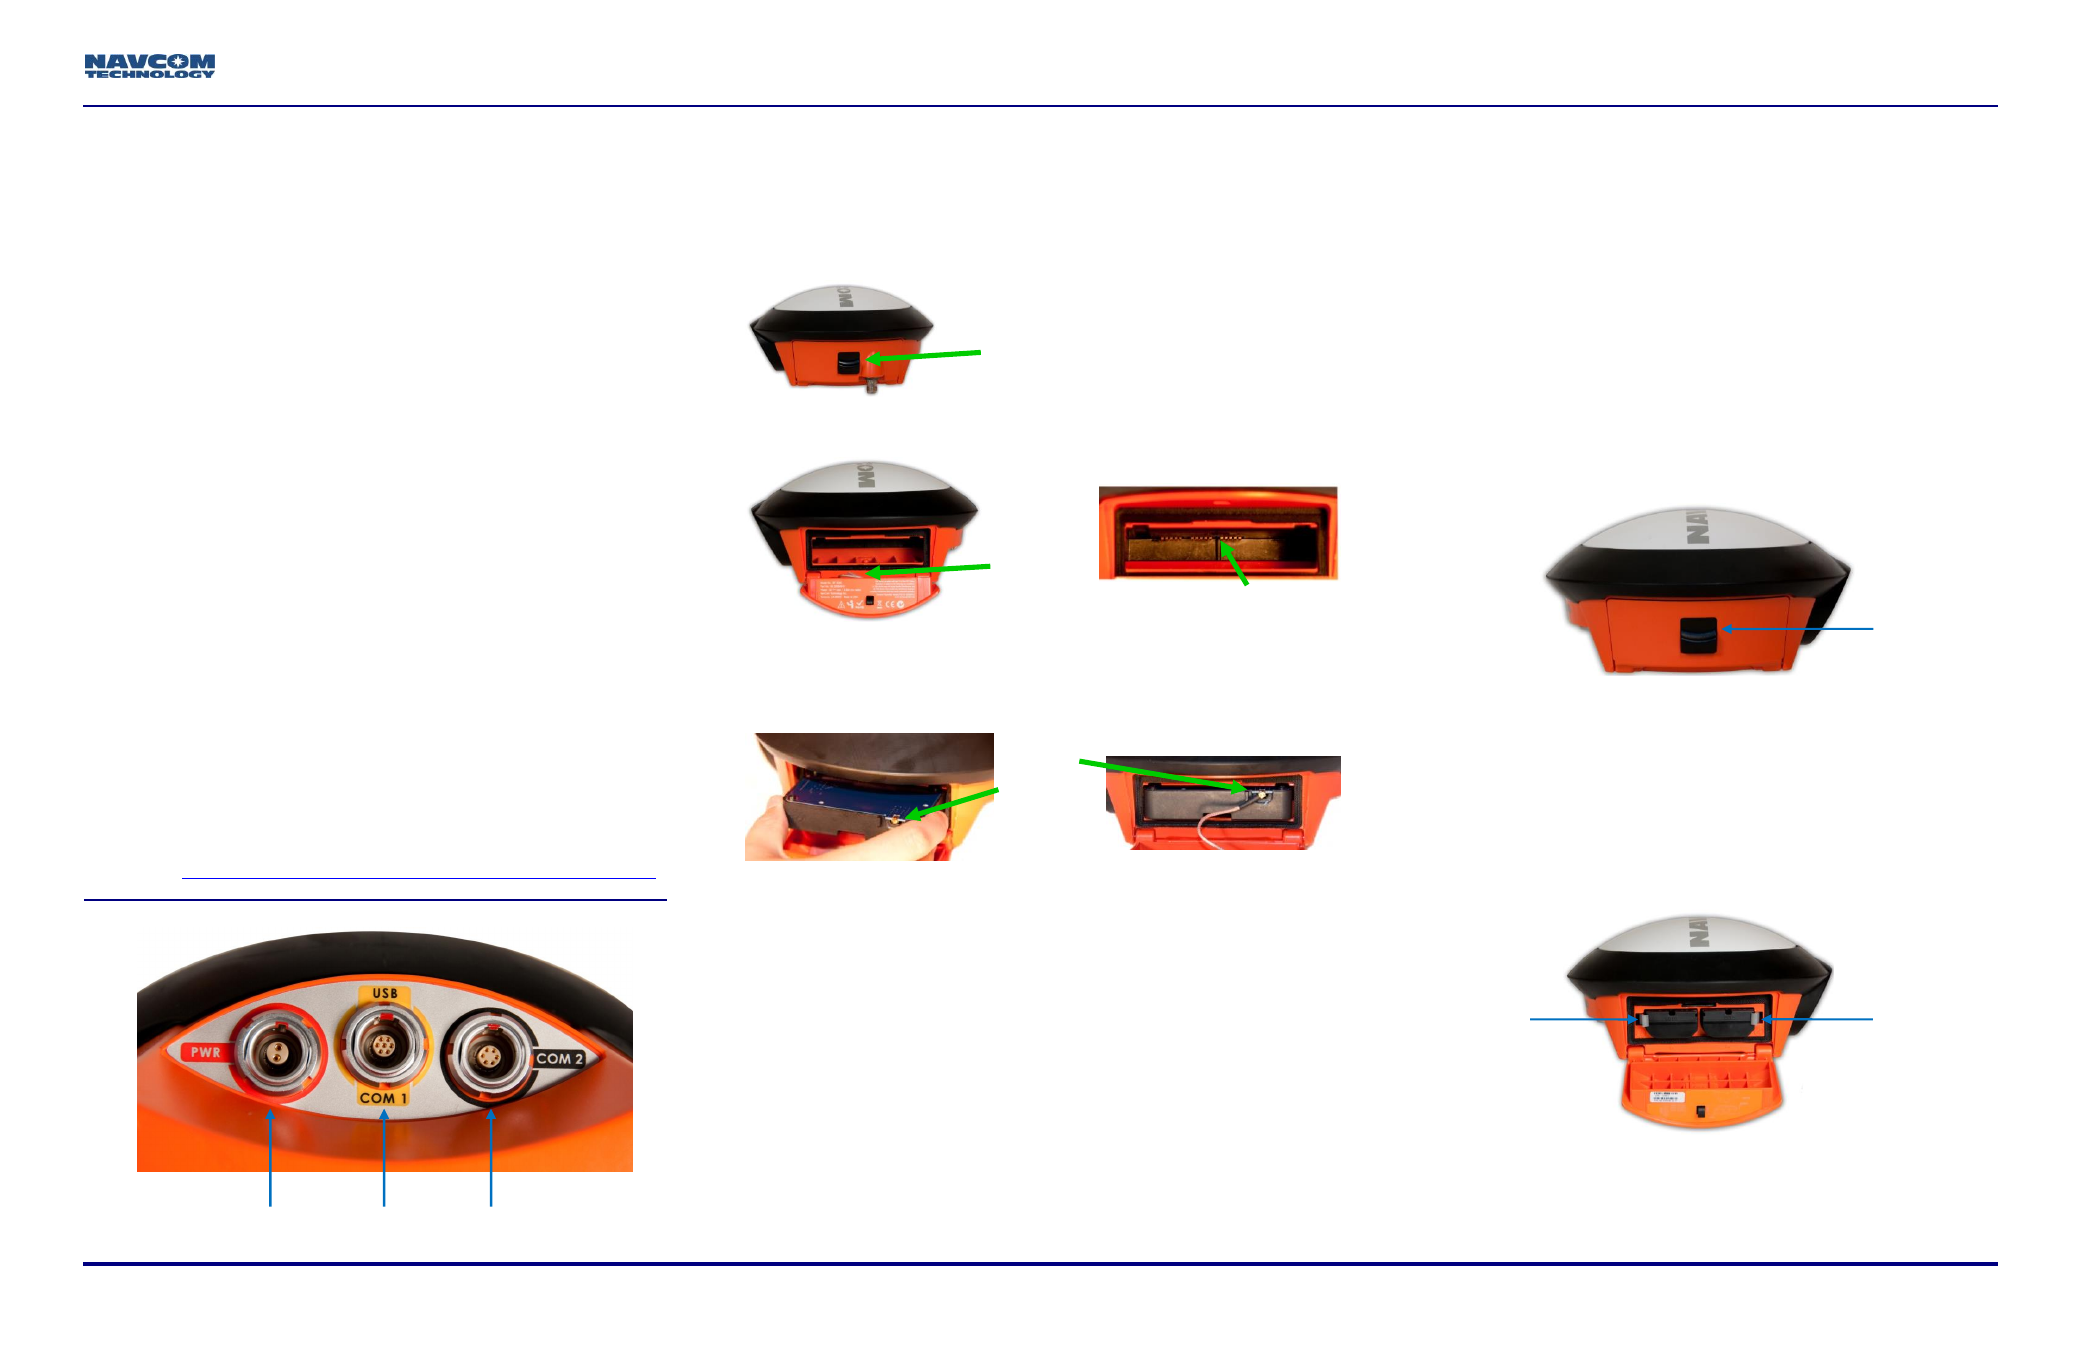
Install UHF Radio
Follow these steps to install the radio:
1.
Turn the SF-3040 off.
2.
Slide the release button downward on the radio bay.
3.
Insert the multi-pin end of the radio in the bay with the
contact-side up, until a click is heard.
4.
Carefully align the coaxial cable MCX connector center pin
with the radio module. Press the connector on straight
with significant pressure and without damaging the center
pin.
5.
Route the cable to prevent pinching.
6.
Close the door until it clicks shut.
7.
Connect the radio antenna to the TNC connector.
Refer to the SF-3040 Product User Guide for additional
detail.
SF-3040 Battery Installation
Charge the batteries in accordance with the steps outlined in
the SF-3040 Product User Guide.
New batteries must be charged for a minimum of
12 hours prior to use, regardless of the LED
indicator on the charger.
The battery chambers are located on the side of the
SF-3040 receiver. There are two locking clips on the outside
edge of each battery chamber to hold the battery packs in
place.
Follow these steps to install the battery packs:
8.
Open the battery pack chamber (located on the left-
hand side of the SF-3040 as you hold the receiver with
the front facing toward you) by pressing downward on
the black button.
9.
Align the battery pack with the chamber.
10. Holding the locking clip to the side, insert a battery pack
into each chamber, metal-contact end first.
11. Push the locking clips back into place.
Repeat steps 8 through 11 with the second battery pack.
Refer to the supplied SF-3040 GNSS Receiver
Product User Guide for complete details on battery
charging, installation, use, safety, and disposal.
The SF-3040 GNSS receiver battery packs are keyed to
prevent improper installation. There are two locking clips on
either side of the battery bay.
Ensure that both locking clips are locked in place.
If both locking clips are not locked in place, the
battery packs can disengage.
POWER
COM2
USB
– COM1
MCX
Antenna
Cable
Interface Connectors
MCX
Antenna
Connector
SF-3040 Radio Bay
Release Button
Locking
Clip
Locking
Clip
Release
Button