Land-pak quick-start guide, Base station hardware setup, Rover hardware setup – NavCom LAND-PAK Quick Start Rev.B User Manual
Page 5
LAND-PAK Quick-Start Guide
96-310039-3001, Rev. C
5 of 7
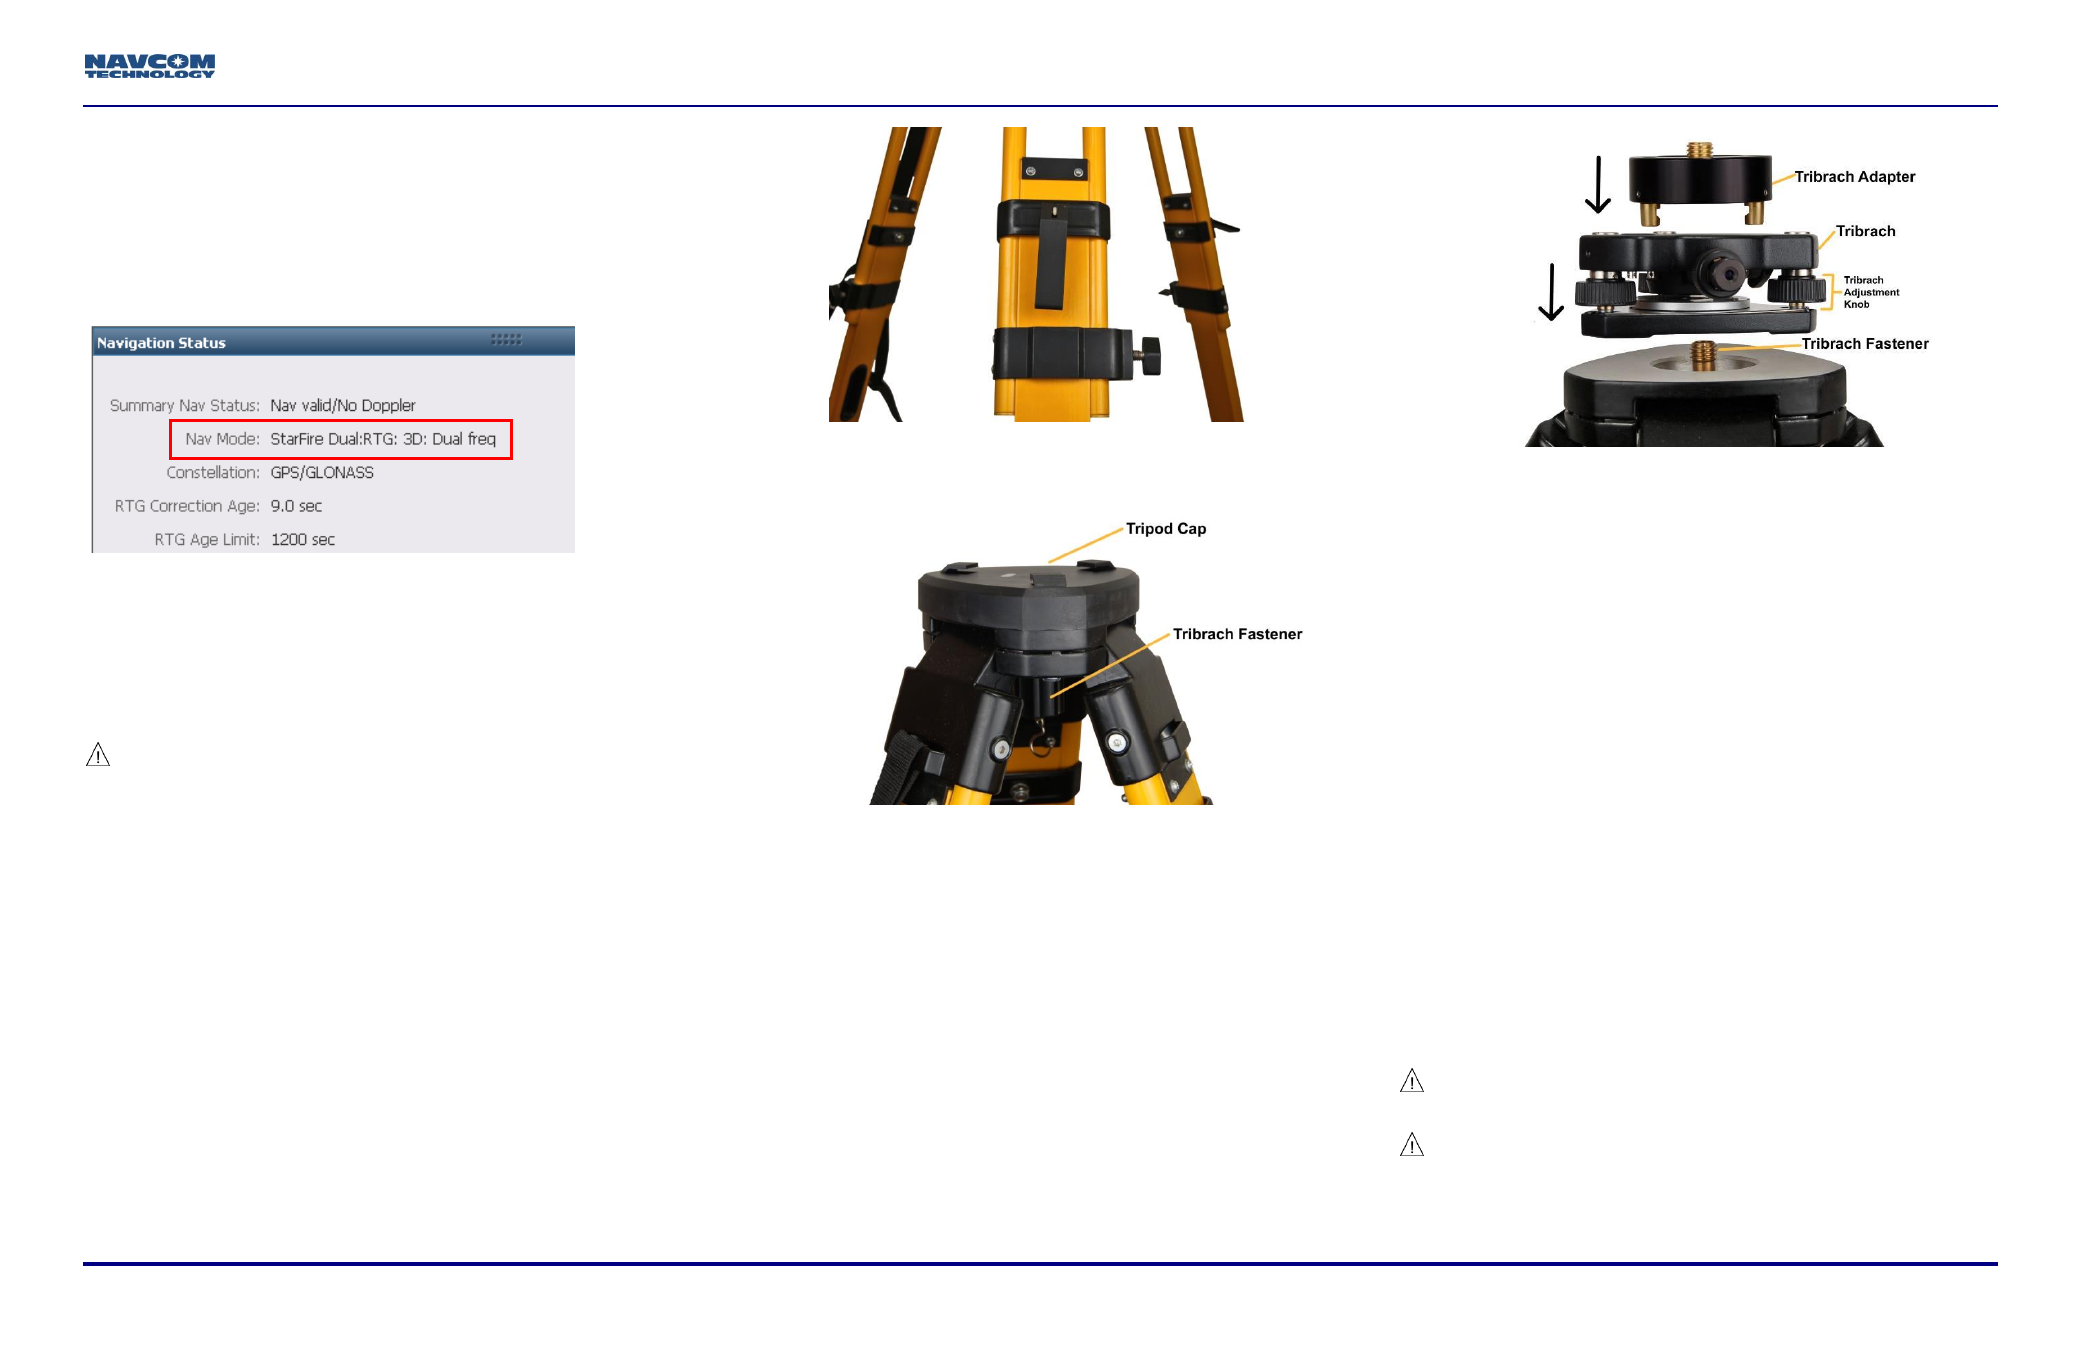
Dual:GNSS, indicates that the receiver is navigating in the
new StarFire format which supports GLONASS, accurate to
<5cm.
Older software versions: The Nav Mode StarFire Dual:RTG:
3D: Dual freq, indicates that the receiver is navigating in
StarFire dual frequency with a 3D position fix, which is very
accurate. RTG is another term for StarFire.
Base Station Hardware Setup
This section provides the steps to correctly and safely set up
the base station. It is important to select an open area for the
test setup.
The base station tripod leg points may damage
soft materials, including indoor carpets.
53. Set up the base station in an open, flat, safe location.
54. Unbuckle the strap that holds the tripod legs together.
55. Open the tripod legs until the tripod is stable. Use the
tripod leg levers and the tripod wing screws to adjust
the height and secure the tripod (see Figure 1). Leveling
the tripod by eye is sufficient.
Figure 1: Base Station Tripod
– Leg Adjustments
Figure 2: Base Station Tripod
Refer to Figure 2 for the steps below:
56. Unscrew the tribrach fastener and remove the tripod
cap. If necessary, use the 4 mm and/or 5mm Allen
wrench (found on the top plate of the tripod) to tighten
the hex screws at the top of the tripod.
57. Replace the Allen wrench for future use.
Figure 3: Mounting Tribrach & Tribrach Adapter
Refer to Figure 3 for the steps below:
58. Mount the tribrach to the top of the tripod as follows:
a. Position the tribrach so that it fits flat and evenly on
the top plate.
b. Screw the tribrach fastener into the tribrach until
secure.
The tribrach has a leveling bubble and three
adjustment knobs for making fine adjustments.
59. Align the tribrach adapter with the three holes on the
tribrach, and turn the knob on the side of the tribrach to
lock it in place.
60. Screw the pole extension onto the tribrach adapter. The
pole extension allows for easier access to the
connectors and exchange of the batteries in the SF-
3040 GNSS receiver.
Rover Hardware Setup
This section provides the steps to correctly and safely set up
the rover. It is important to select an open area for the test
setup.
The rover pole may damage soft materials,
including indoor carpets.
Over-tightening of the attachments on the rover
pole may cause damage.
61. Set up the rover in an open, flat, safe location.